How to Make a Sourdough Starter
A homemade sourdough starter requires only flour and water and in as little as six days you can be baking bread with it. Find out how.
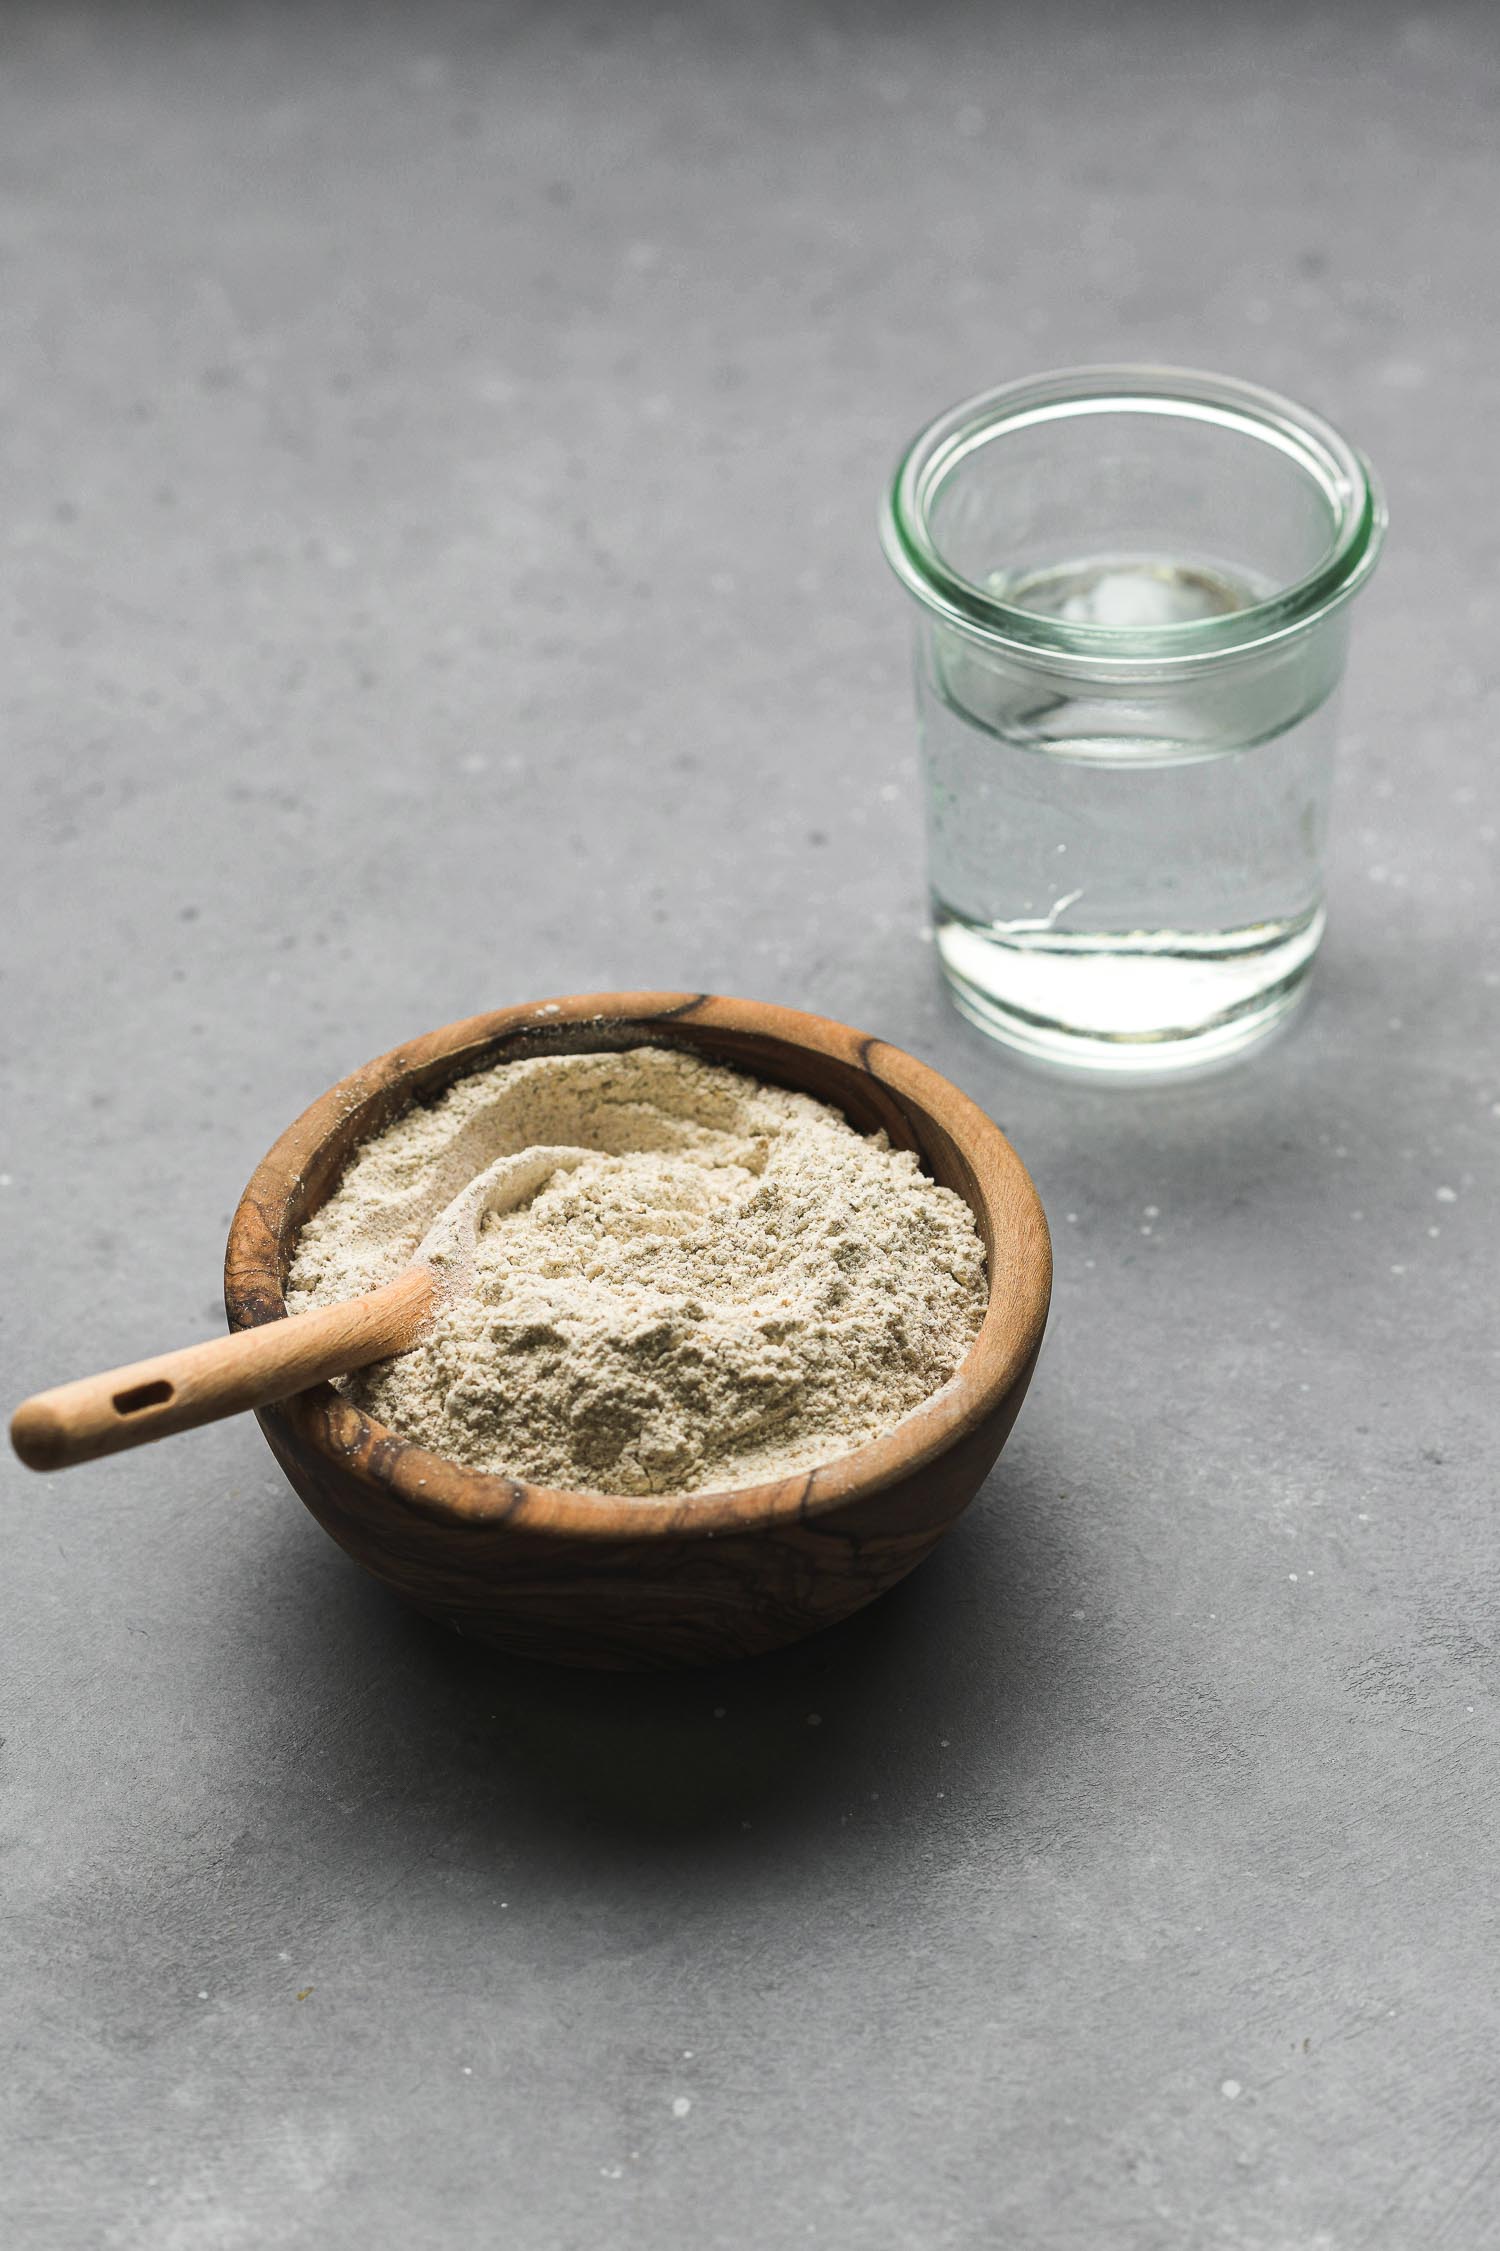
Here’s the thing. I wanted to start this post by saying something poetic and flowery about my five year old sourdough starter, Ida (ee-da), how strong and dependable she has been, her unfailingly effervescent quality, blah, blah, blah. But you’re not here for that. You’re looking for a recipe for a sourdough starter, your own Ida that you will be able to use for years to come, and you’re wondering why you should try this one and what makes it different from the rest.
The truth is, it’s the same as most–all you need are flour and water. That’s it. Mix equal amounts of both ingredients, feed, repeat.
What’s different about my method is that I use less flour and water than called for in most recipes. It’s not necessary to use up pounds of flour to get a bubbly starter going.
With the current flour shortage you can save your flour for baking bread, which, if you follow my recommendations below, you can enjoy in just one week.
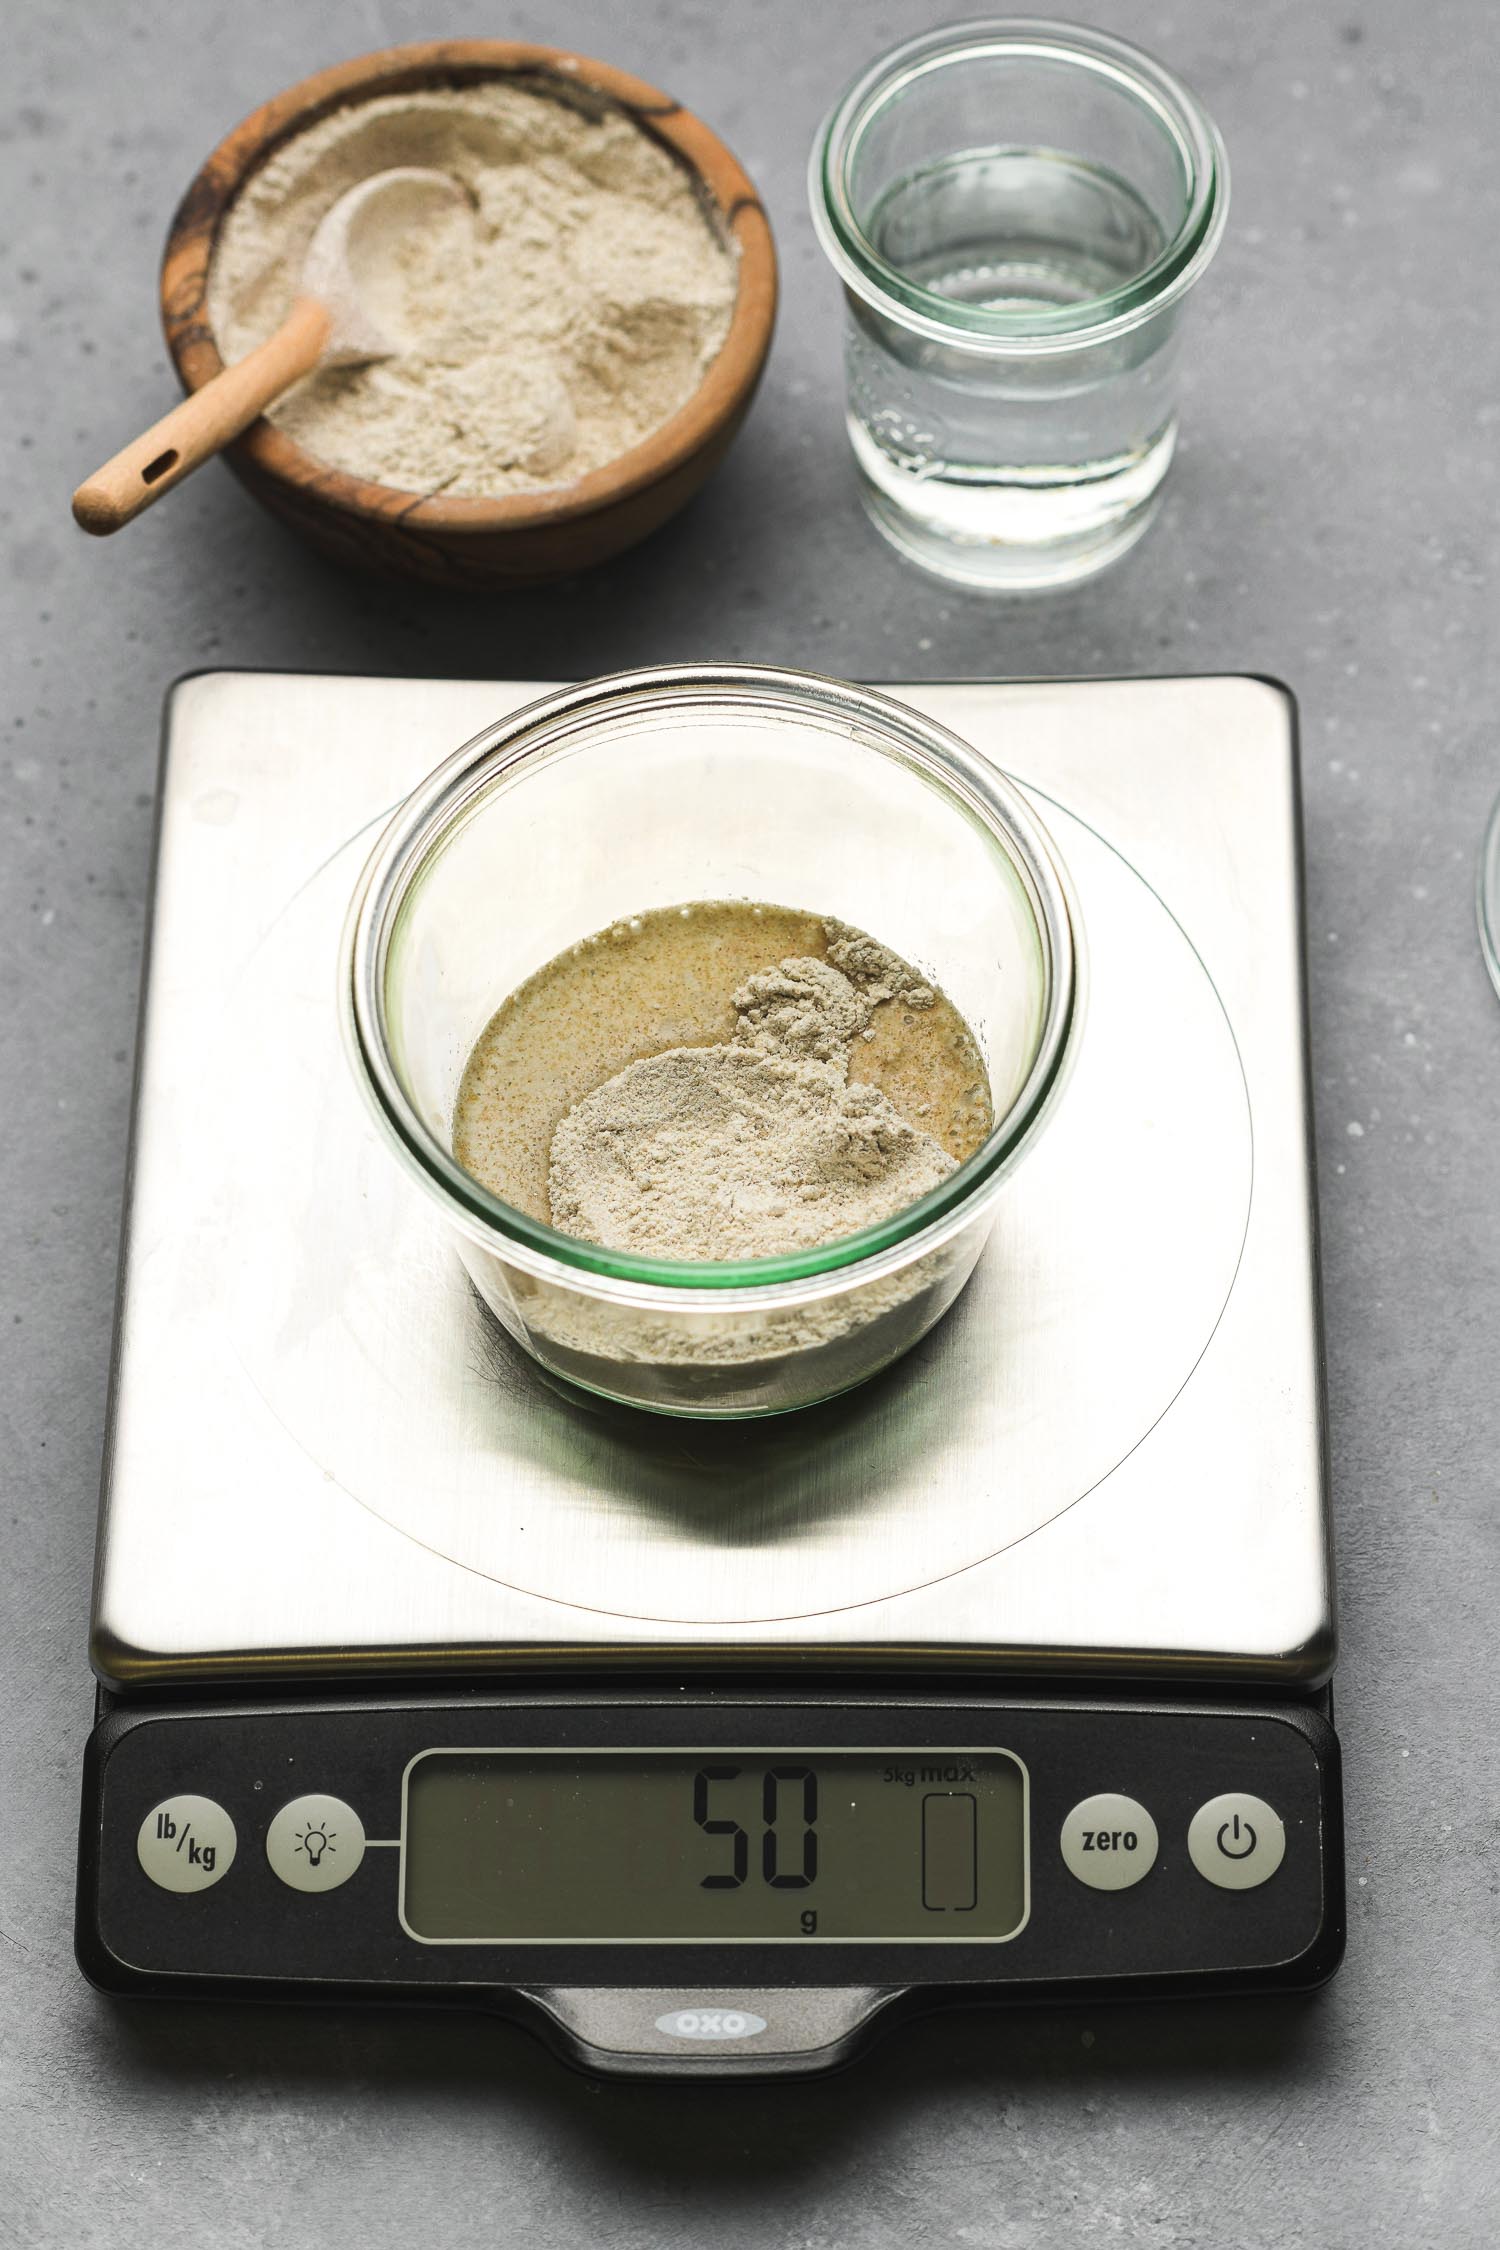
The following method is one I learned from a German bread book I picked up a decade ago. For this post I created another starter last week to make sure the method would work again and also to make sure that it would be easy to follow. I cut back further on the flour/water to minimize discard and it worked just as well.
Please note that this recipe recommends the use of rye flour, warm filtered water and a warm environment to promote good yeast activity although this is not mandatory. Be sure to read my notes throughout this post to make sure your efforts are fruitful. Use the images as a guide.
Basic Sourdough Starter Formula
(Printable Recipe at the end of this Post)
Day 1: Mix 25 grams rye flour and 25 grams warm water. Cover and let sit for 24 hours. (Total: 50 grams)
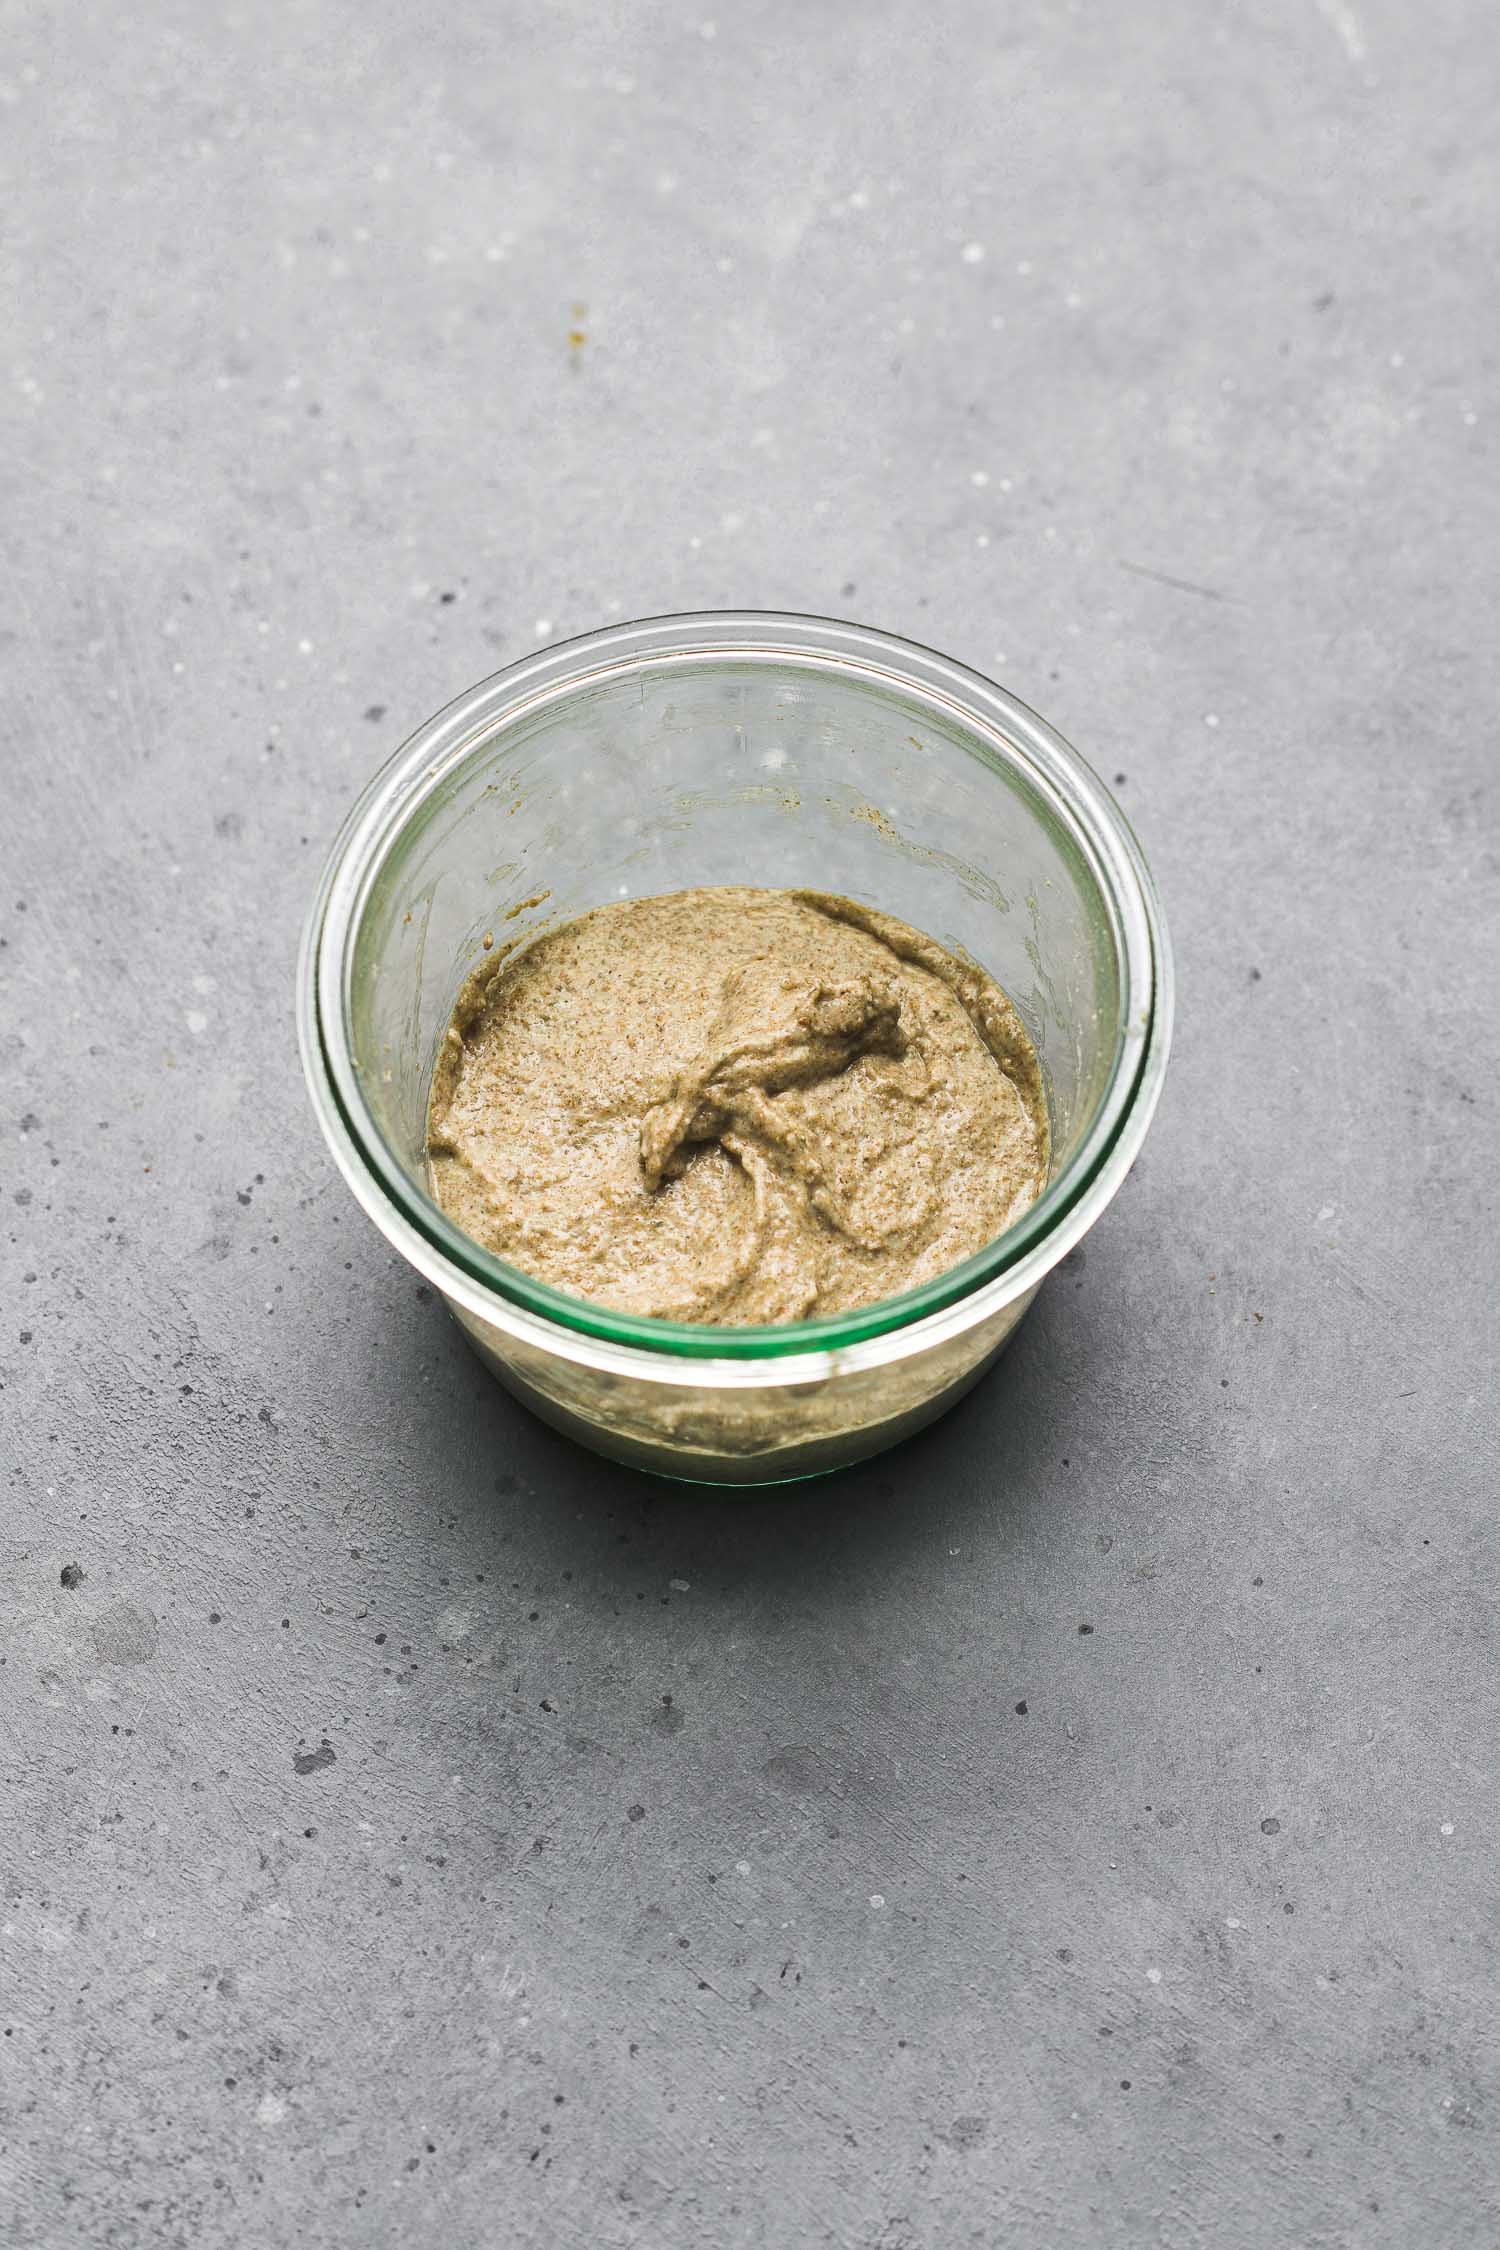
***At the end of Day 1 there will be no visible activity***
Day 2: To the 50 grams flour/water mixture from Day 1 add 25 grams rye flour and 25 grams warm water. Cover and let sit for 24 hours. (Total 100 grams)
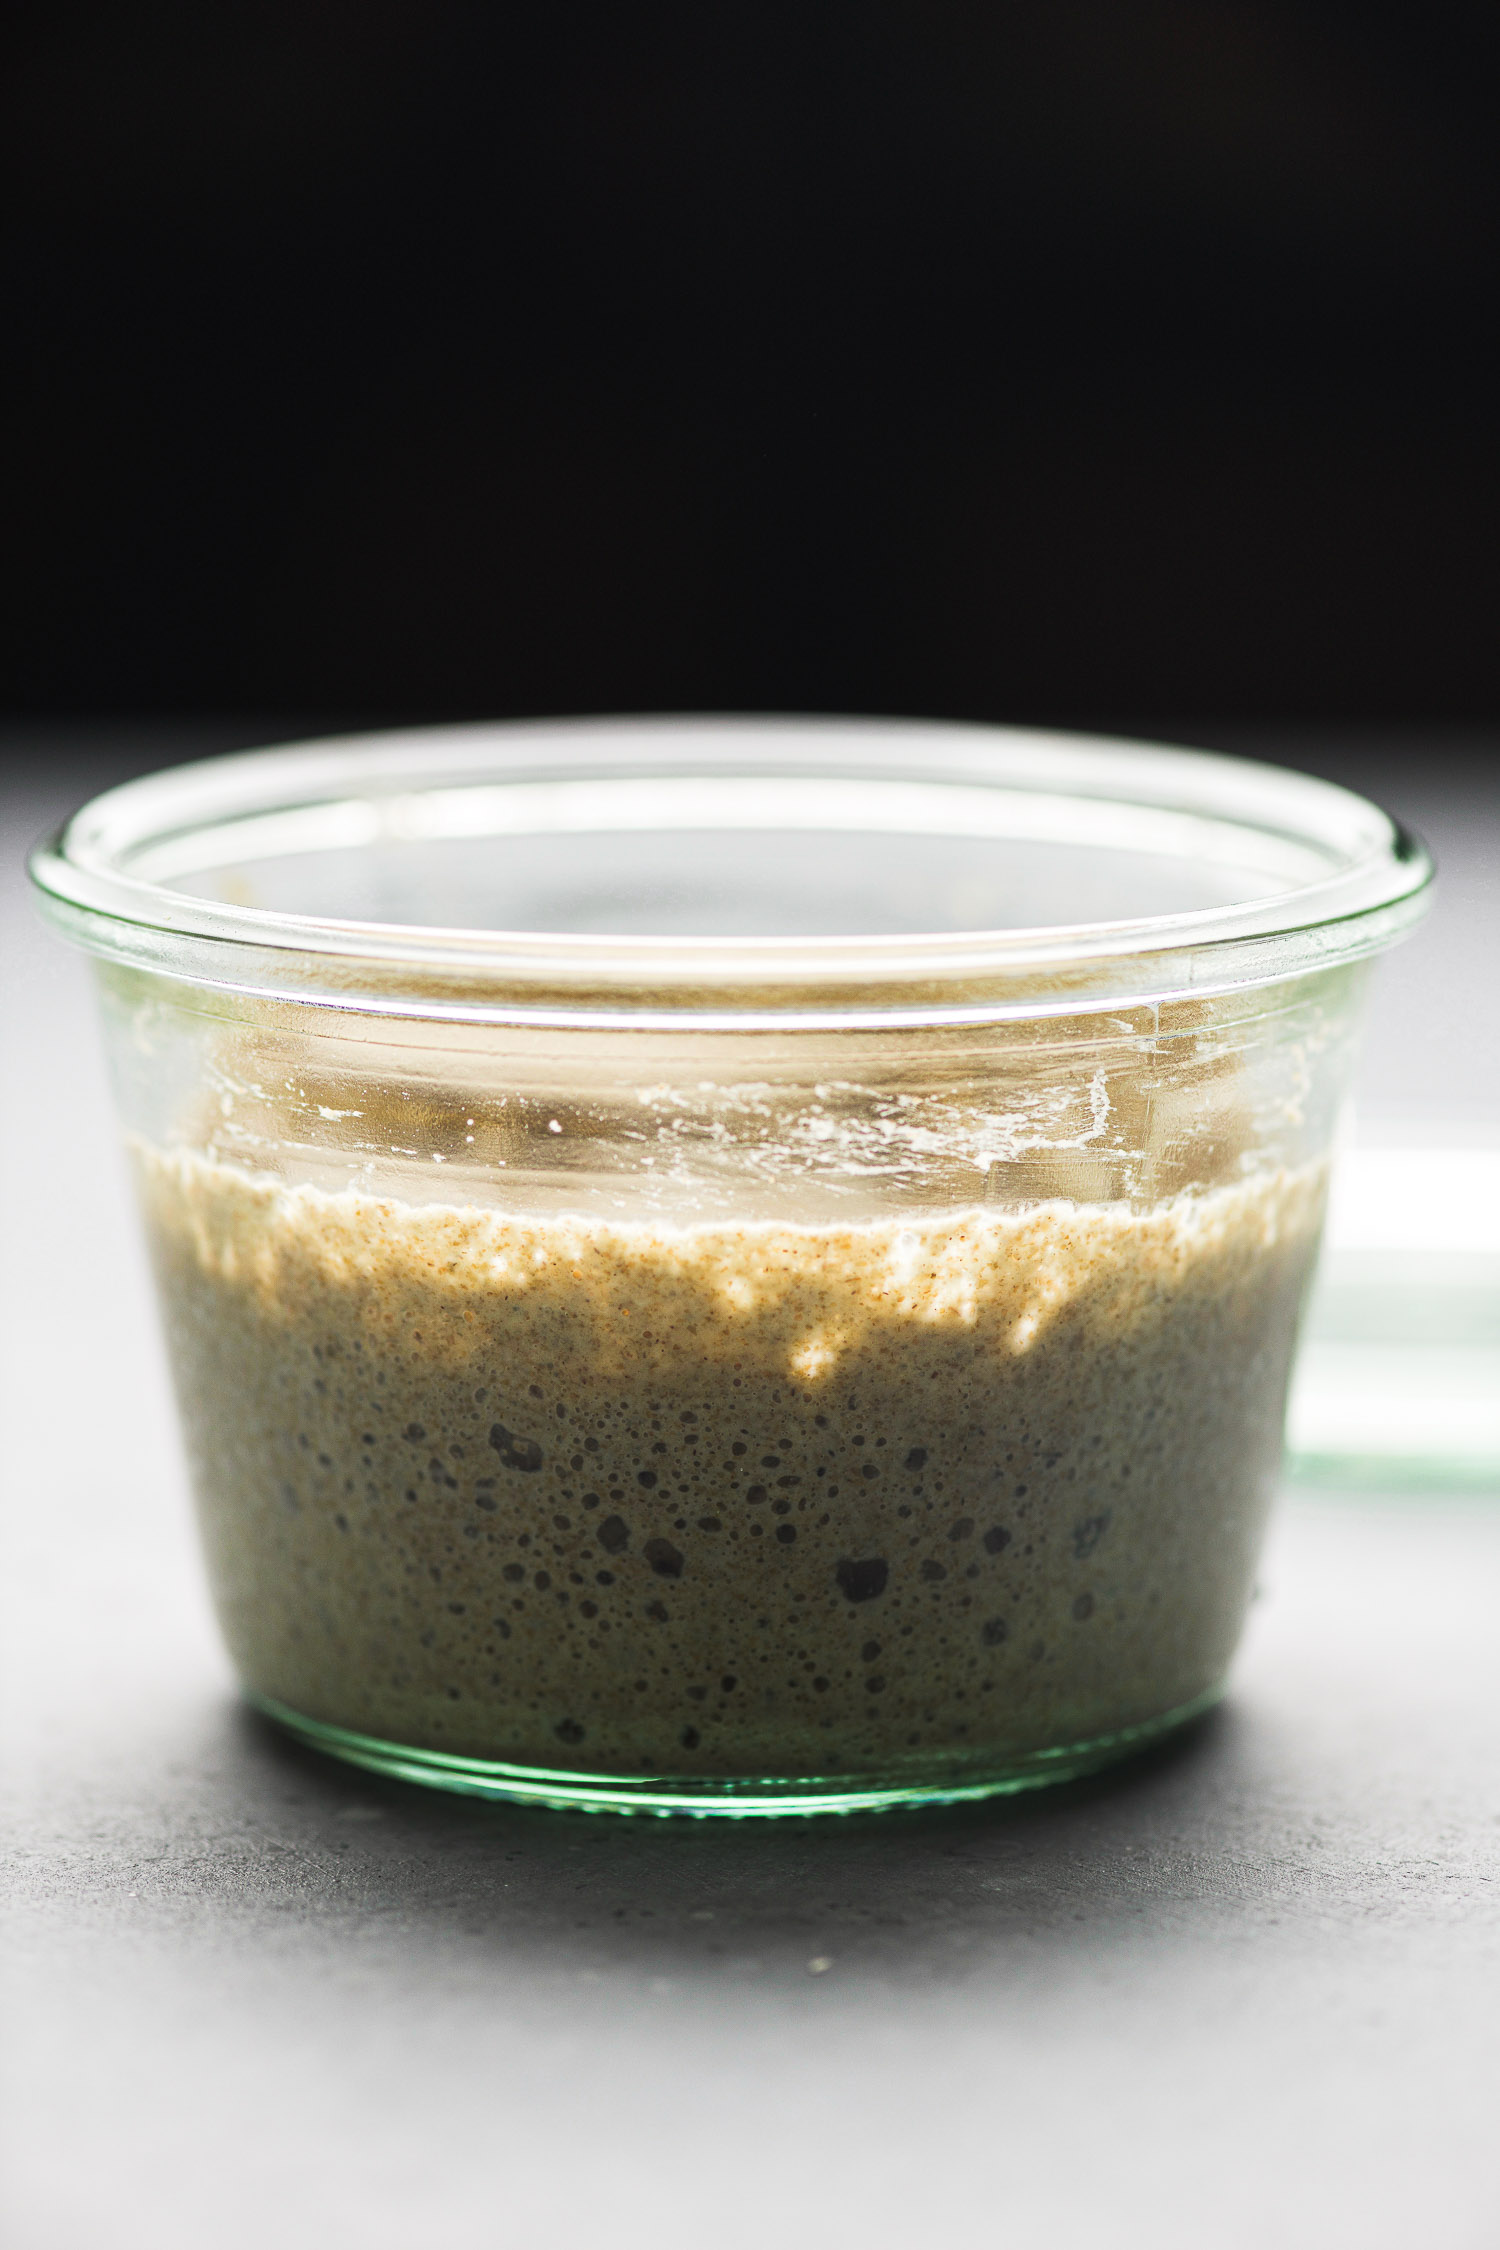
***At the end of Day 2, in a warm environment, you should see some bubbling (signs of fermentation). For this starter I saw a lot of activity but don’t despair if you don’t see it in yours.***
Day 3: To the 100 grams flour/water mixture from Day 2 add 50 grams rye flour and 50 grams warm water. Cover and let sit for 24 hours. (Total 200 grams)
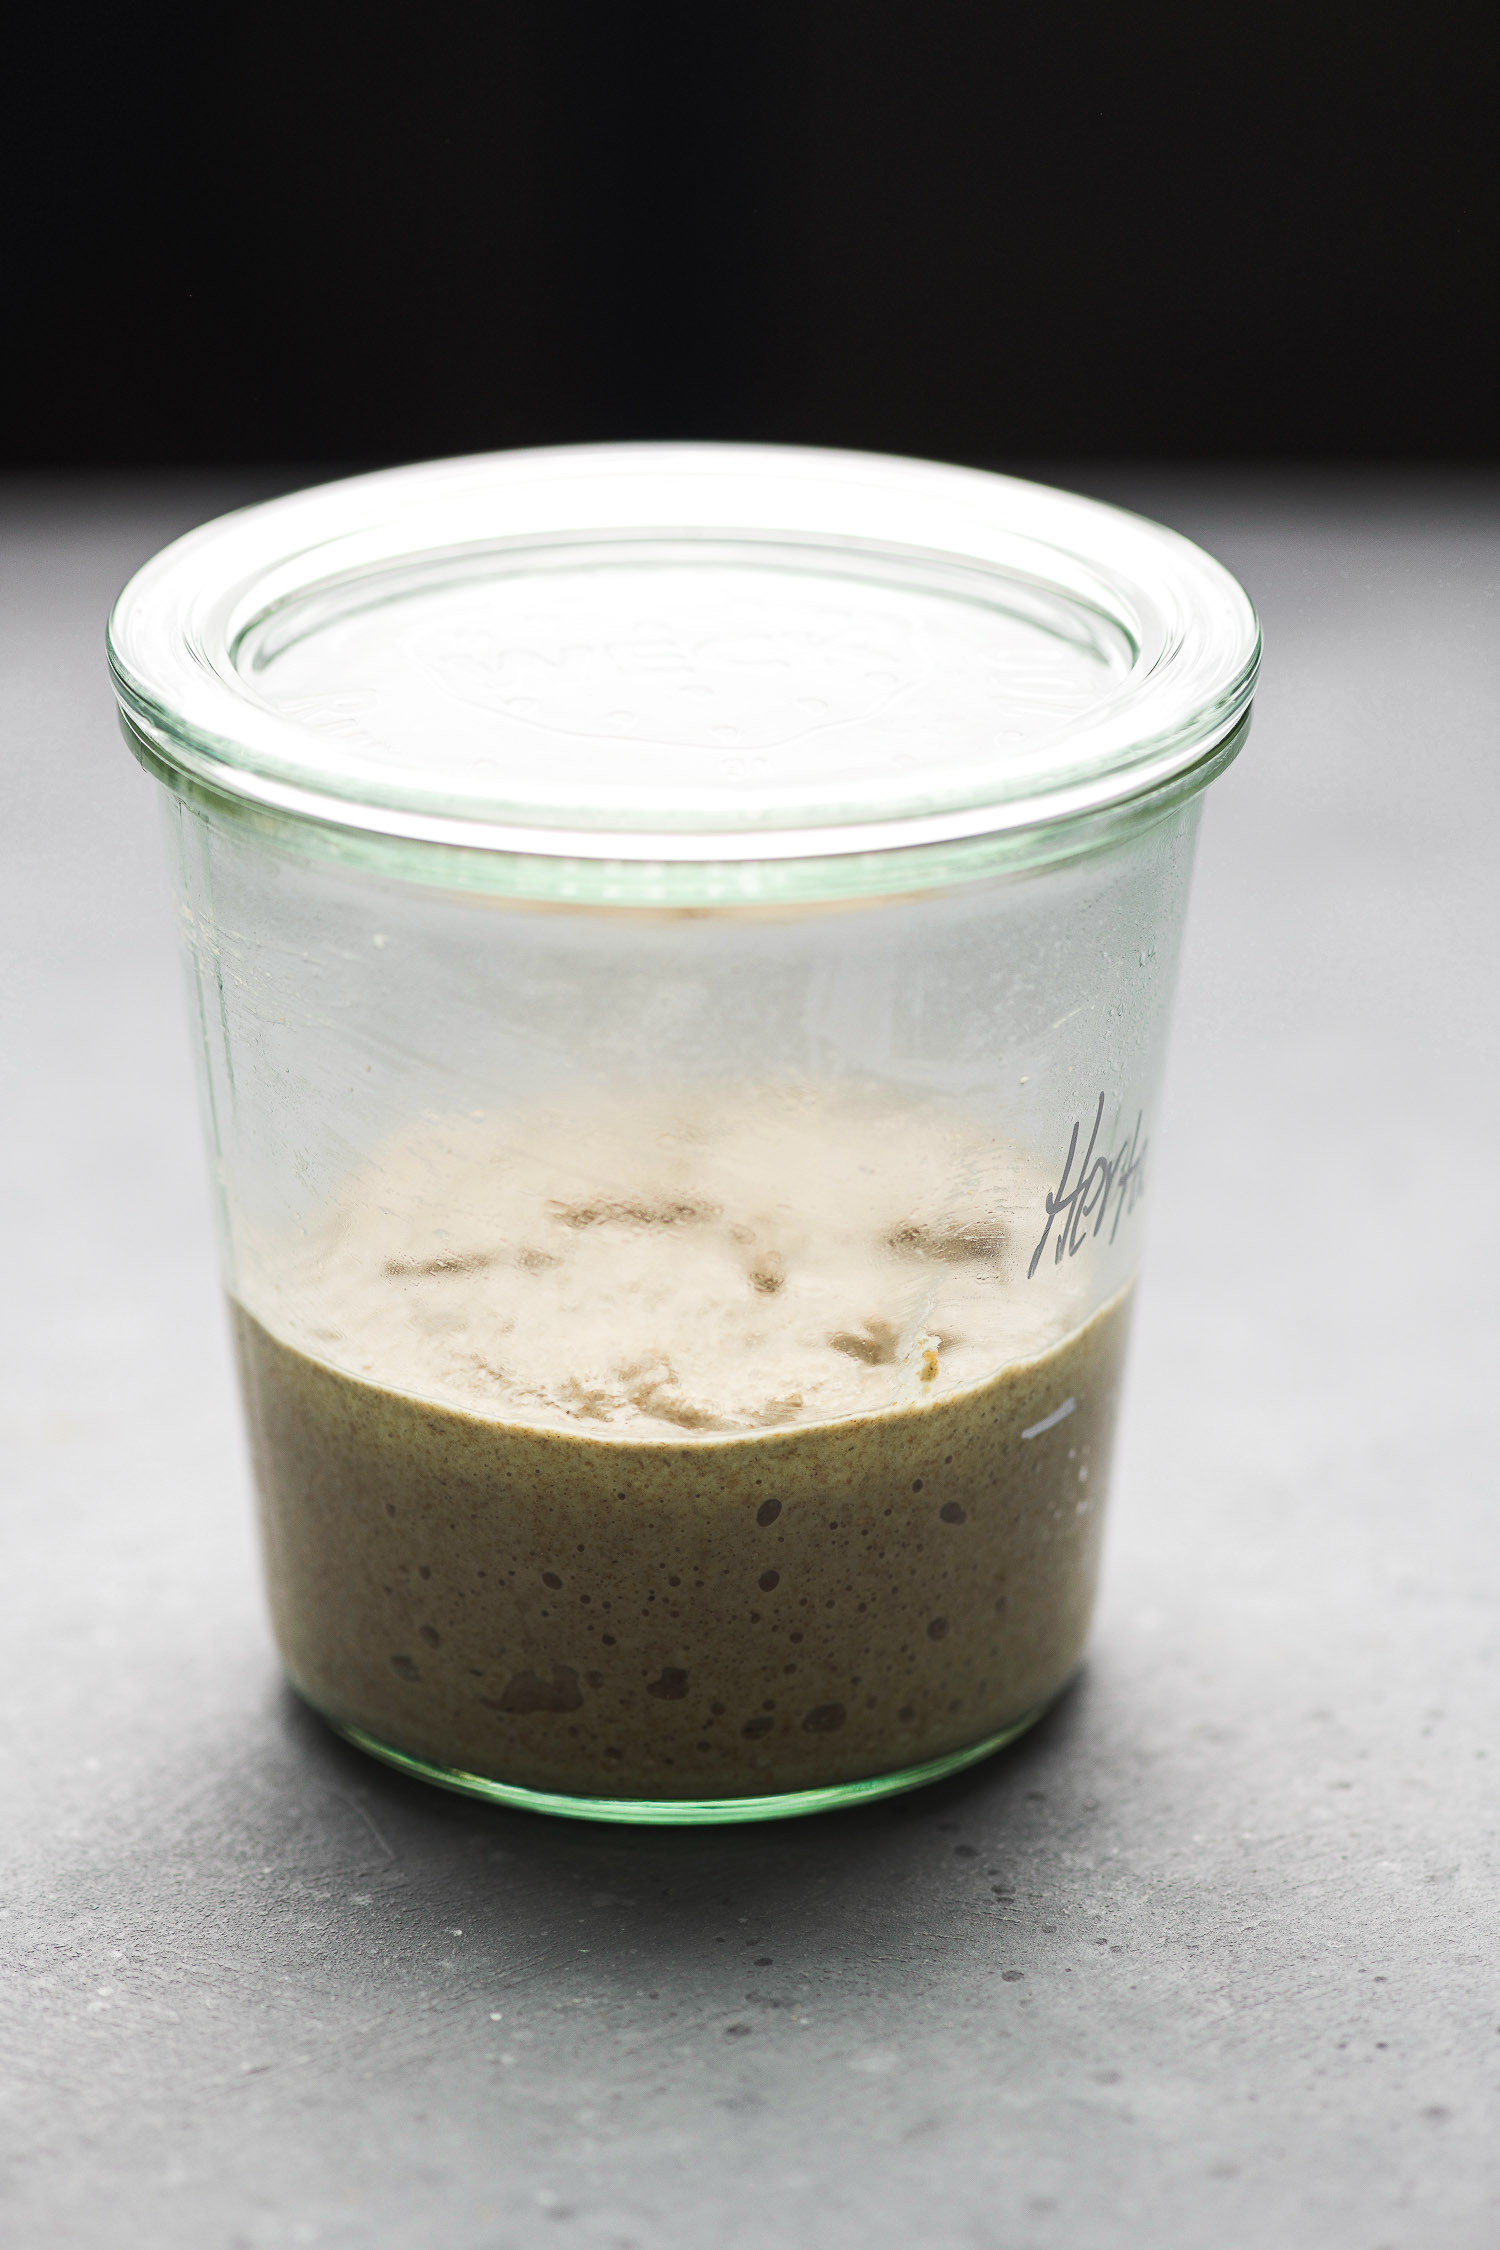
***At the end of Day 3 you may not see any activity at all but don’t worry and don’t give up. This is typical. The bacteria and yeast are trying to establish a mutually beneficial existence at this point. For this starter I didn’t observe any activity overnight but during the last few hours when I moved my jar to a warmer room the bubbles appeared.***
A note about feeding before proceeding: at this stage most starter formulas would recommend twice daily feedings. Respectfully, I don’t see that this is necessary. If your young starter appears sluggish at this stage it’s not because it needs to be fed. The flour and water from the previous day, its “food”, have not been consumed. Again, temperature is what needs to be adjusted to encourage yeast activity. With twice daily feedings you’re not giving the yeast a chance to do their thing.
Day 4: Take 100 grams of the flour/water mixture from Day 3 and discard the remainder (see note about discard below). Add 50 grams rye flour and 50 grams warm water. Cover and let sit for 24 hours. (Total 200 grams)
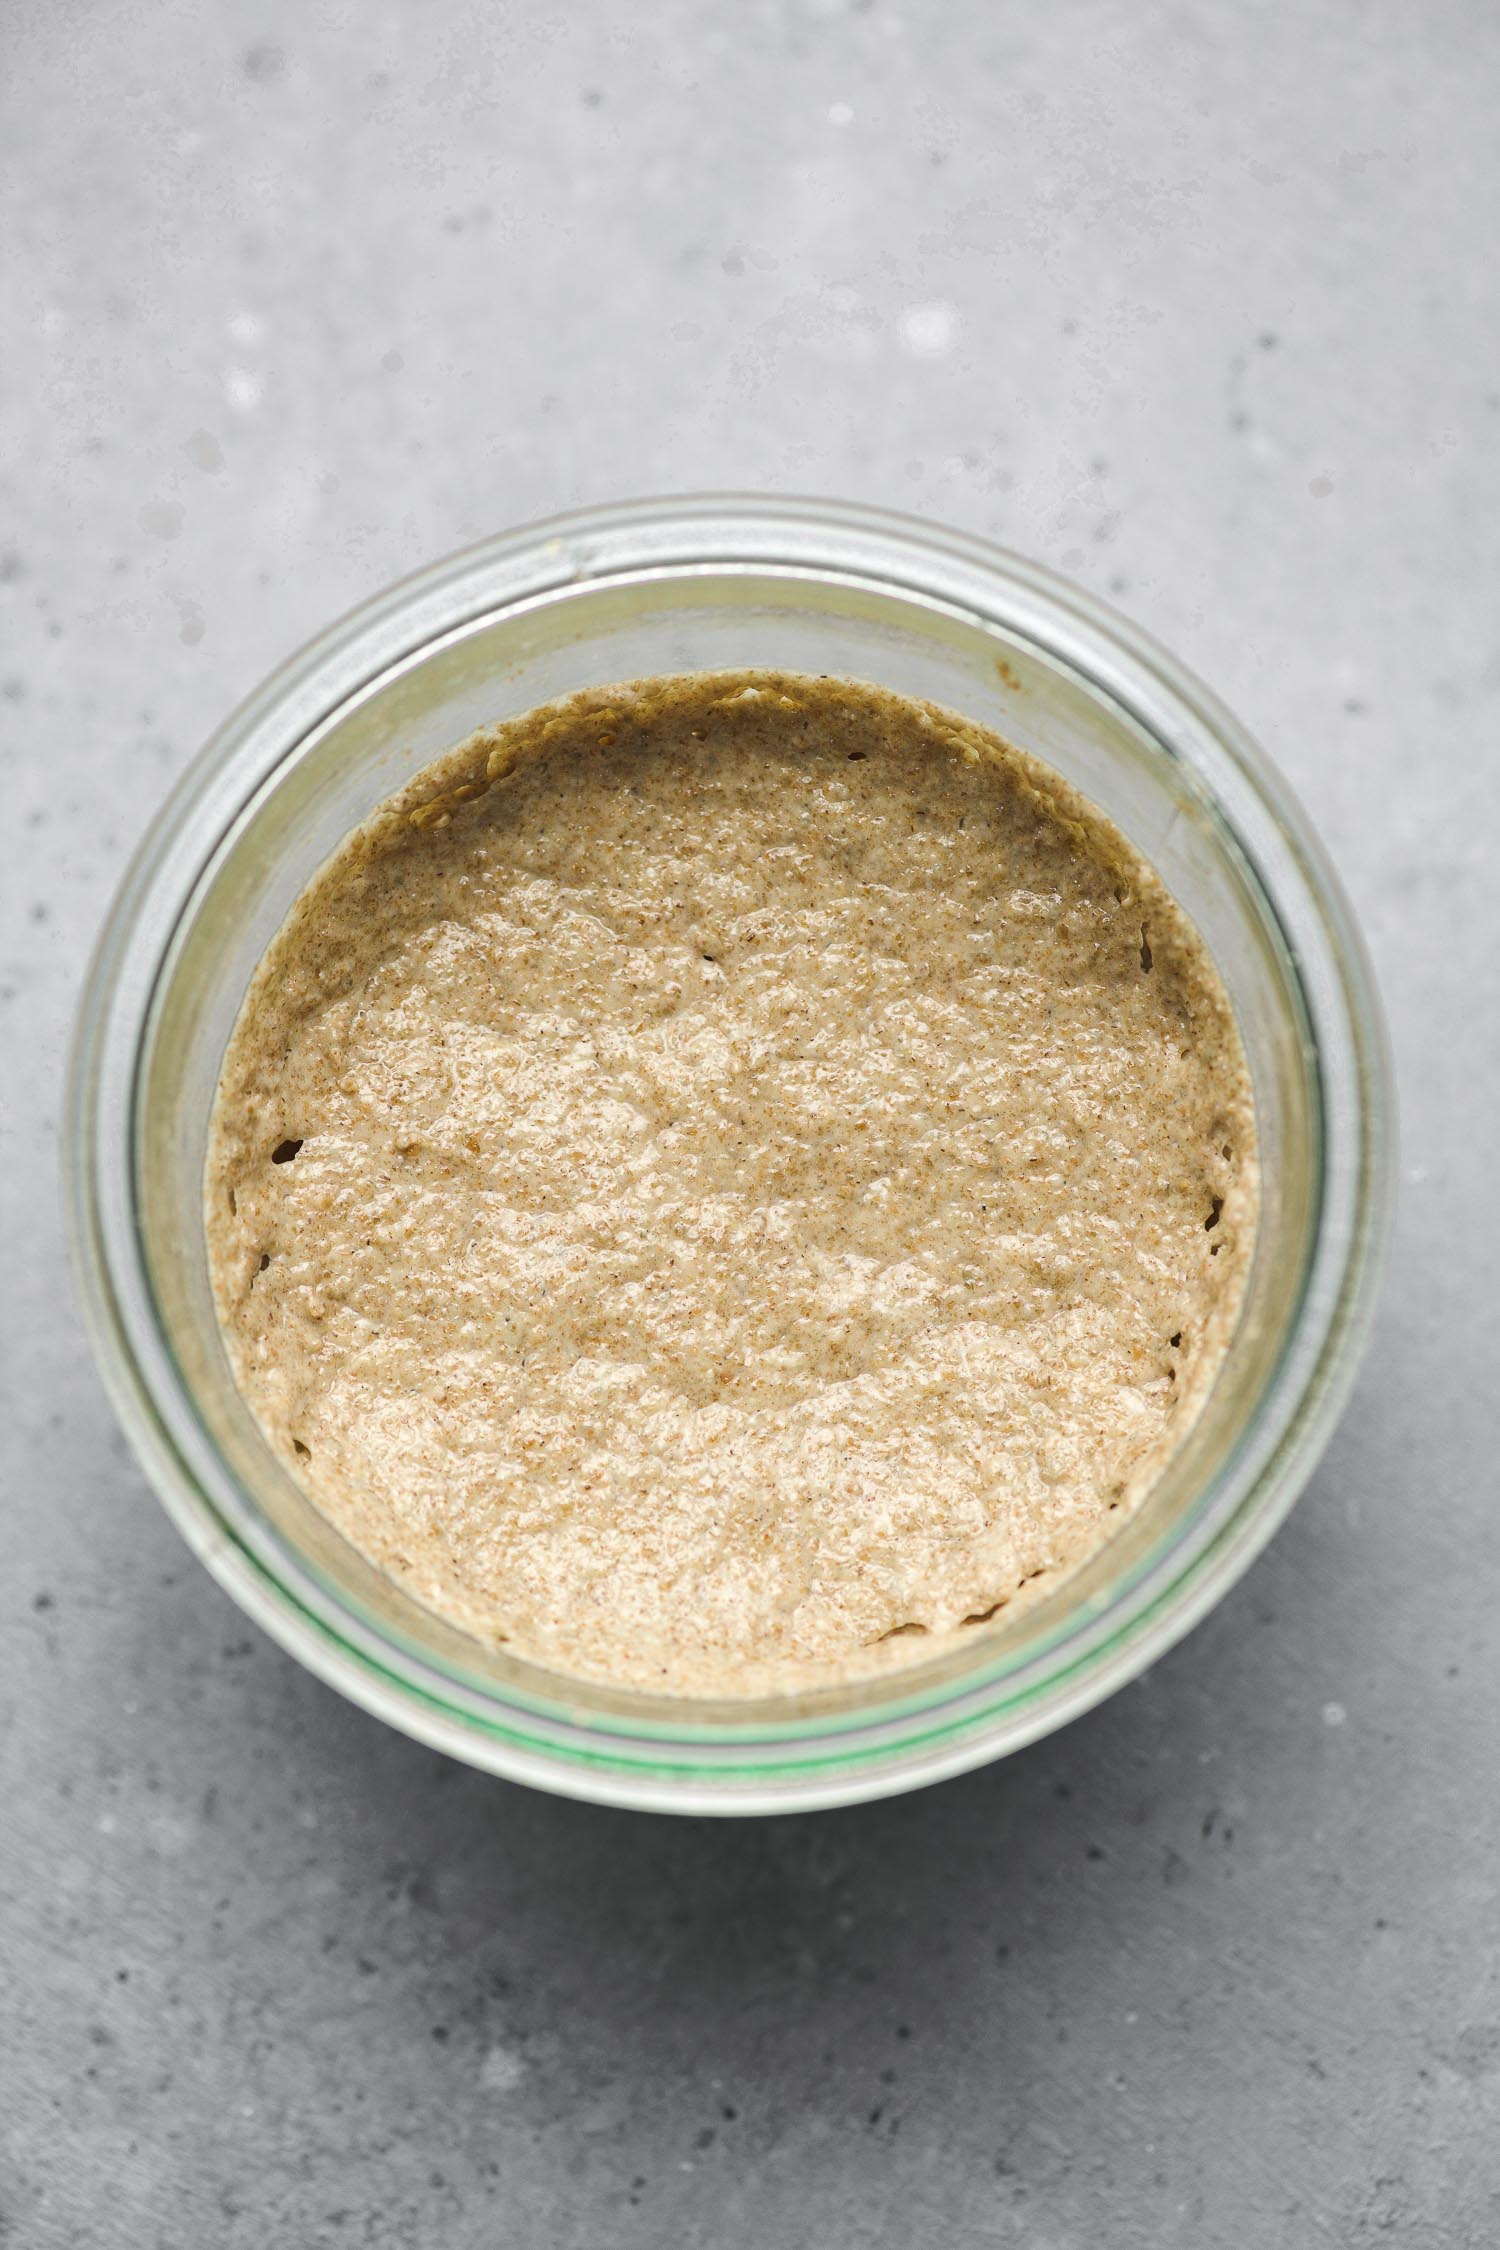
***At the end of Day 4 you should see good bubbling activity and the starter will be somewhat vinegary, alcoholic, sweet. If your environment is cooler or if you’re using white (all-purpose) flour you may see delays from this schedule but it’s okay. See my notes below regarding temperature.***
Day 5 and Day 6: Repeat steps on Day 4. Keep 100 grams, discard the rest and feed another 50 grams each rye flour and warm water. (You should end up with a total of 200 grams after each feeding on Days 5 and 6.)
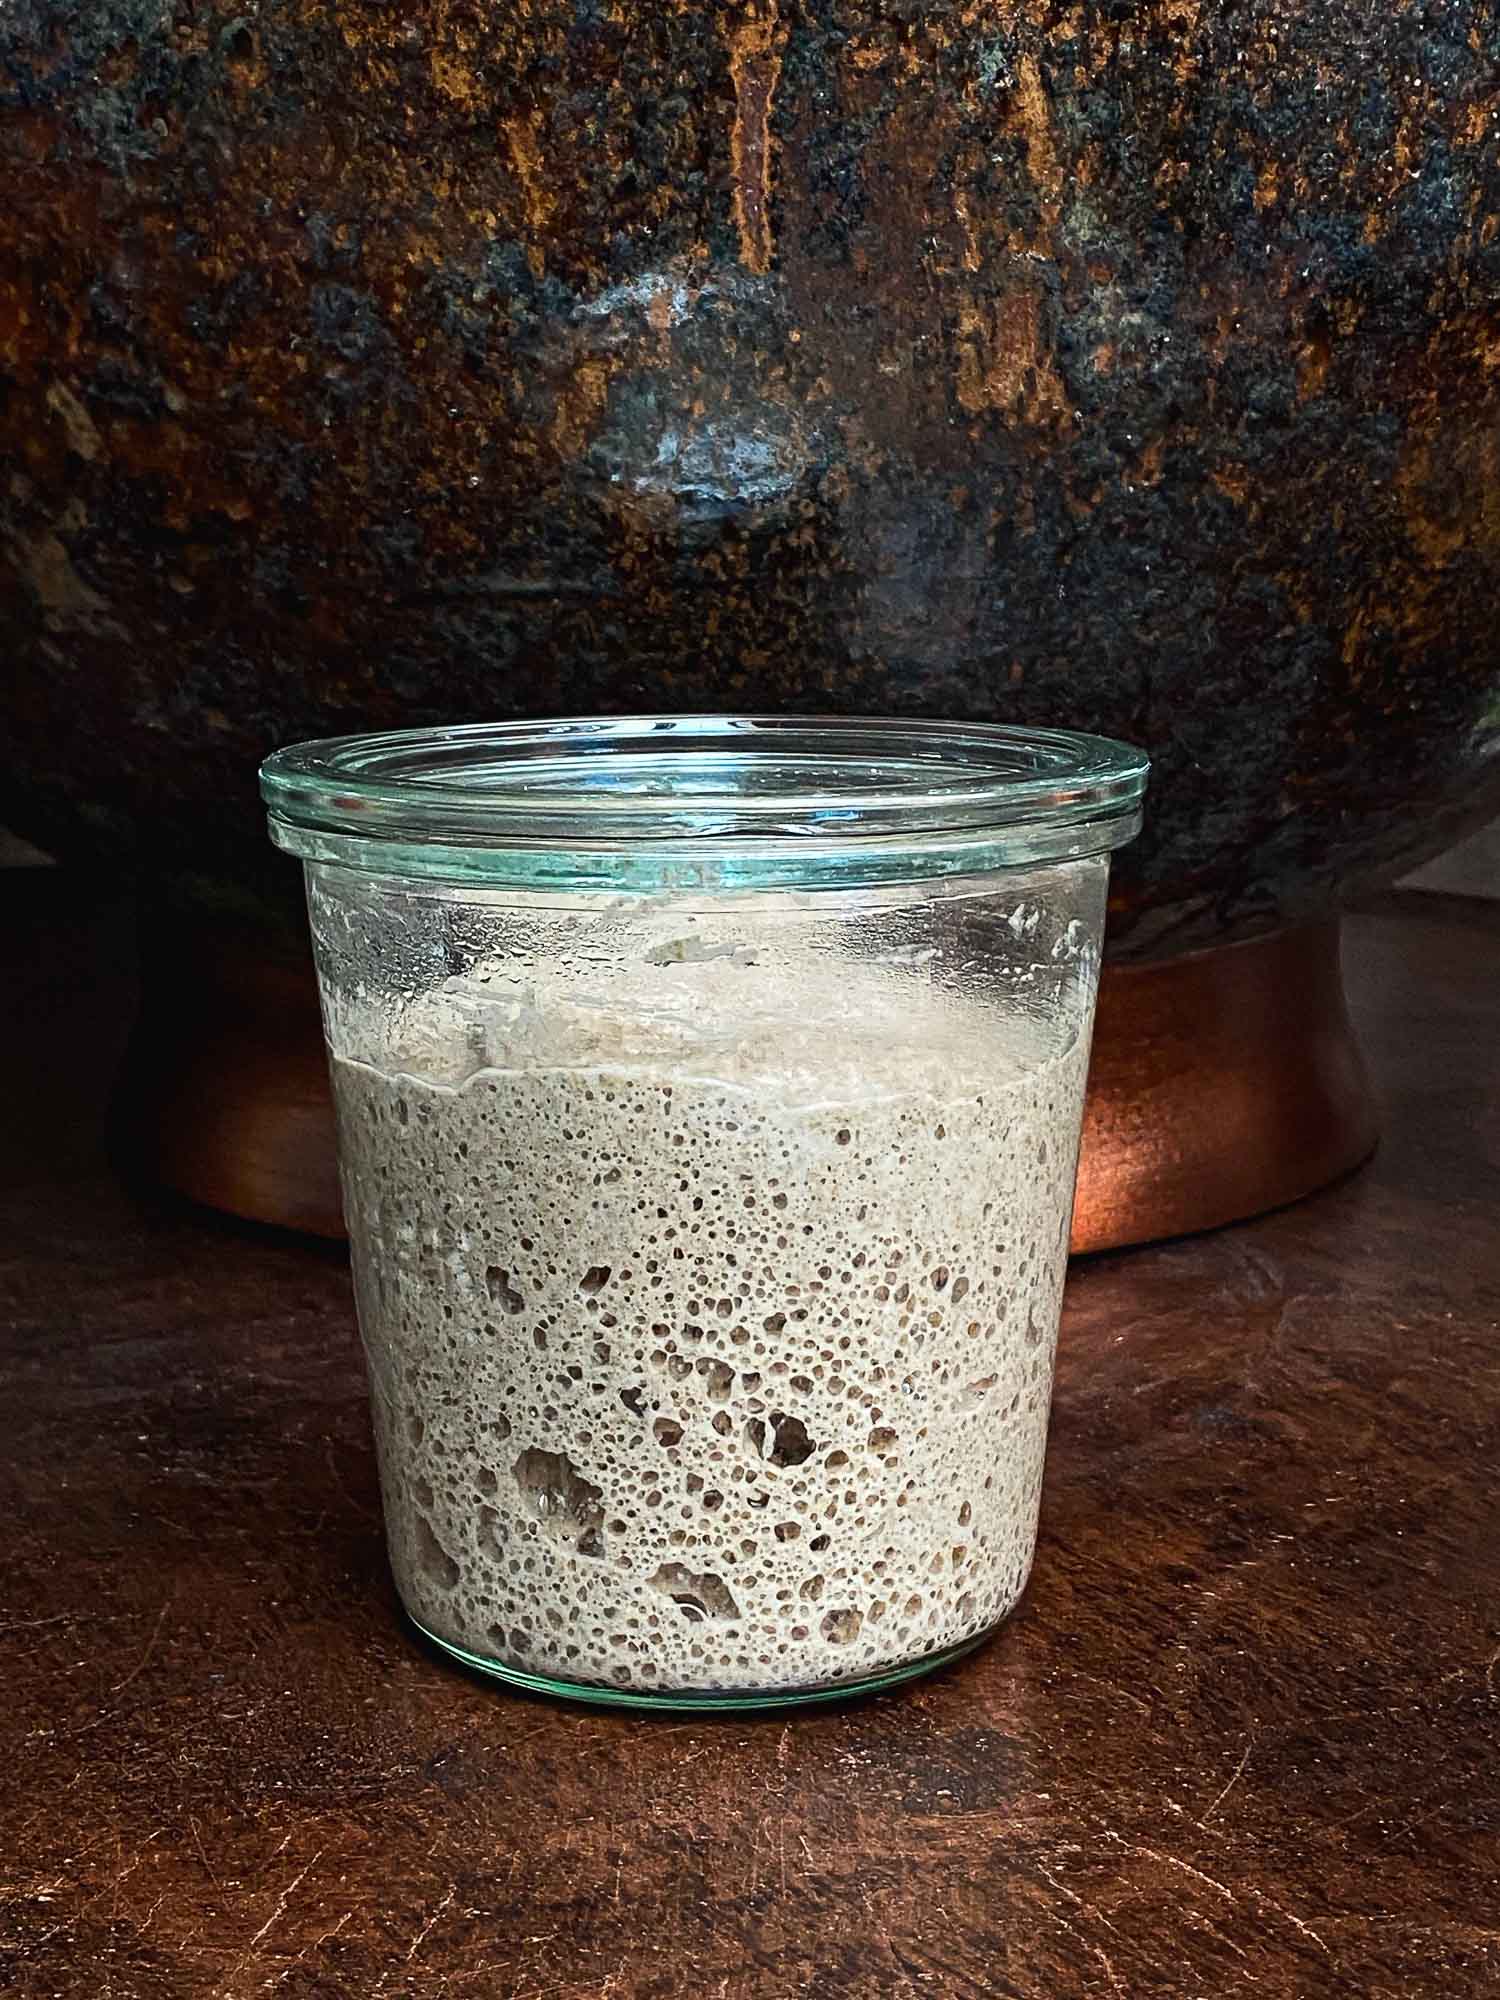
***You should see consistent doubling of your starter within four to six hours. Again, cooler temperatures will slow down yeast activity but this is okay. At the end of Day 6 when your starter is doubling consistently, it’s ready to use. See “How to Use your Sourdough Starter below.”***
The First Bake with a Young Sourdough Starter
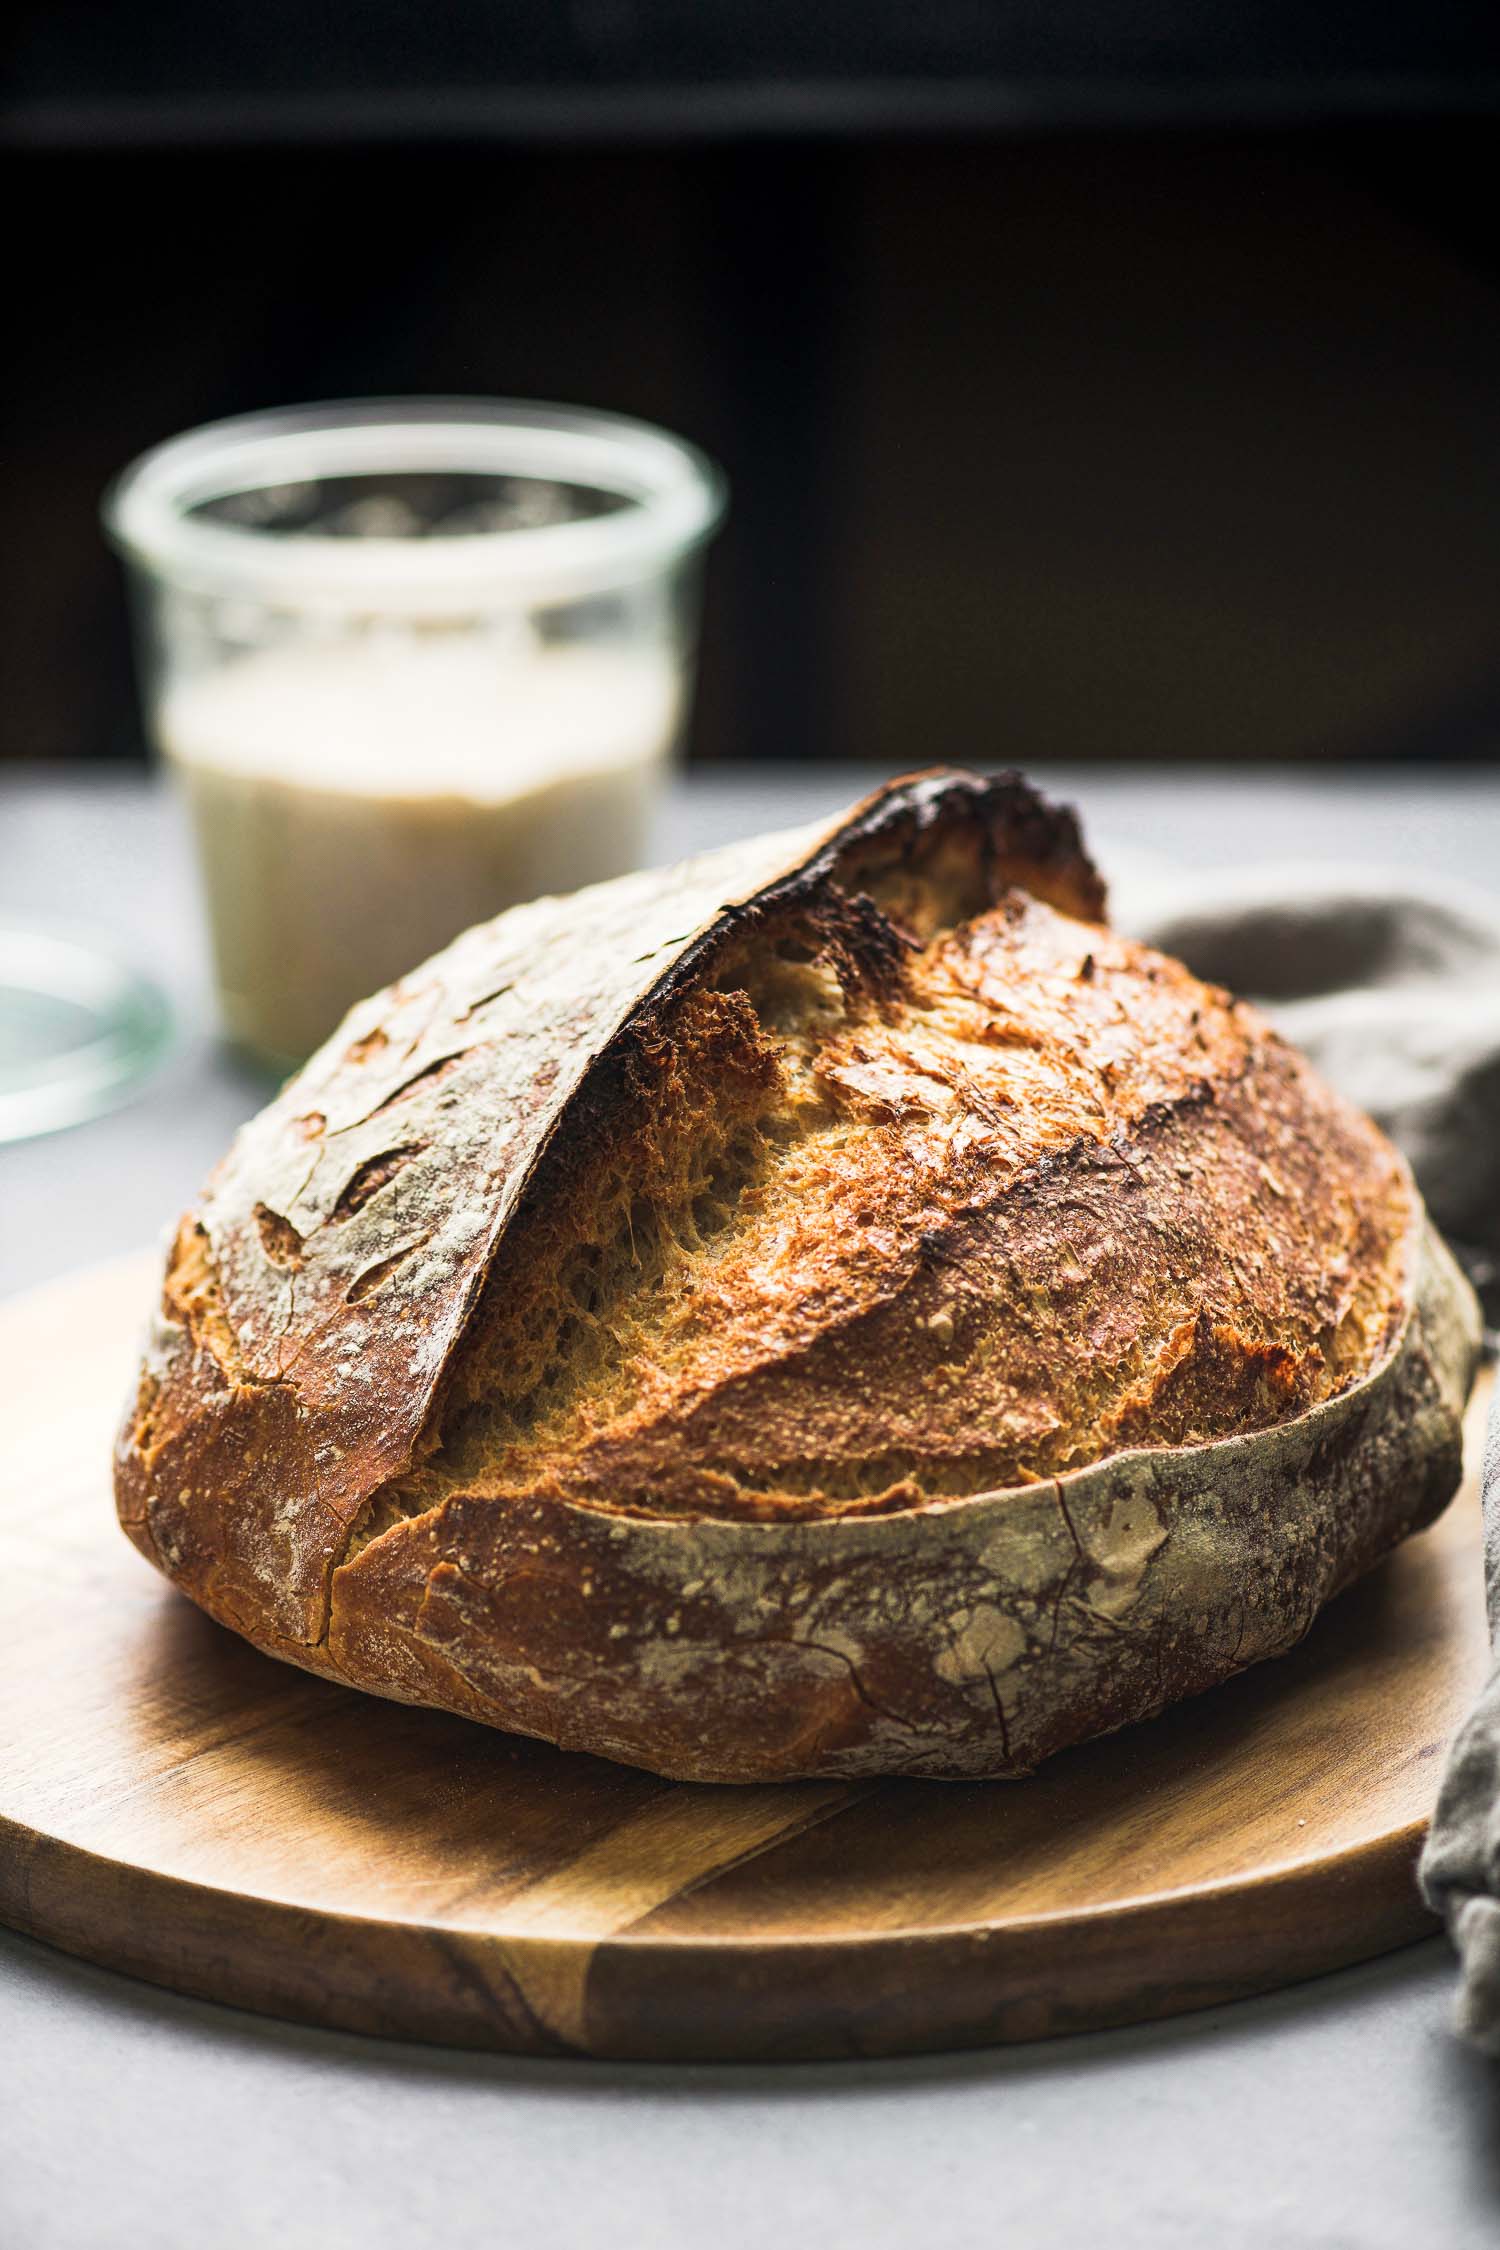
If you scroll down to the last image in this post you will see the loaf I baked using this young starter, Herta, at Day 6. See, it can be done but don’t be discouraged if your loaf isn’t as lofty as this one. I promise you that your bakes will improve with time and experience. Flavor, too, will come with time as you become more familiar with how the bacteria (source of acidity) and yeast (for leavening power) work relative to temperature and fermentation. One day everything will click and you will bake the sourdough bread of your dreams.
Scroll to the end of this post for the recipe I used to bake the loaf in this post, along with my notes.
(Keep reading below for maintenance, tips, terminology and the printable recipe.)
Sourdough Starter Maintenance (Feeding your Starter)
On Day 7 and beyond, you will need to establish a feeding schedule to keep your starter healthy and happy. With a young starter like this one it would be a good idea to feed it once a day for another few days, preferably a week. After this period, based on how often you plan to use your starter, you can elect to continue to keep a daily feeding schedule or store it in the refrigerator and feed it every few days or once a week. (The benefit of more frequent feeding at this stage is to increase in number the desirable bacteria and yeasts in your sourdough culture. The more of these good microorganisms present in your starter, the greater will be its ability to ward off the bad microorganisms that could cause it to go bad. It’s the acid that the good bacteria produce that creates an intolerable environment for the bad ones.)
Daily Feeding: This works best for regular bakers who bake at least a few times a week. You can use as little as 25 grams of your mother starter (this is the portion of starter you keep and feed), feed it 25 grams of water and 25 grams flour. For your bakes you can take 25 grams of the 50 gram total here and keep it as your mother and take the remaining 25 grams and feed it to build up to the amount of starter you will need for your recipe. You can increase the ratios of flour and water relative to your starter to get to the desired amount you need for your recipe. For example, here the ratio is 1:1:1, 25 grams each starter: flour: water. This is the most common ratio for maintaining a starter. For your bake, you can use 1:3:3, starter: flour: water or an even greater ratio. Personally, I keep about 100 grams starter so I take 50 grams of the mother and feed 25 grams each flour and water. The proportions of starter to flour/water don’t need to be firm but I recommend always equal amounts flour and water (more on hydration below).
Weekly Feeding: If you’re a once-a-week bread baker like I am, once your starter is established you can confidently store your mother starter in the refrigerator and feed it once or twice before you are ready to use it. When you take it out of the refrigerator leave it on the counter for an hour or until the starter has reached room temperature before feeding it. (As your starter matures this won’t be so critical but a good idea for now.) Just remember to always set aside a small amount of your mother starter for your next bakes. Also, when you feed it, give the starter a chance to become active before storing it in the refrigerator so wait until it has reached or come close to peak rise.
***In trying to determine what ratio to use for maintenance, think of how much “food” you want to provide for your starter between feedings. If your schedule will involve daily or weekly feedings 1:.5:.5 (technically, 2:1:1) should be fine. If less frequent then consider 1:1:1 or even more (more on ratio below.)***
***You will find that once your starter is established it will be quite forgiving. If you should be out of town for a few weeks or simply forget, your starter will survive neglect. Don’t worry. Just feed again and continue on.***
***Sourdough starters can go bad if there’s not enough of the desirable bacteria and yeast to fend off the unwelcome variety. A regular feeding schedule helps to keep your starter healthy and happy. If your starter turns pink, smells other than yeasty or like alcohol and has mold, throw it out and start over.***
How to Use Your Mother Starter
As I mentioned above, your mother starter is the portion you keep and feed. You take a portion of the mother and feed it for your recipe.
When maintaining a starter you will hear the term “discard”. This is the portion you remove from the mother and toss if you’re not planning to use it for a baking project. However, let’s say you are planning to bake a loaf of bread this is what you would do.
If you maintain 100 grams of sourdough starter, take 50 grams and feed it based on the ratio you choose. This is your mother starter and the one you will keep for next time.
The remaining 50 grams you can feed as the levain for your baking project. So if your recipe calls for 200 grams of starter, that 50 grams you took from the mother can be fed 75 grams each of flour and water. As I mentioned, the ratios don’t always have to be 1:1:1. A small amount of starter is enough to build on.
***Once your starter is established you can feed it a different type of flour depending on what your recipe calls for. I maintain my starter, Ida, and now Herta, the new one I created for this post, rye flour. But most of my bakes require mostly bread flour or all-purpose flour so I feed them with the latter when building a levain for my bakes.***
Sourdough Starter Terminology and Notes
- Flour. Any type of wheat flour will work for establishing a sourdough starter but I highly recommend using rye or whole wheat flour. These types of flour contain more living organisms that promote yeast activity. White, all-purpose or bread flour would also work well (and in fact this is what is most commonly used) but it may take a few days longer before you see the level of activity I’ve noted in this post. Once you have a healthy and active starter you can choose to maintain it with the flour you prefer. You don’t need to stay with rye or whole wheat. I will also note that a rye flour starter will be thicker than one that uses white flour so don’t be disappointed if you see your rye-based starter double but not appear overly loose and watery like the white flour based ones you might see online. Lastly, I prefer unbleached flour for all-purpose or bread flour but I have heard that bleached may work, too (I don’t have personal experience with it, though).
- Water. Filtered water works best to avoid additives in chlorinated water. Depending on the quality of your tap water it could work but I use filtered water for my starter and for my bakes. One workaround for tap water is to boil it and allow it to cool before using it. If your tap water has chloramine instead of chlorine I believe it would take a longer time before it boils off.
- Temperature. This is one of the most important elements of maintaining a sourdough starter and of baking sourdough bread. Warmer temperatures promote yeast activity, ideally between 75º-80ºF. In creating this new starter the daytime temperature in my home was 77ºF (I stored it in my family room with the fireplace on). When feeding a starter, I heat up the water to roughly 95ºF to give the yeast a good start. (My home is normally cooler this time of year so don’t let this part discourage you from creating a starter. Yeast progress will just be a little slower but you can still follow the same steps in this post.)
- Tools/Equipment.
- A canning jar works well for storing your mother starter. I like Weck canning jars–no need to use the rubber seal or clamp, just the glass lid.
- I highly recommend investing in a scale and becoming accustomed to baking by weight (grams) rather than by volume (cups). This ensures more accurate, consistent results. I use this OXO kitchen scale.
- For mixing the starter in a jar I’ve found that a wooden chopstick works better than a spoon or spatula for keeping the mixture tidier in the jar.
- After mixing the starter with a chopstick I use a firm, rubber spatula to scrape the sides of the jar and make sure no dry bits of flour remain in the mixture. This GIR Skinny Spatula is my favorite and it comes with a long handle so it works for taller jars, too.
- Thermometer. An instant-read thermometer is handy for measuring the temperature of the water for your feeds and for measuring the temperature of the dough. This OXO Instant Read Thermometer is the one I use.
- Ratio. New sourdough bakers are most often stumped by this. How much flour and water should you feed your starter? The most common ratio is 1:1:1 starter, flour, water (tripling the starter amount) but you might notice in my starter formula it’s 1 to .5 to .5 (or 2:1:1 but I see it better as the starter being the base amount), starter, flour, water (doubling the starter amount). This ratio works just fine both for building your starter and for maintaining it. It might be easier to remember 1:1:1 so feel free to use this but as I mentioned above, for building a starter for your bakes (not the mother starter, the levain) you can use one part starter and feed it three or four parts each flour and water, or even more. The important thing to keep in mind is to always use an equal amount of water and flour (by weight) so that your starter is always at 100% hydration (the percentage of water to flour). When you’re a more advanced baker you may choose to maintain a different starter hydration but this is not important at this point.
- Discard. This is the term used for the portion of your mother starter you throw away when feeding it. This same portion of starter is also the part you take and build your levain for your baking project. But you don’t need to throw your discard away. There are many recipes online that use discard starter–English muffins, pancakes, biscuits, etc. Just search for discard starter recipes (I have several recipes in the archives too). That said, I recommend only using a “fresh” discard, one that still has bubbles and smells sweet and yeasty. I will keep a discard for a day, up to a few days. I wouldn’t save discard that I don’t expect to use within two or three days or from a starter that has been neglected and hasn’t been fed in a while. And since it’s not a good idea to consume raw flour, make sure that it’s fully cooked in whatever discard recipe you choose.
- Float Test. You might come across this term when you research sourdough starters. The idea is that if a small piece of your sourdough starter floats in a container of water it’s ready to use. Well, this is a myth. The float test is no indicator of how ready your starter is or how well it will perform during a bake. Your starter may or may not float–don’t get stuck on this.
Preserving and Sharing your Sourdough Starter
Once you have an established starter you can take a portion of it and dry it for safekeeping in case of unfortunate mishaps in the kitchen. In case you accidentally use all of your starter for a baking project or it’s thrown away by a houseguest (speaking from experience) or knocked off the counter by your husband (again speaking from experience) you won’t have to start from scratch. Dried starter is easy to rehydrate and you can be baking again in a few days.
Dried starter is also a great way to share with friends and family who want to start baking with sourdough. I’ve mailed portions of my dried starter to friends across the country over the years.
I’ll be sharing instructions on how to dry and rehydrate your starter soon. Stay tuned!
My Base Sourdough Bread Recipe
(4.23.20 Based on multiple requests to share the recipe I used for the loaf in this post I’ve updated to add this section.)
There is not just one correct or best sourdough recipe to follow. There are many–but as a new sourdough baker five years ago I decided that it would make sense to stick to one recipe/technique so I can track my progress and make it easier to troubleshoot the issues I knew I would have. This worked and I recommend you do the same.
I chose to follow Ken Forkish’s method for his Overnight Country Brown bread in his book, Flour, Water, Salt, Yeast. I scaled down his recipe for two loaves to make just one which I shared in this post. Looking at the pictures in that post today, with more sourdough experience under my belt, I see that my bakes needed much improvement but as the recipe was derived from the book and one I trust, it was my better understanding of how dough behaves relative to time and temperature that has improved my bakes. In other words, it’s a solid, reliable recipe and it has become one of my most popular sourdough recipes here. All my other recipes for sourdough bread in this blog use this base recipe; I’ve just made small adjustments to time over the years based on conditions in my kitchen. That said, here are those adjustments. Based on your interest, eventually I’ll share this recipe with these small changes in a separate post.
- Use this recipe with the following adjustments.
- I used the larger amount of sourdough starter in the recipe, 120 grams. Also, mix the dough earlier in the day instead of early evening
- I combined the starter, water and flour (not the salt) and let the dough sit for one hour.
- After one hour add the salt and use the Forkish’s “pincer” method (step 3 in recipe).
- After thirty minutes stretch and fold the dough. Do this four times, repeating every thirty minutes over the course of two hours. After stretch and folds, continue bulk fermentation until the dough has roughly doubled in size. Cooler temps, this will take longer. Warmer temps, this will happen sooner.
- After bulk fermentation store the dough in the refrigerator overnight. In the morning, shape and final proof in the refrigerator one hour while you preheat your oven. Bake according to instructions in the recipe.
Here are additional recipes/resources in this blog:
- A Sourdough Baking Guide (and Chocolate-Cherry Sourdough Bread)
- Sourdough Bread Recipe Made with Unfed Starter (for a more mature, healthy sourdough starter)
- Orange-Raisin Sourdough Bread
- Sourdough Rye English Muffins
- Sourdough Cinnamon Raisin Swirl Bread (very popular)
- There are several more–click the search button and type sourdough for all my other recipes.
Recommended Reads
How to Make a Sourdough Starter
A homemade sourdough starter requires only flour and water and in as little as six days you can be baking bread with it. Here's how.
Ingredients
- 300 grams rye flour (minimum)
- 300 grams warm, filtered water (minimum)
Instructions
Day 1
-
In a jar, combine 25 grams rye flour and 25 grams warm water and stir until no dry bits of flour are visible. Cover the mixture and let sit in a warm place for 24 hours (ideally, 75º-80ºF). You won't see much or if any activity after Day 1.
Day 2
-
Take the 50 gram flour/water mixture from Day 1 and stir in 25 grams rye flour and 25 grams warm water. Cover and let sit in a warm place for 24 hours. You might see good bubling activity at the end of Day 2 (see blog post for more detailed notes).
Day 3
-
Take the 100 gram flour/water mixture from Day 2 and stir in 50 grams rye flour and 50 grams warm water. Cover and let sit in a warm place for 24 hours. At the end of Day 3 you might not see much activity but proceed to Day 4 instructions.
Day 4
-
Of the 200 grams flour/water mixture from Day 3 keep 100 grams (discard the remaining 100 grams or set aside for a discard baking project–see blog post) and stir in 50 grams rye flour and 50 grams warm water. Cover and let sit in warm place for 24 hours. At the end of Day 4 you should see strong activity and the starter should begin to smell vinegary, alcoholic and sweet. It should also have doubled in size during this time.
Day 5 and 6
-
Follow the instructions for Day 4 for both Day 5 and Day 6. This means that after each feeding on days five and six you should end up with 200 grams of starter. By the end of each day you should see strong activity and the starter should double within four to six hours. Your starter is now ready to use.
Day 7 and Beyond
-
Feed for a few more days then establish a daily or weekly feeding schedule based on how often you expect to use your starter.






Really helpful and as ever great photography – I especially like the header shot.
Keith, I appreciate your positive feedback–thank you so much! 🙂
This is so comprehensive. So many pics to lead the way! That’s very reassuring for a beginner.
I’m one of those folks you sent a starter to over the years. I kept using the one you sent me for quite a while, but I neglected it over this past summer and it doesn’t look so good now (it dried out). But since you sent it to me dried I figured I could probably reinvigorate it someday so I saved some. You seem to indicate in this post that I can. You’ve inspired me to try. GREG
Hi, Greg. If you aren’t able to revive the starter, happy to send you more once quarantine is lifted. I’ve been avoiding the post office as much as I can but happy to send you more unless you do try this starter recipe, in which case I hope it works. 🙂
Great read, thanks
Question:
What do you suggest if your environment is cooler and after day 6 you don’t see any movement in your starter?
Hi, Newton. Normal temps in my kitchen are below 70ºF so I will sometimes store my starter in the oven with the light on (oven off) to create a warmer environment (just don’t forget to take it out before preheating your oven). My original starter was created in cooler conditions and it worked fine. As long as you see a bubble or two something is happening. Are you on Day 6 of a culture you have started? Do you smell anything?
Hi Jean when I posted this I was on Day 4 so Day 6 the smell today before and after I mixed and just smelled it now smell like off porridge with a little alcohol smell. Not sweet or sour at all. I am in South Africa and the temperature at night drop to about 12˚C and during the day its around 18˚-22˚C. Day 2 I saw growth and loads of bubbles but after feeding and on day 3 it ended up being a gloopy batter kind of texture.and it stayed like that. I changed the feeding ratio to 1:2:2.
Do you think that maybe starter as it is now is not getting enough food, should I maybe try upping the feeding tomorrow to 1:3:3
Or
Should I just start from scratch and try again?
Hi, Newton. I’m not sure what off porridge would smell like so I’d say trust your nose if you think it smells foul. A yeasty, alcoholic or vinegar smell is fine. Your starter sounds like it behaved according to what I would expect. You got great activity on Day 2 and by Day 3 it had deflated. That’s to be expected. And at around this time the yeast and bacteria seem not to be doing anything but this is okay. A 1:1:1 ratio would be fine to use. In my recipe I use 1:.5:.5 so I don’t think you need to increase your ratio at all. Your temperatures are a bit cooler than mine so you can expect some delay compared to the timeline I note in this post. Unless you have a bad feeling about the smell of your starter, I think it would be okay to continue with it. I will let you be the judge of the this part, though. I hope this helps.
I live in florida and we keep our a/c on at 77-78 in summer…would you. Suggest I put it outside on fgs porch for a warmer environment in summer? It’s usually 80 in tbe morning but gets to 100 around lunch time.
Hi, Dixiana. It sounds like you already have ideal conditions in your home now to make this work. Really, you can use this starter recipe any time of the year. If it’s cooler than the temperatures I noted it will just take longer to see the results I’ve posted here. If warmer, it will happen faster. Let me know if you have more questions. 🙂
I was given starter from a Seattle neighbor, abt . 1 /3 c. from a follower of yours! I put in fridge. Took out after 3 (?) days and emptied it 1/3 c or 100 gms into LG bowl as directed. Her recipe gives feeding directions for first and 2nd feedings. . The directions said, add to the levain 100 g whole wheat but in this period of C-19, no flour in stores at all. So I used 1 and 3/4 c bsrley flour plus 2 cups white which is all that I had. Then added 400 g hot water. mixed and it ended up a round ball of dough as if it could be baked into a loaf of bread. It’s covered and esrm so I’ll see what happens on day 2. The directions say to do a 2nd feeding! It doesn’t resemble a slurry nor is it a gummy qua;ity as I imagine it should be. I hope it doubles in size and then I am supposed to only take 100 g of it as I did day before. and feed again . Have to find some flour tonight! 2nd feed says use only 85 degree hot water. I’m concerned that I never had the slurry, gummy startwr that developed bubbles and expanded? Perhaps my neighbor did all that, so I idn’t experience the startwer making proess. What I received was gummy,think slury but hadn’e expaned, maybe I was given starter in it’s deflated stage? Did I miss something critical in directions? This is my first bread attempt. Confused as I watched videos and saw photos of bubbly starter dooubling in size from liquidy matter, not from a firm ball of dough which I could have shaped easily into a loaf of brad! THX for help! Sour dough lover!! JC.
Hi, JC. What a small world! Yes, it sounds like you may have received a starter that had peaked already and needed feeding. The instructions you have in your comment are for feeding the starter? It sounds like much more than you need. I know that some recipes call for that but it’s not necessary. You can use a small amount and feed enough flour and water to reach the quantity you need for your recipe. And depending on the how mature and active the starter you were given, you might only need to feed it once before using it. Everyone follows a different method. Hope this helps. Happy to help further. Do you have a scale?
Hi there
I live in a tropical country where the average daily temperature is around 30 degrees Celsius. Indoor temperature could be around 28ish… Will I still be able to follow your recipe? What changes should I make?
Also I’m curious why rye for the starter?
Much thanks!
Hi, Mich. Yes, you can follow this recipe with your local temperatures. In fact, anyone can follow these instructions but since your local temperatures are in the range I recommend (maybe just a little warmer) your results should match mine, if not seeing results faster. No changes.
Rye flour is a whole grain flour so it contains more of the desirable yeast and bacteria that helps to establish a starter more quickly. Whole wheat flour would work, too. All-purpose flour is also perfectly fine–you might just have delayed results. Feel free to use what you have.
Jean, what a helpful, comprehensive post! I finally have flour again, so I’m eager to try again. I’ll never forget when you gifted me with some of Ida — I had named her Olga — but I sadly forgot to feed her. I promise to be a better starter mother this time! Thank you for such a wonderful post! The only thing that will make it better is if I found some rye flour!
Hi, Liren! Yay for more flour and thanks for taking the time to read this post. I love what you named your starter and hopefully there will be an Olga the Younger soon. White flour would work, too; you might just see some delays compared to the timeline here. Hope you get some rye flour soon, though. I’m also running very low.
Hi, I am feeding my Mother starter today that I have kept in the fridge. It had beautiful bubbles and smelled like sour dough bread. It is sitting out for an hour and I will use warm water, but do I put it back in the fridge right after I feed? Or let it sit on my counter for a day? Im in Wisconsin, its cold here . Thank you for any advice! Love your Blog site!!!
Mary
Hi, Mary. I forgot to mention this in the post so I will update. After feeding, leave your starter on the counter until it peaks or nearly peaks before storing it in the fridge. The timing doesn’t have to be exact but you want your starter to have some time to feed before you store it. And if you lose track of time and forgot to store it it’s fine. If I feed mine in late afternoon or early evening I will let it sit overnight and put it in the fridge the following morning. You just don’t want to completely deplete the starter’s “food”. Hope this helps and I appreciate the positive feedback! 🙂
Hi Jean,
Thank you so much for your recipe, I’ve successfully built up my own starter, it works exactly like what you describe! I’m so happy because I’ve failed many times with other recipes before finding yours, so really, thank you!
A small question here: You have mentioned that we do not need to feed the starter twice or more a day. However, now at day 12, my starter doubles its size within 6 hours then it starts to collapse, should I refeed it at its peak or just leave it like that and it shall be okay? (I don’t want it to die again!)
Thank you! <3
Karine, I’m so happy to hear this recipe worked out for you! Thanks for taking the time to write your feedback. As for a feeding schedule, I recommend doing what would work best for you. More frequent bakers would feed their starter twice a day but personally, I think this can be a lot of responsibility if you’re just baking one to two loaves a week. A daily feeding would be fine if you plan to keep your starter on the counter so you can just adjust for a higher ratio so that your starter has more “food” to get it through the day. Alternatively, you can store your starter in the fridge between bakes. I have lately been baking two loaves per week so I store mine in the fridge and pull it out, feed it then use it. At this point, you would have to try hard to kill the wild organisms in your starter so not to worry. Hope this helps. 🙂
Jean, thank agaib for taking your time to reply, I really appreciate.
So I had changed the feeding ration as you suggested, then I’ve move my starter to the fridge when it was 16 days old 🙂 It has beautiful bubles everywhere and smell nice.
Another question, just out of curiosity: Rye starter only doubles its size at its peaks and never goes higher, isn’t it? Coz I see there are starters that triple or even burst out of the jar, but it’s never happened to mine.
Hi, Karine. Always happy to help. 🙂 I think it might have to do with whole grain flour absorbing more water so the starter is thicker. It can usually more than double in size depending on the ratio you use to feed and the temperature but as long as it’s doubling it’s doing what it should. Hope this helps. 🙂
Thank you for such detailed directions! I’m a sourdough newbie. I keep coming back to this page, because there are so many helpful tips. One question re the bread recipe. In your modifications notes – #6 – you write: “final proof in the refrigerator one hour while you preheat your oven.” The earlier recipe post says to proof for 4 hours (not in the fridge). Is this correct? Final proof is just one hour? Then straight to the oven?
Hi, Catherine. Yes, that’s right. One hour in the fridge should be fine after an overnight cold retard in the refrigerator and if your dough has increased in size during the room temperature bulk fermentation the day before. Hope this helps. Please let me know how it goes. 🙂
Thank you, Jean! It turned out pretty well for a first loaf. The experience and your helpful tips gave me the confidence to keep baking. I’ve since made the chocolate cherry bread and Ken Forkish’s field blend 2 recipe. My enthusiasm has been so infectious (or annoying) as to inspire a friend to accept some of my starter to try baking herself. I pointed her to your helpful website. I’m glad you updated the Forkish method page. Now I don’t have to keep going back and forth b/w that page and this one. 🙂
Hi, Catherine. This is so nice to hear, thank you! That update to the Ken Forkish recipe was overdue but I didn’t realize how popular it had been. Glad it’s helpful and I bet your friend will be thanking you very soon for introducing her to sourdough bread baking. Thanks so much again! 🙂
I have a sourdough starter that I have been using for a few months. What is your weekly feeding recipe? I am still confused about the ratios for maintenance.
Starting your bread tomorrow, baking the next. Can’t wait!
Hi, Margaret. For weekly maintenance 1:1:1 works for me. This is my typical formula: 50 grams mother starter + 50 grams water + 50 grams flour so I usually have 150 grams of sourdough starter in the fridge.
This doesn’t have to be exact so don’t worry if your proportions are a little different. You can use any ratio to maintain your starter. For example, if you want a greater proportion of “food” for your starter you could do 1:2:2. Take 50 grams mother starter + 100 grams water + 100 grams flour. The ratio doesn’t have to be even and in these multiples. The general idea is to keep the amount of total water and flour in the starter equal proportions to maintain 100% hydration (though this isn’t a rule either but this keeps things simplest for use in most recipes).
Also, it depends on how much starter you like to have at any given time. I like to have around 120-150 grams of my mother starter so I use these amounts. Hope this helps! Please let me know and I hope the recipes work for you. 🙂
Hi Jean,
I am now on day 6 and there are some bubbles, but it is not really rising at any moment.
Should I just have some more patience and keep on feeding on a daily basis?
How long should I keep on trying?
Greetings, Stefanie
Hi Stefanie. Sorry for my very late reply. Have you been able to get your starter going? Happy to help if you still have questions.
Hi there!
Can I replace rye flour with whole grain flour?
Hi, Christine. Yes, you can use whole grain flour for your starter. Hope the recipe worked out for you. Happy to answer any questions.