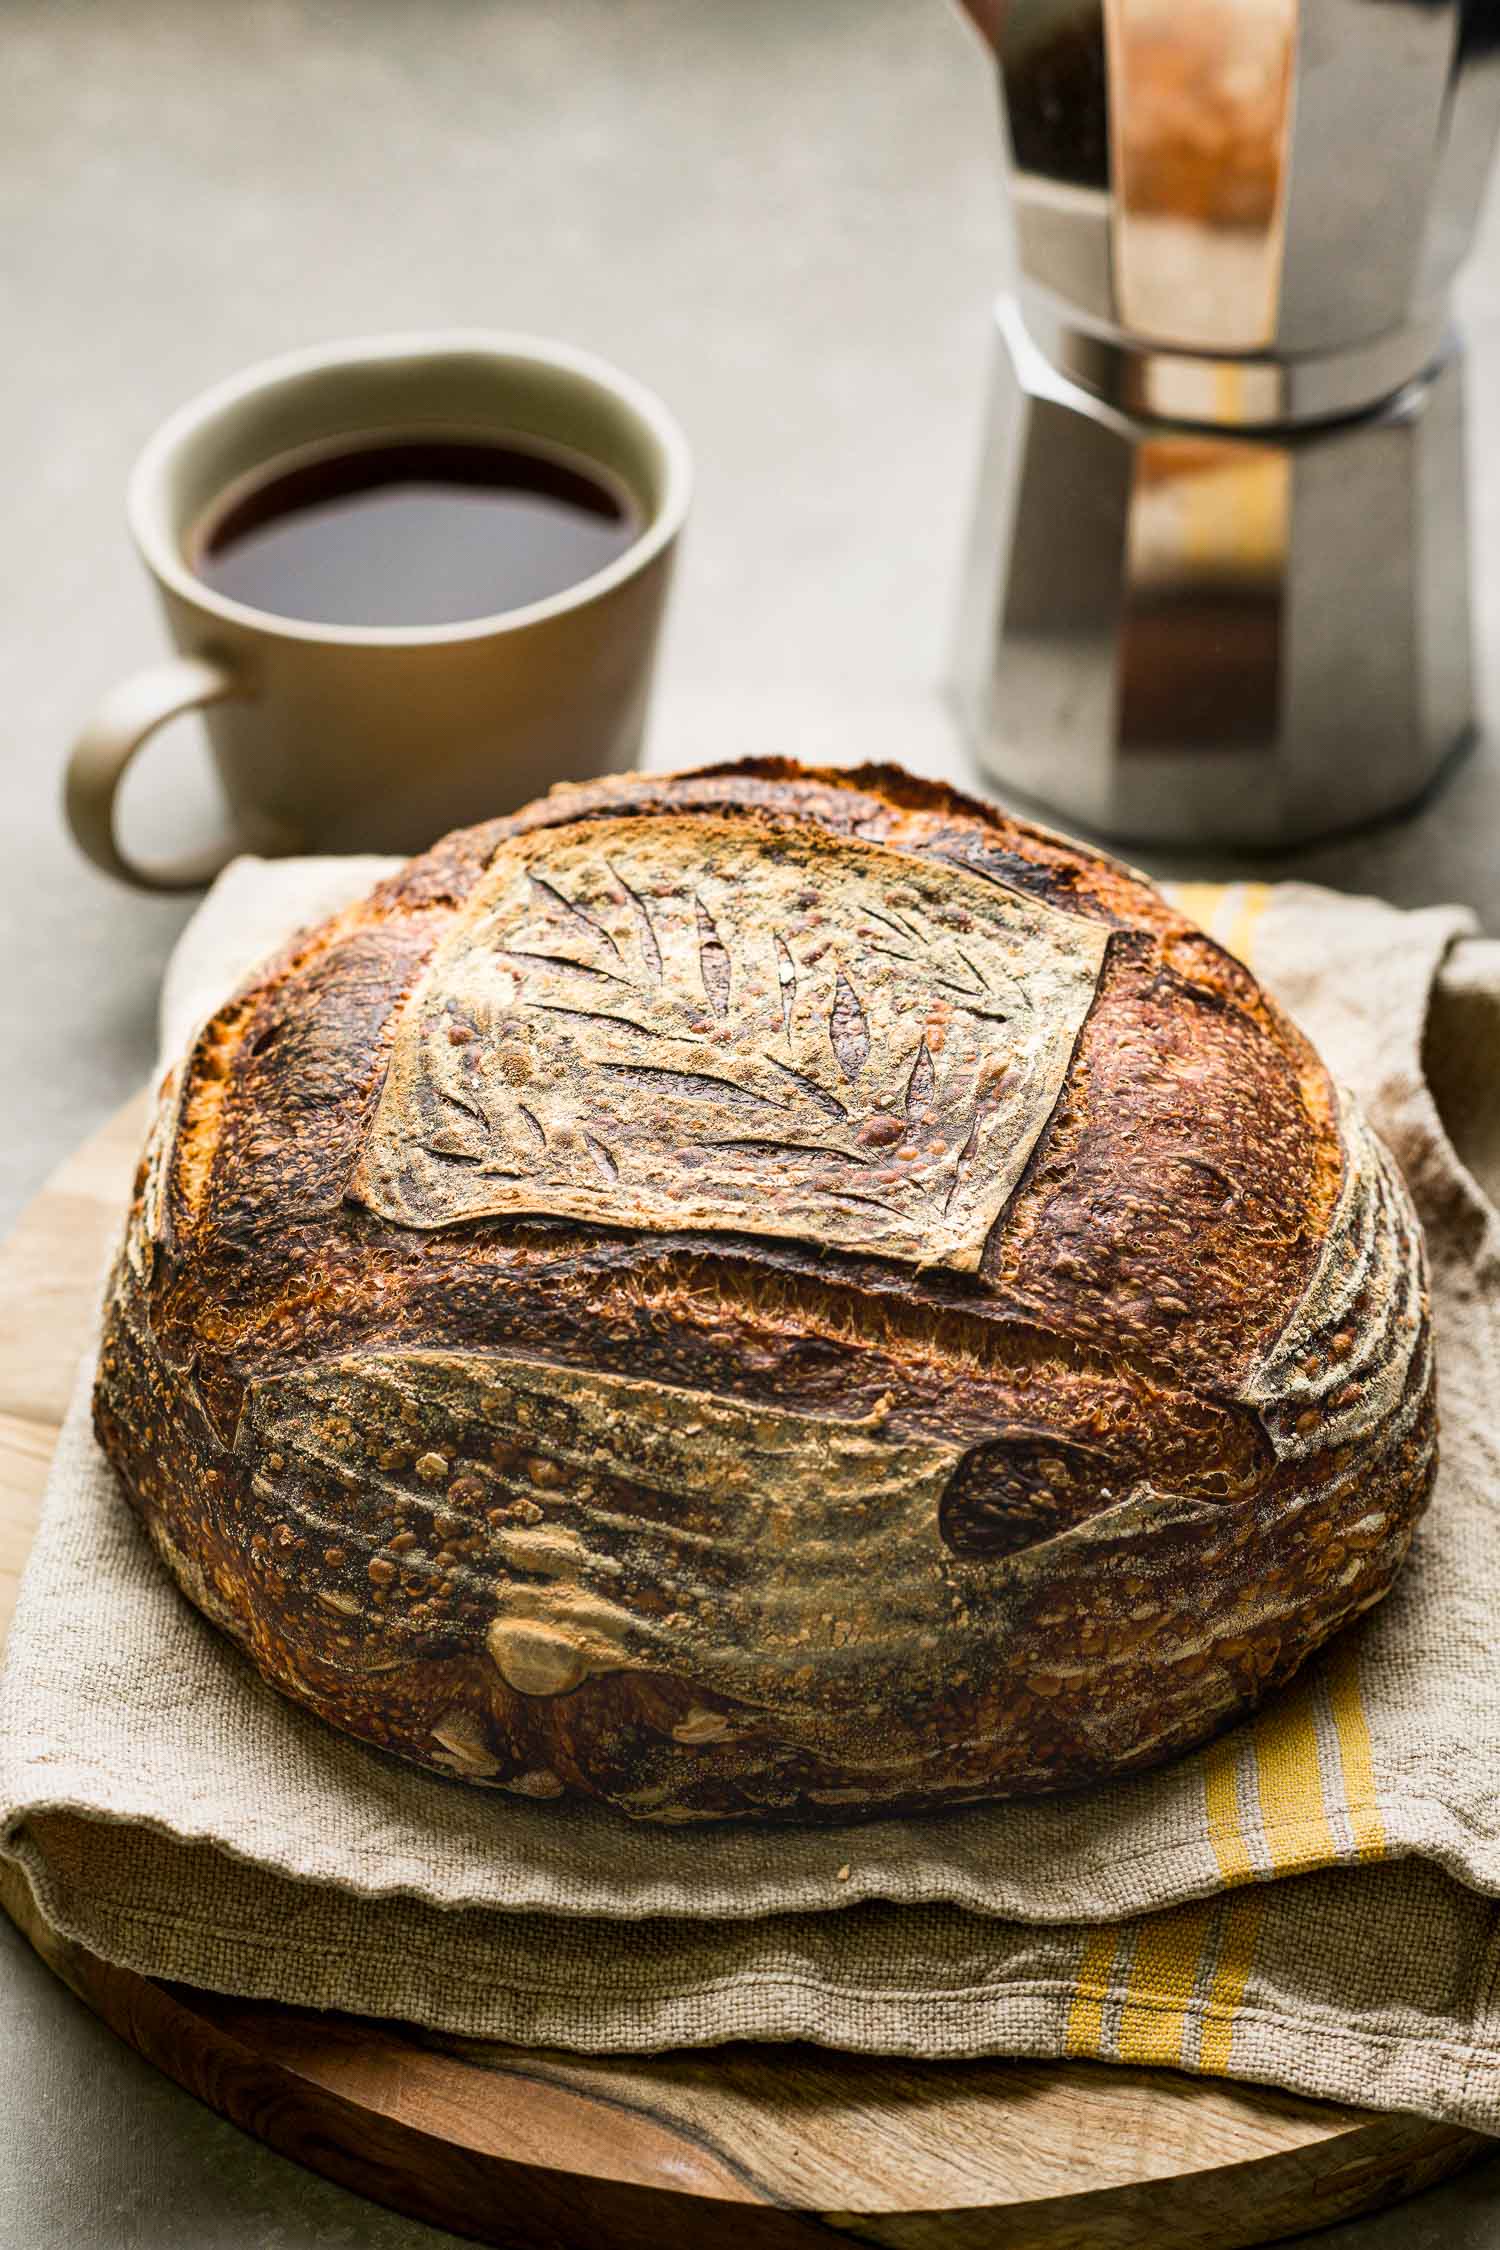
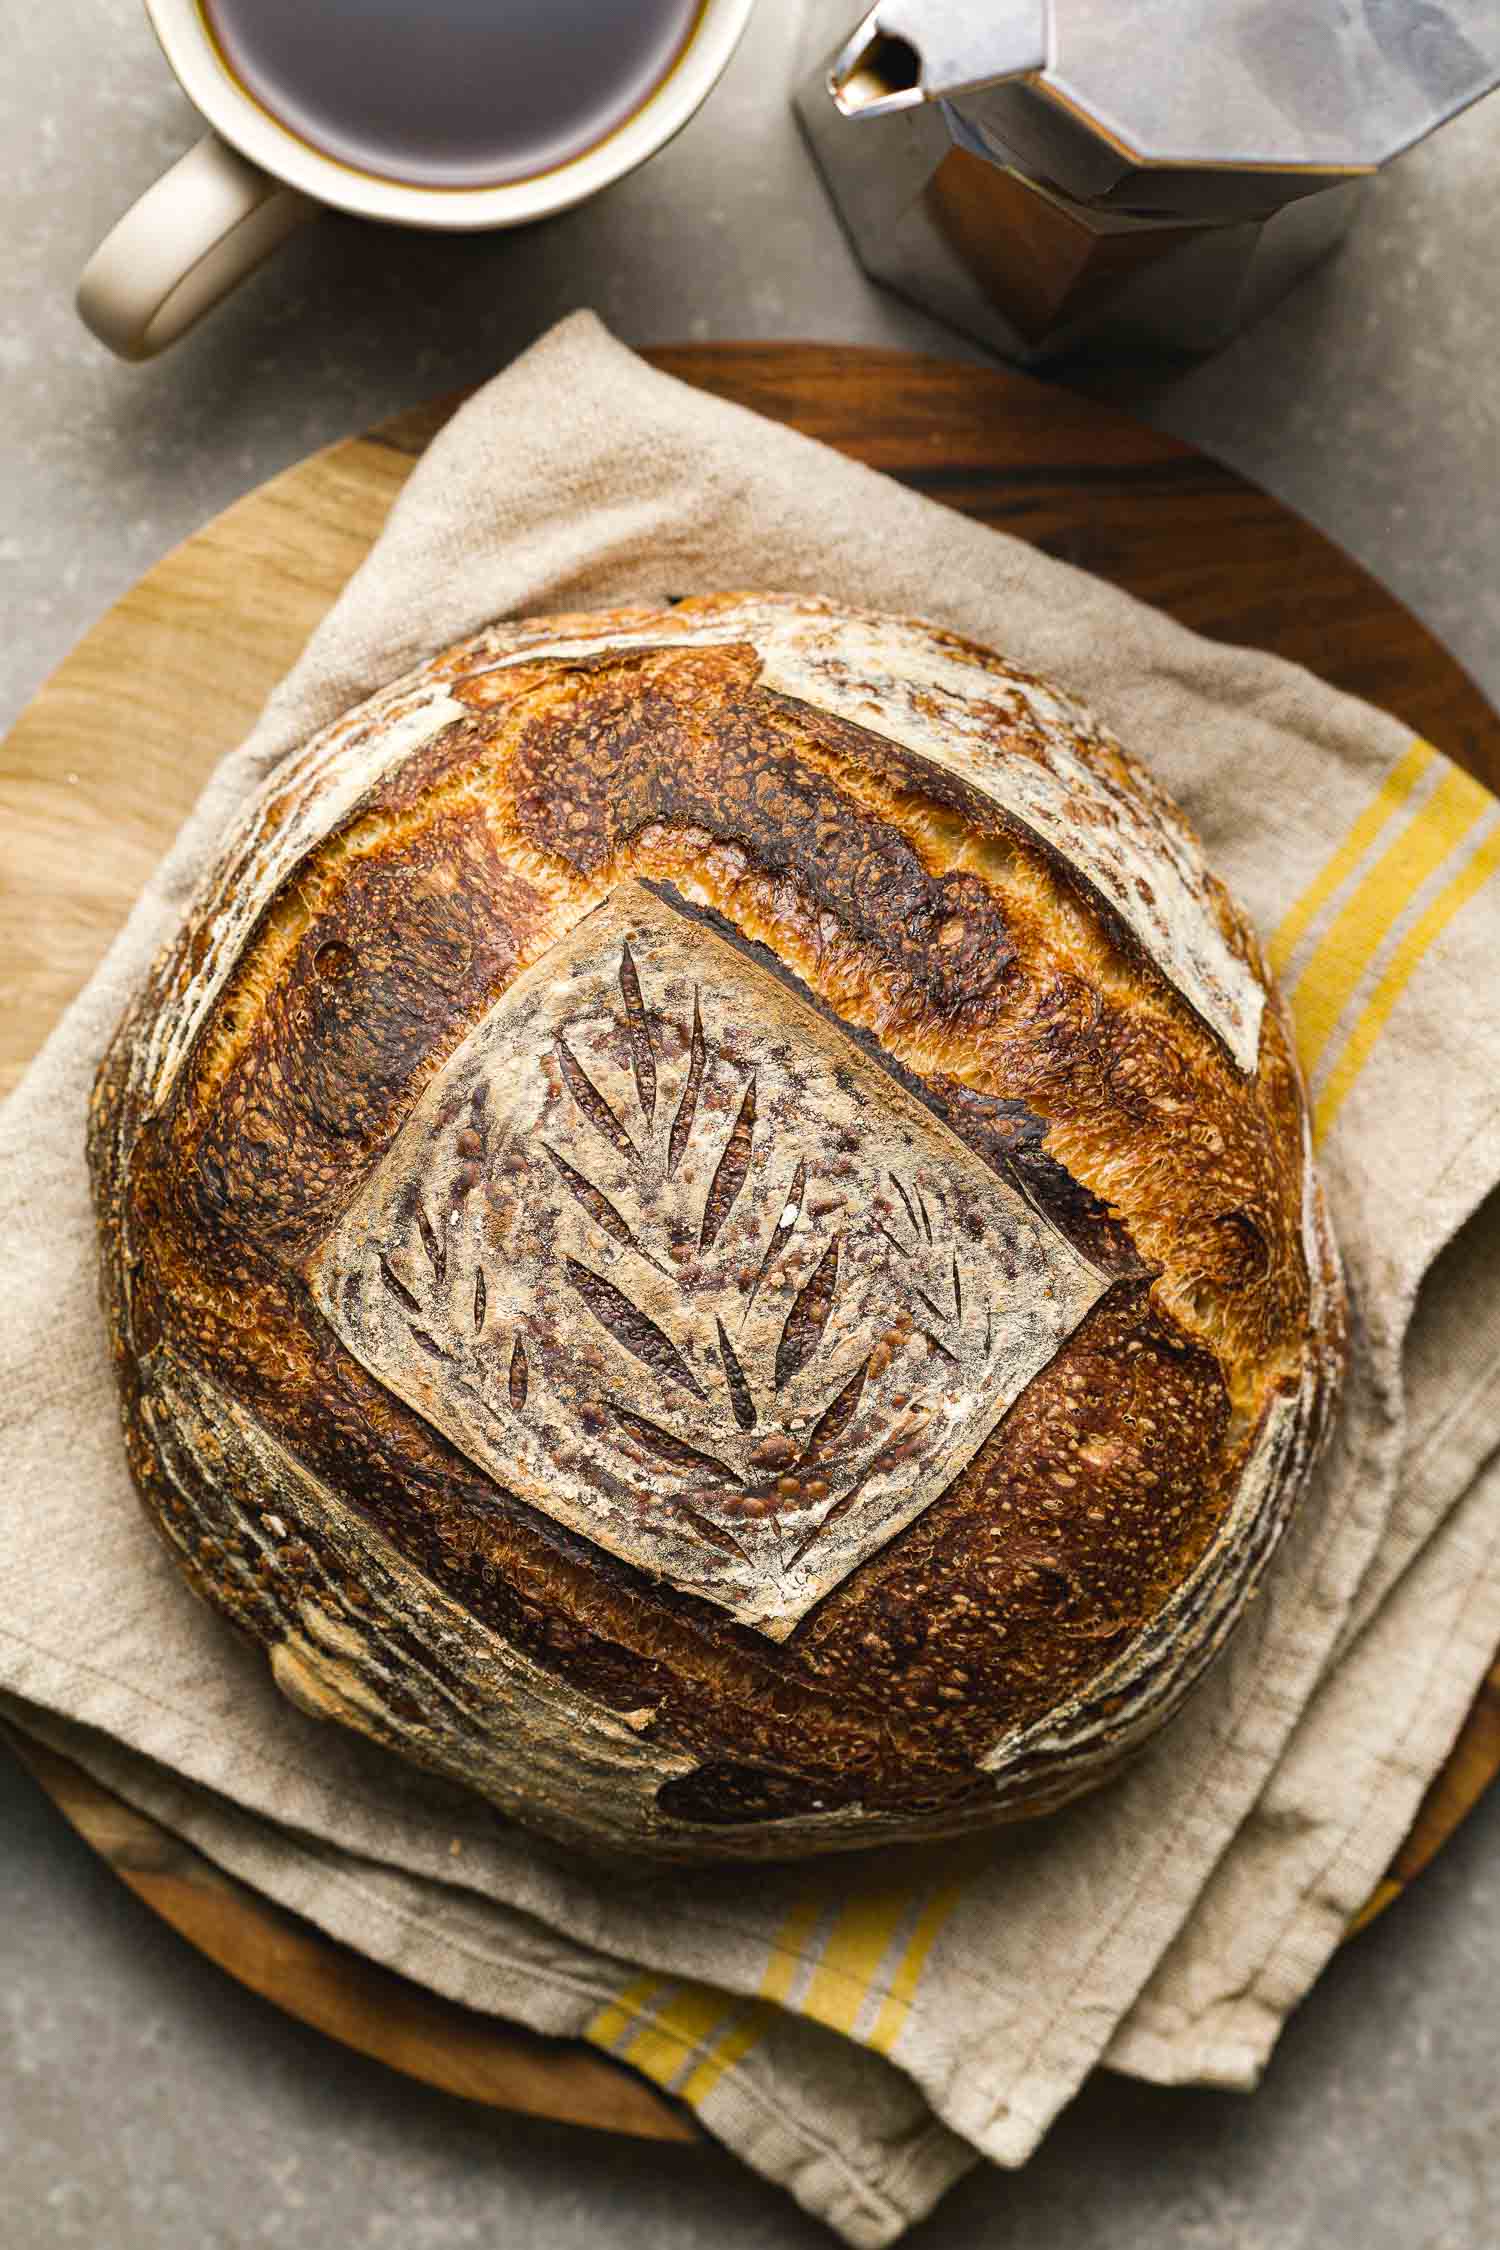
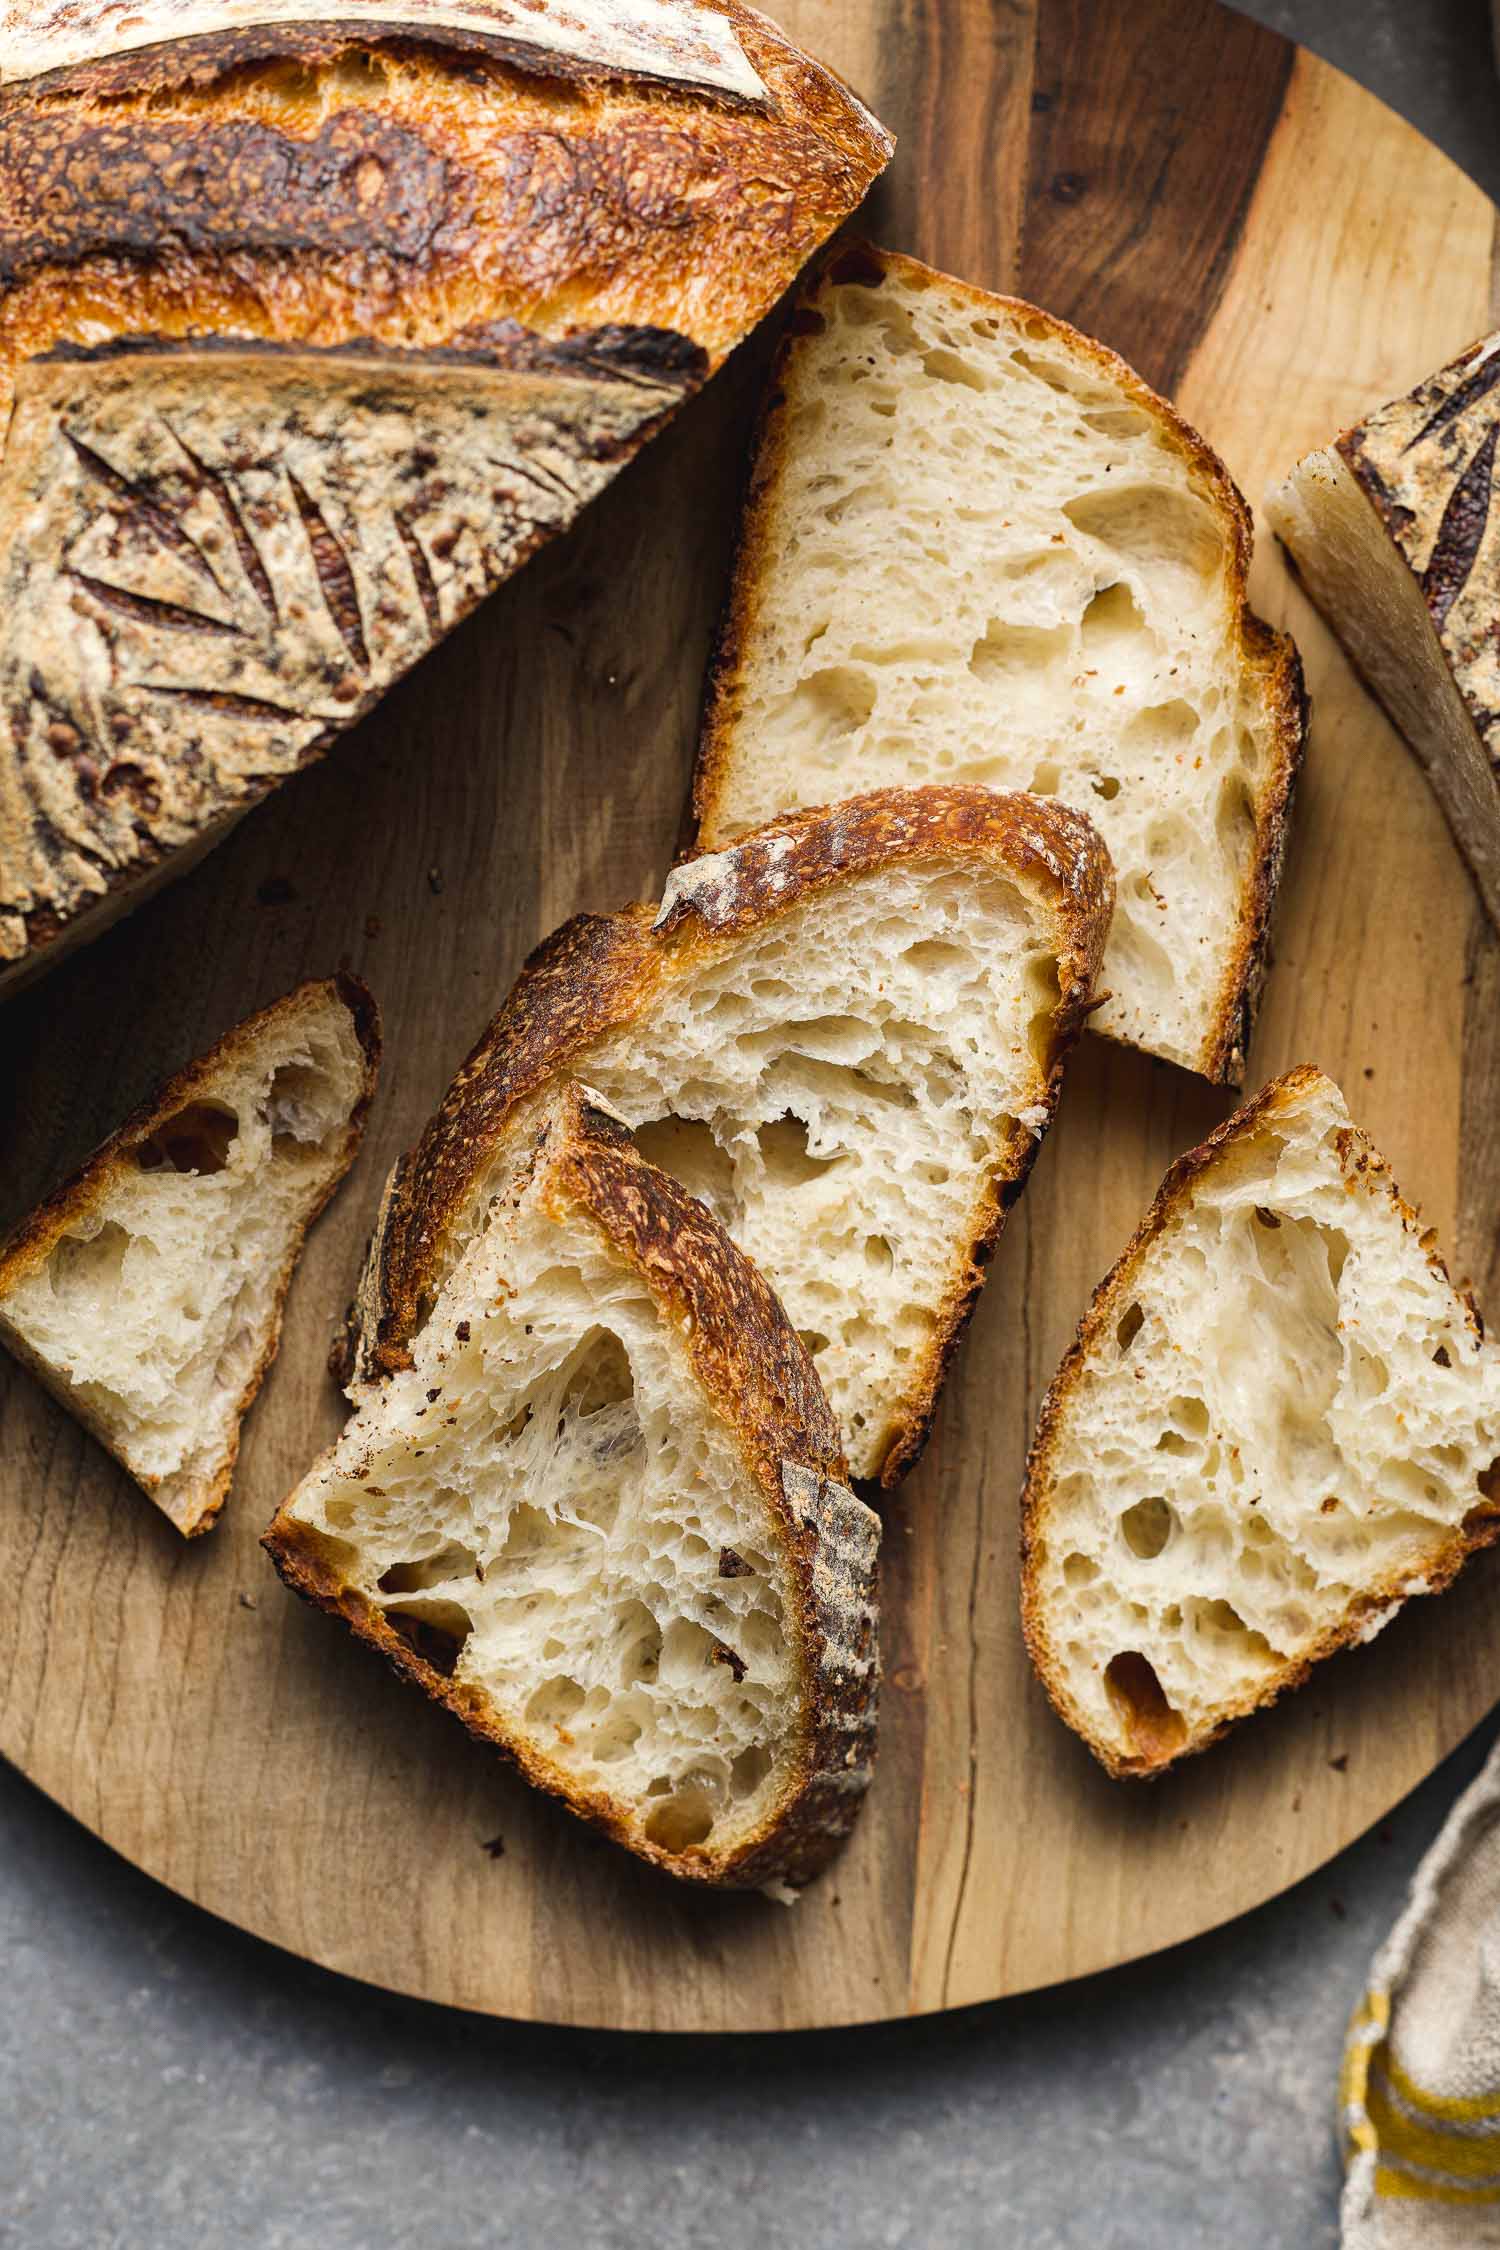
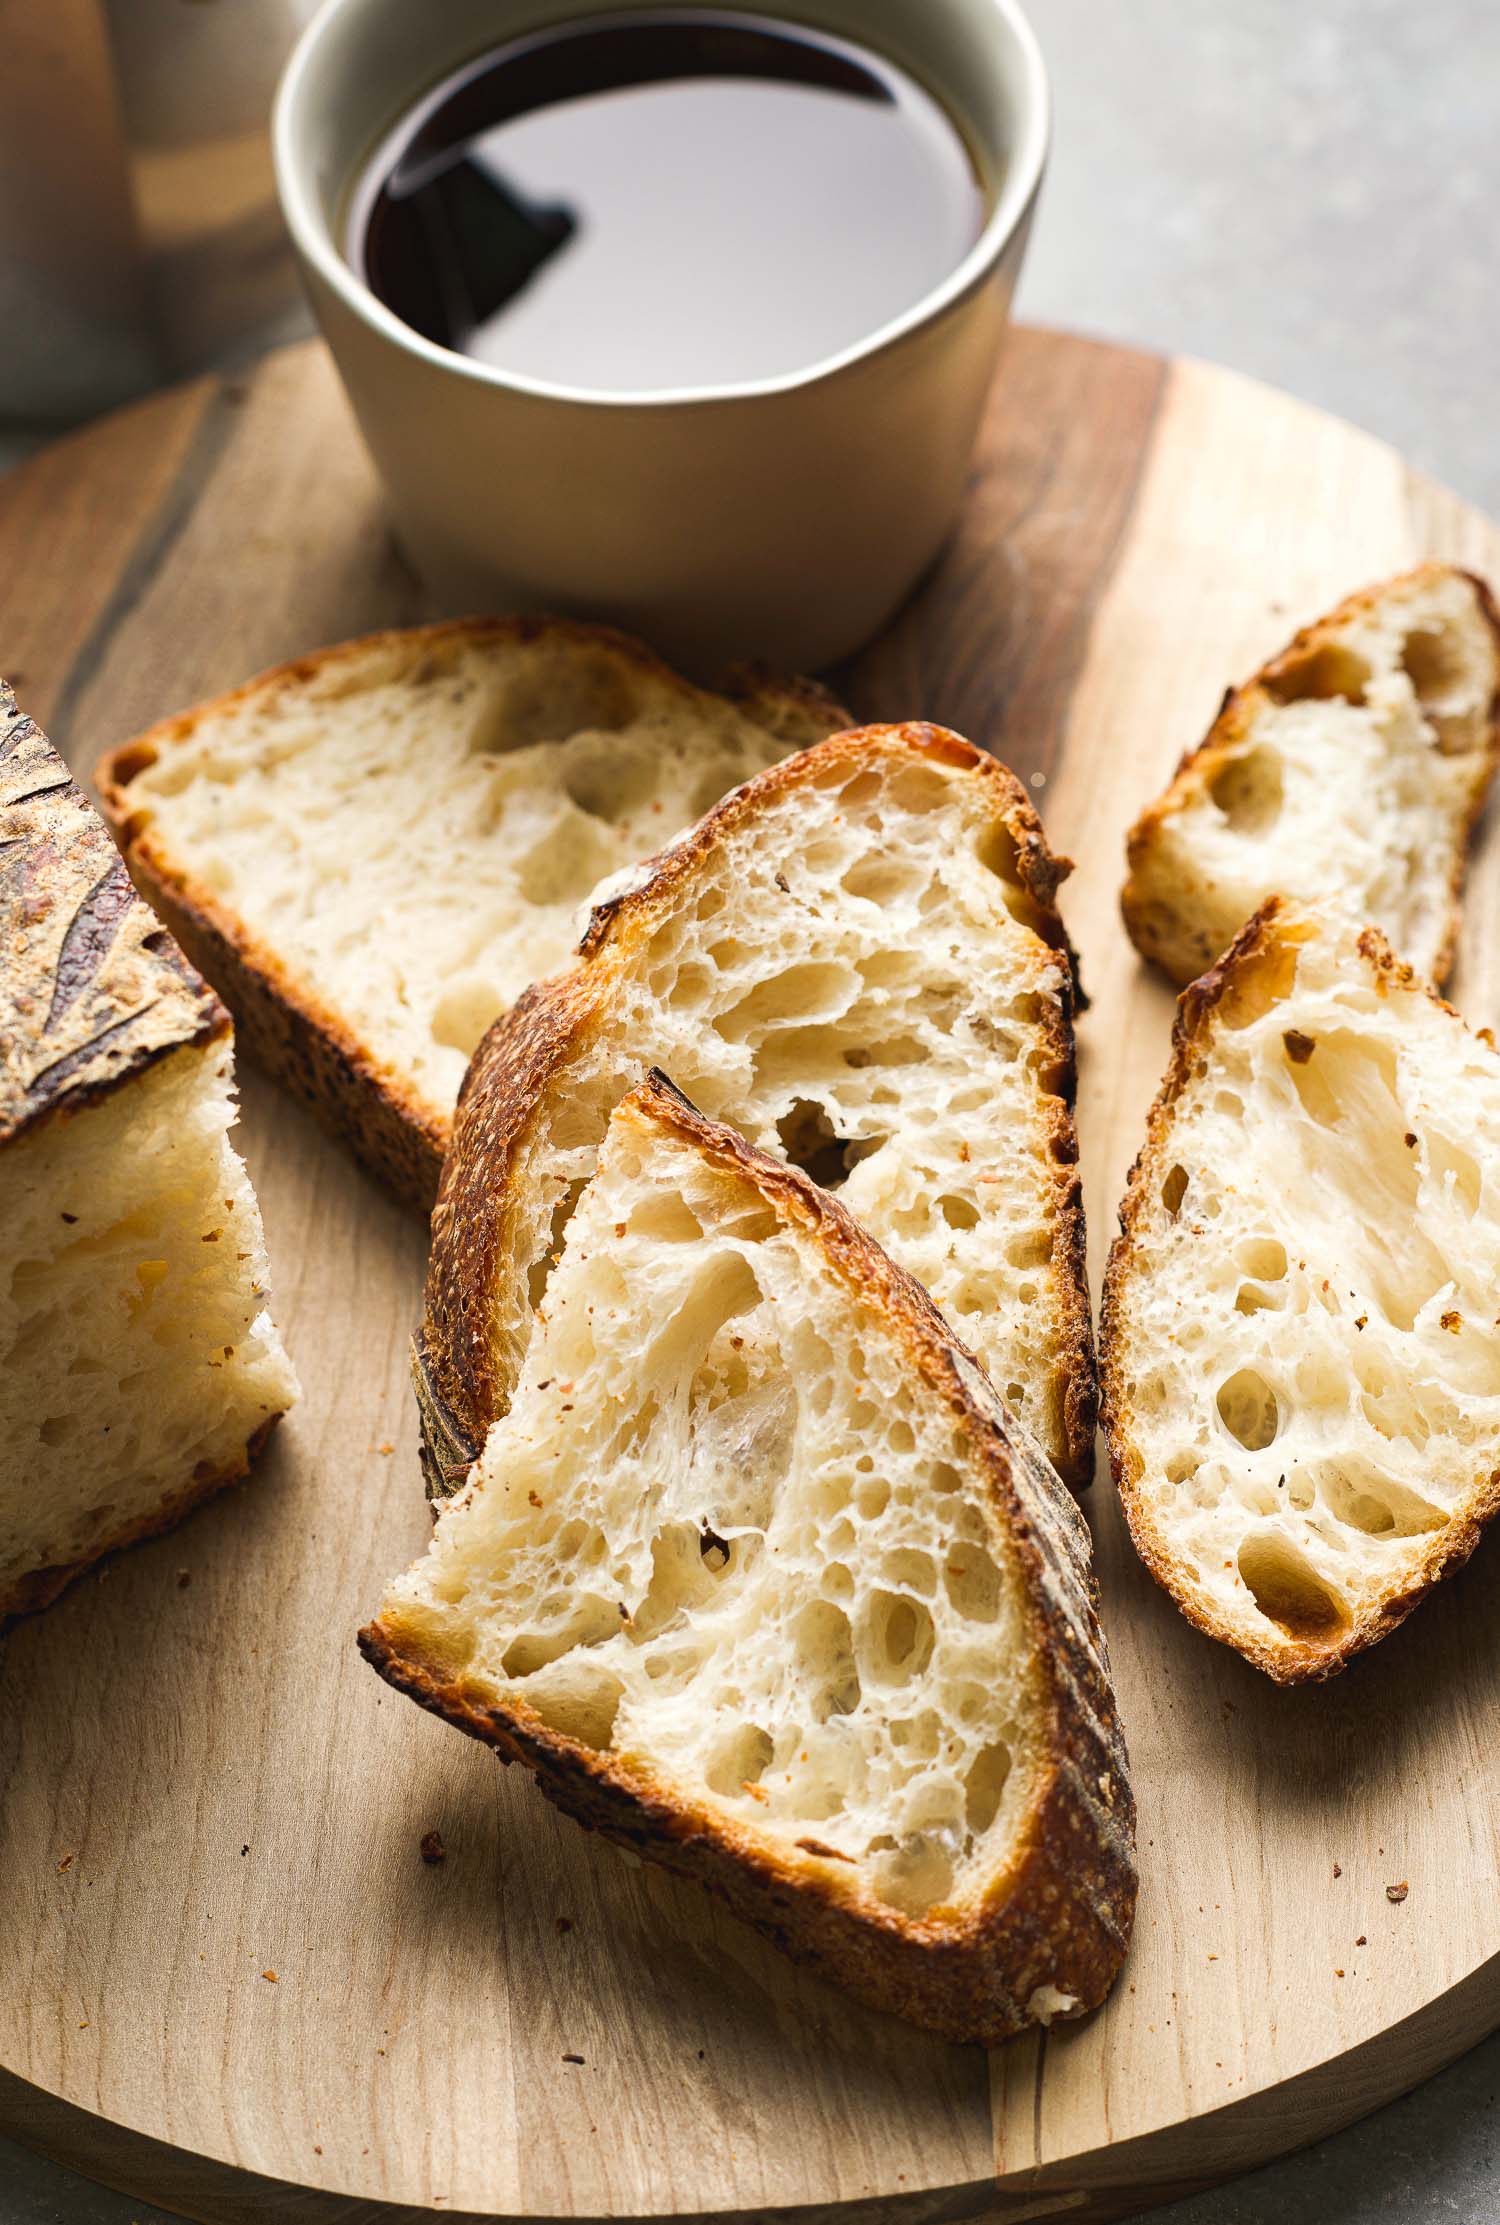
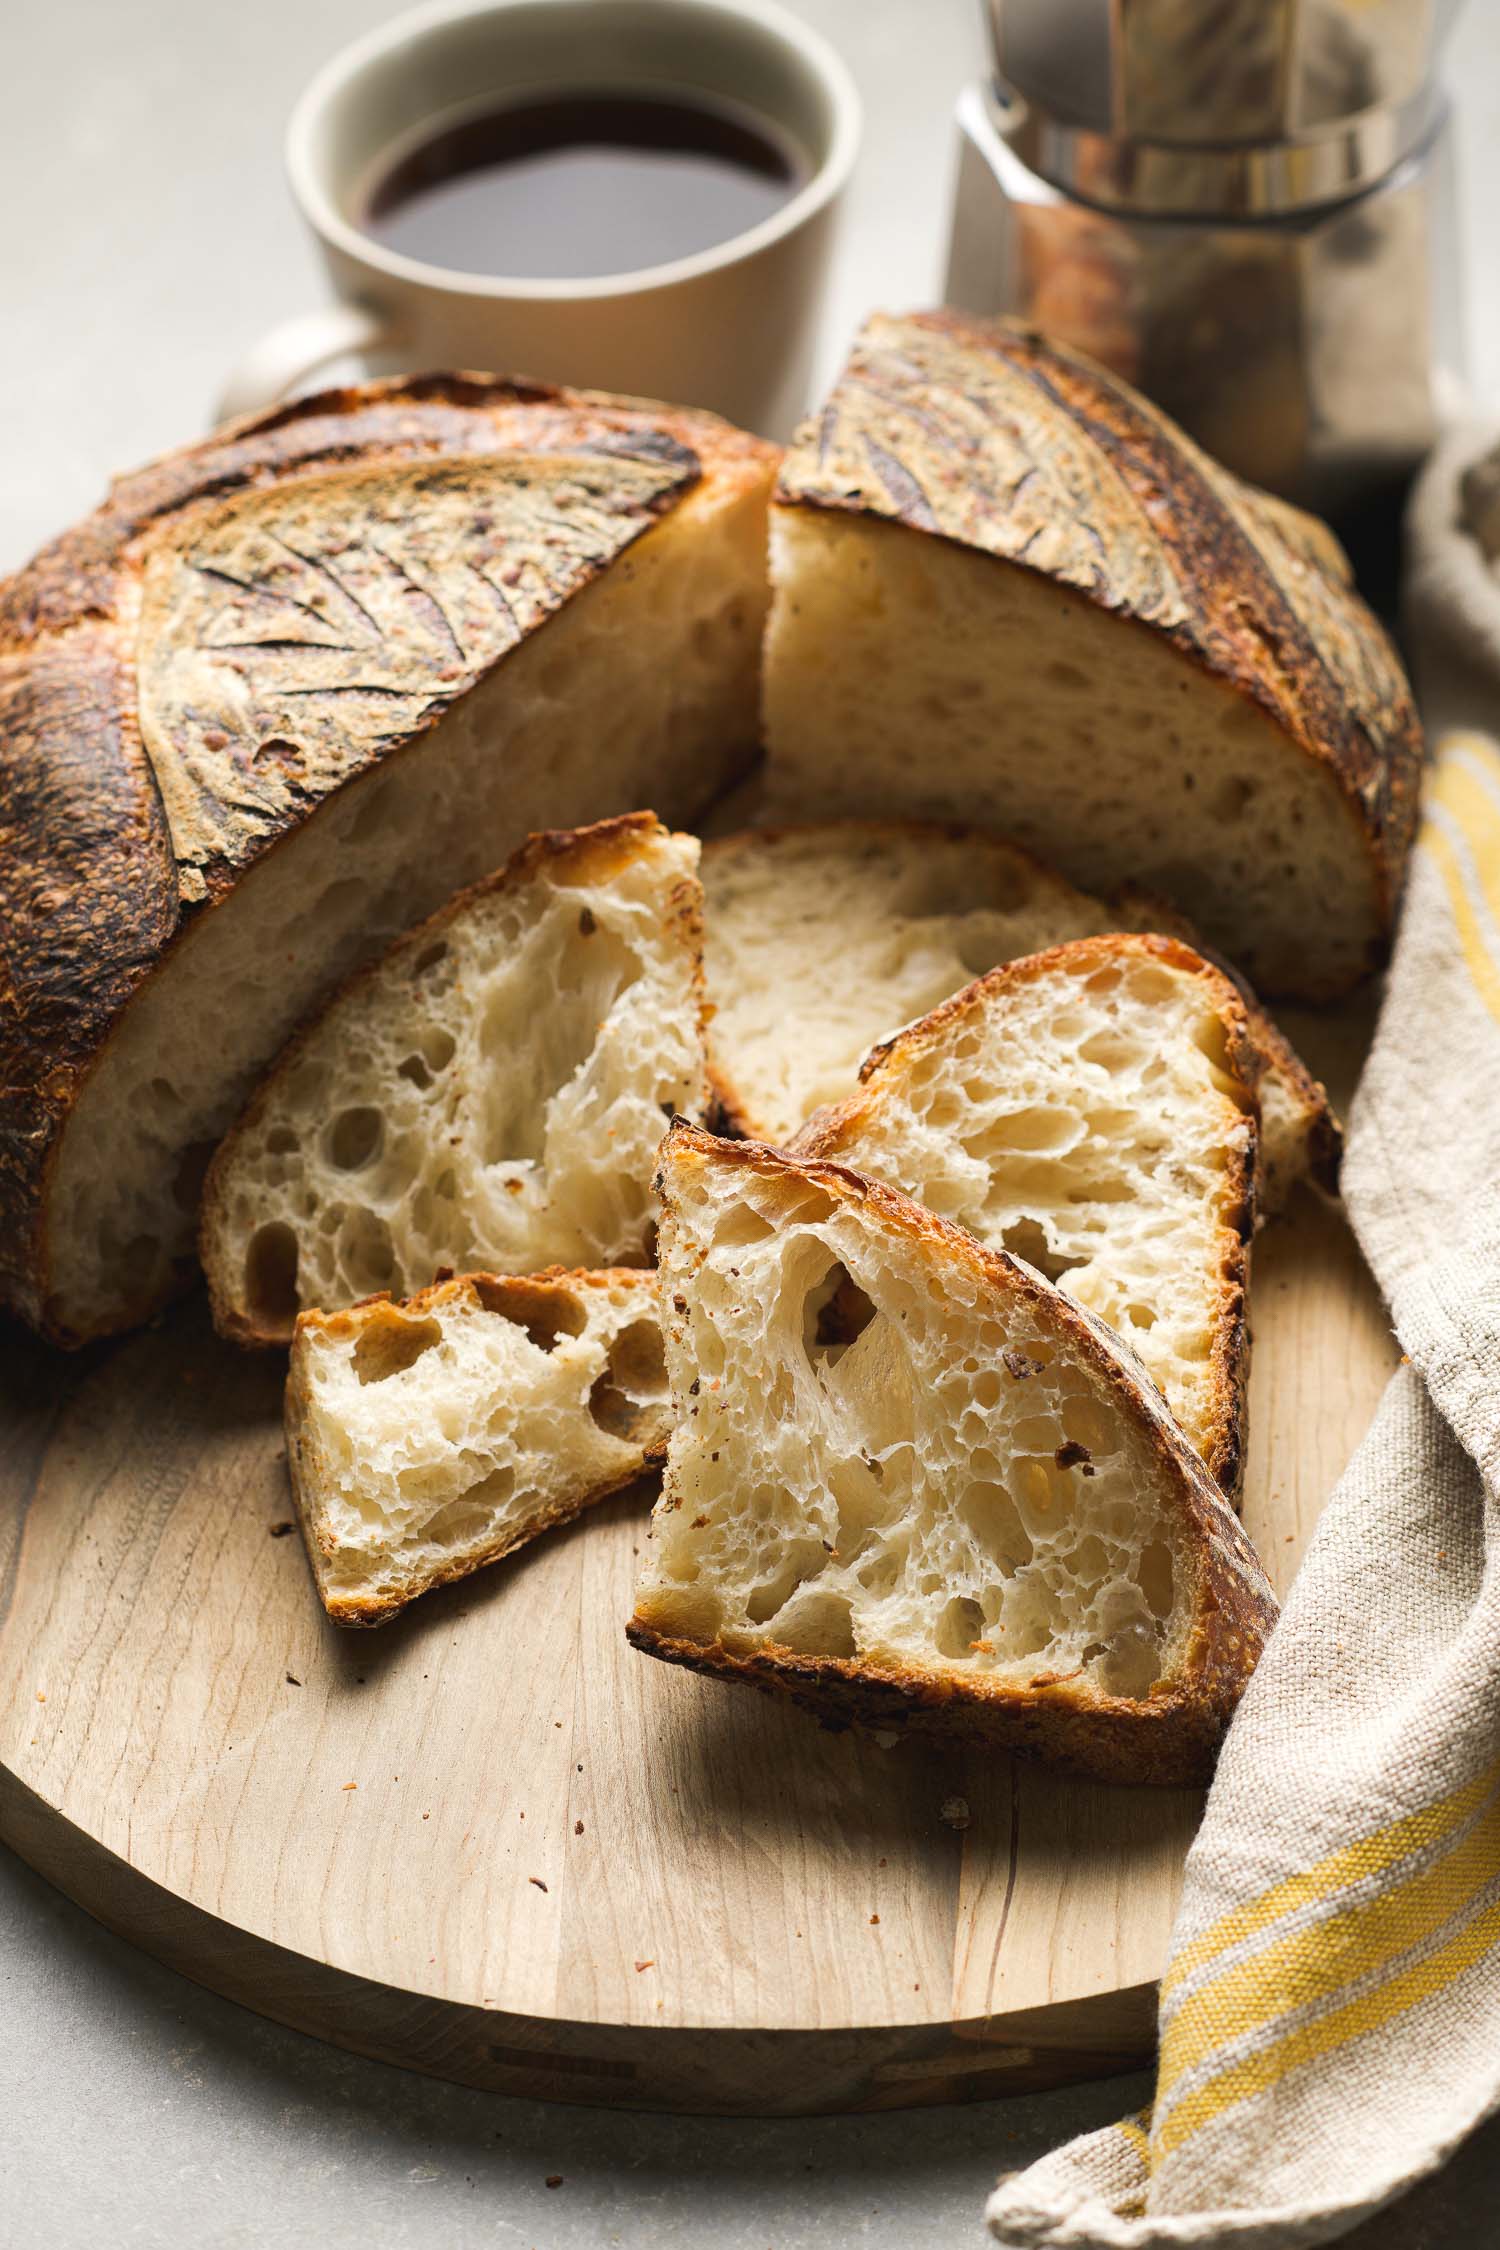
Sourdough Bread: My Master Recipe
This sourdough recipe is a hybrid of my old go-to and new methods I’ve learned recently. It’s given me wonderful and consistent results for a beautifully open crumb.
Stick to one recipe and and use it until you understand it and know it well.
This was one of the first lessons I learned when I started baking sourdough bread. It made a lot of sense since there seem to be as many recipes/techniques as there are bakers–no single recipe is the right one–or the best one. Couple this with the variables that can affect the outcome of each bake–time, temperature, type of flour, strength of the starter, the experience of the baker–it would be nearly impossible to troubleshoot the problem.
The recipe I decided to stick with years ago was Ken Forkish’s Overnight Country Brown. I used it faithfully and got to know it well–well enough that after initially getting less-than-stellar results from following the solid recipe exactly I realized that the mistake I was making was just that–following it exactly.
Many loaves later and after countless hours of reading various sourdough books and online resources it finally made sense that because of the aforementioned variables, the time prescribed in any sourdough recipe should only be considered a guide, not a rule. My bakes improved accordingly.
As I’ve grown to understand how the recipe will respond based on the set of variables thrown at it and with more experience and confidence, the recipe has evolved. For my bakes I now usually use less starter (levain, leaven) and follow a much shorter bulk fermentation time. These days I’m a lot more flexible with the autolyse period and all my loaves are retarded in the fridge overnight while final proof has been cut much shorter.
These changes have been documented here over the years (links below) and the two months of sheltering in place have inspired more reading (also Youtube watching) and have prompted self-imposed challenges which have led to me picking up new techniques along the way. The results have been wonderful and consistent so I’ve shamelessly (but hopefully not pretentiously) decided to call this hybrid of old and new (to me) methods my master recipe.
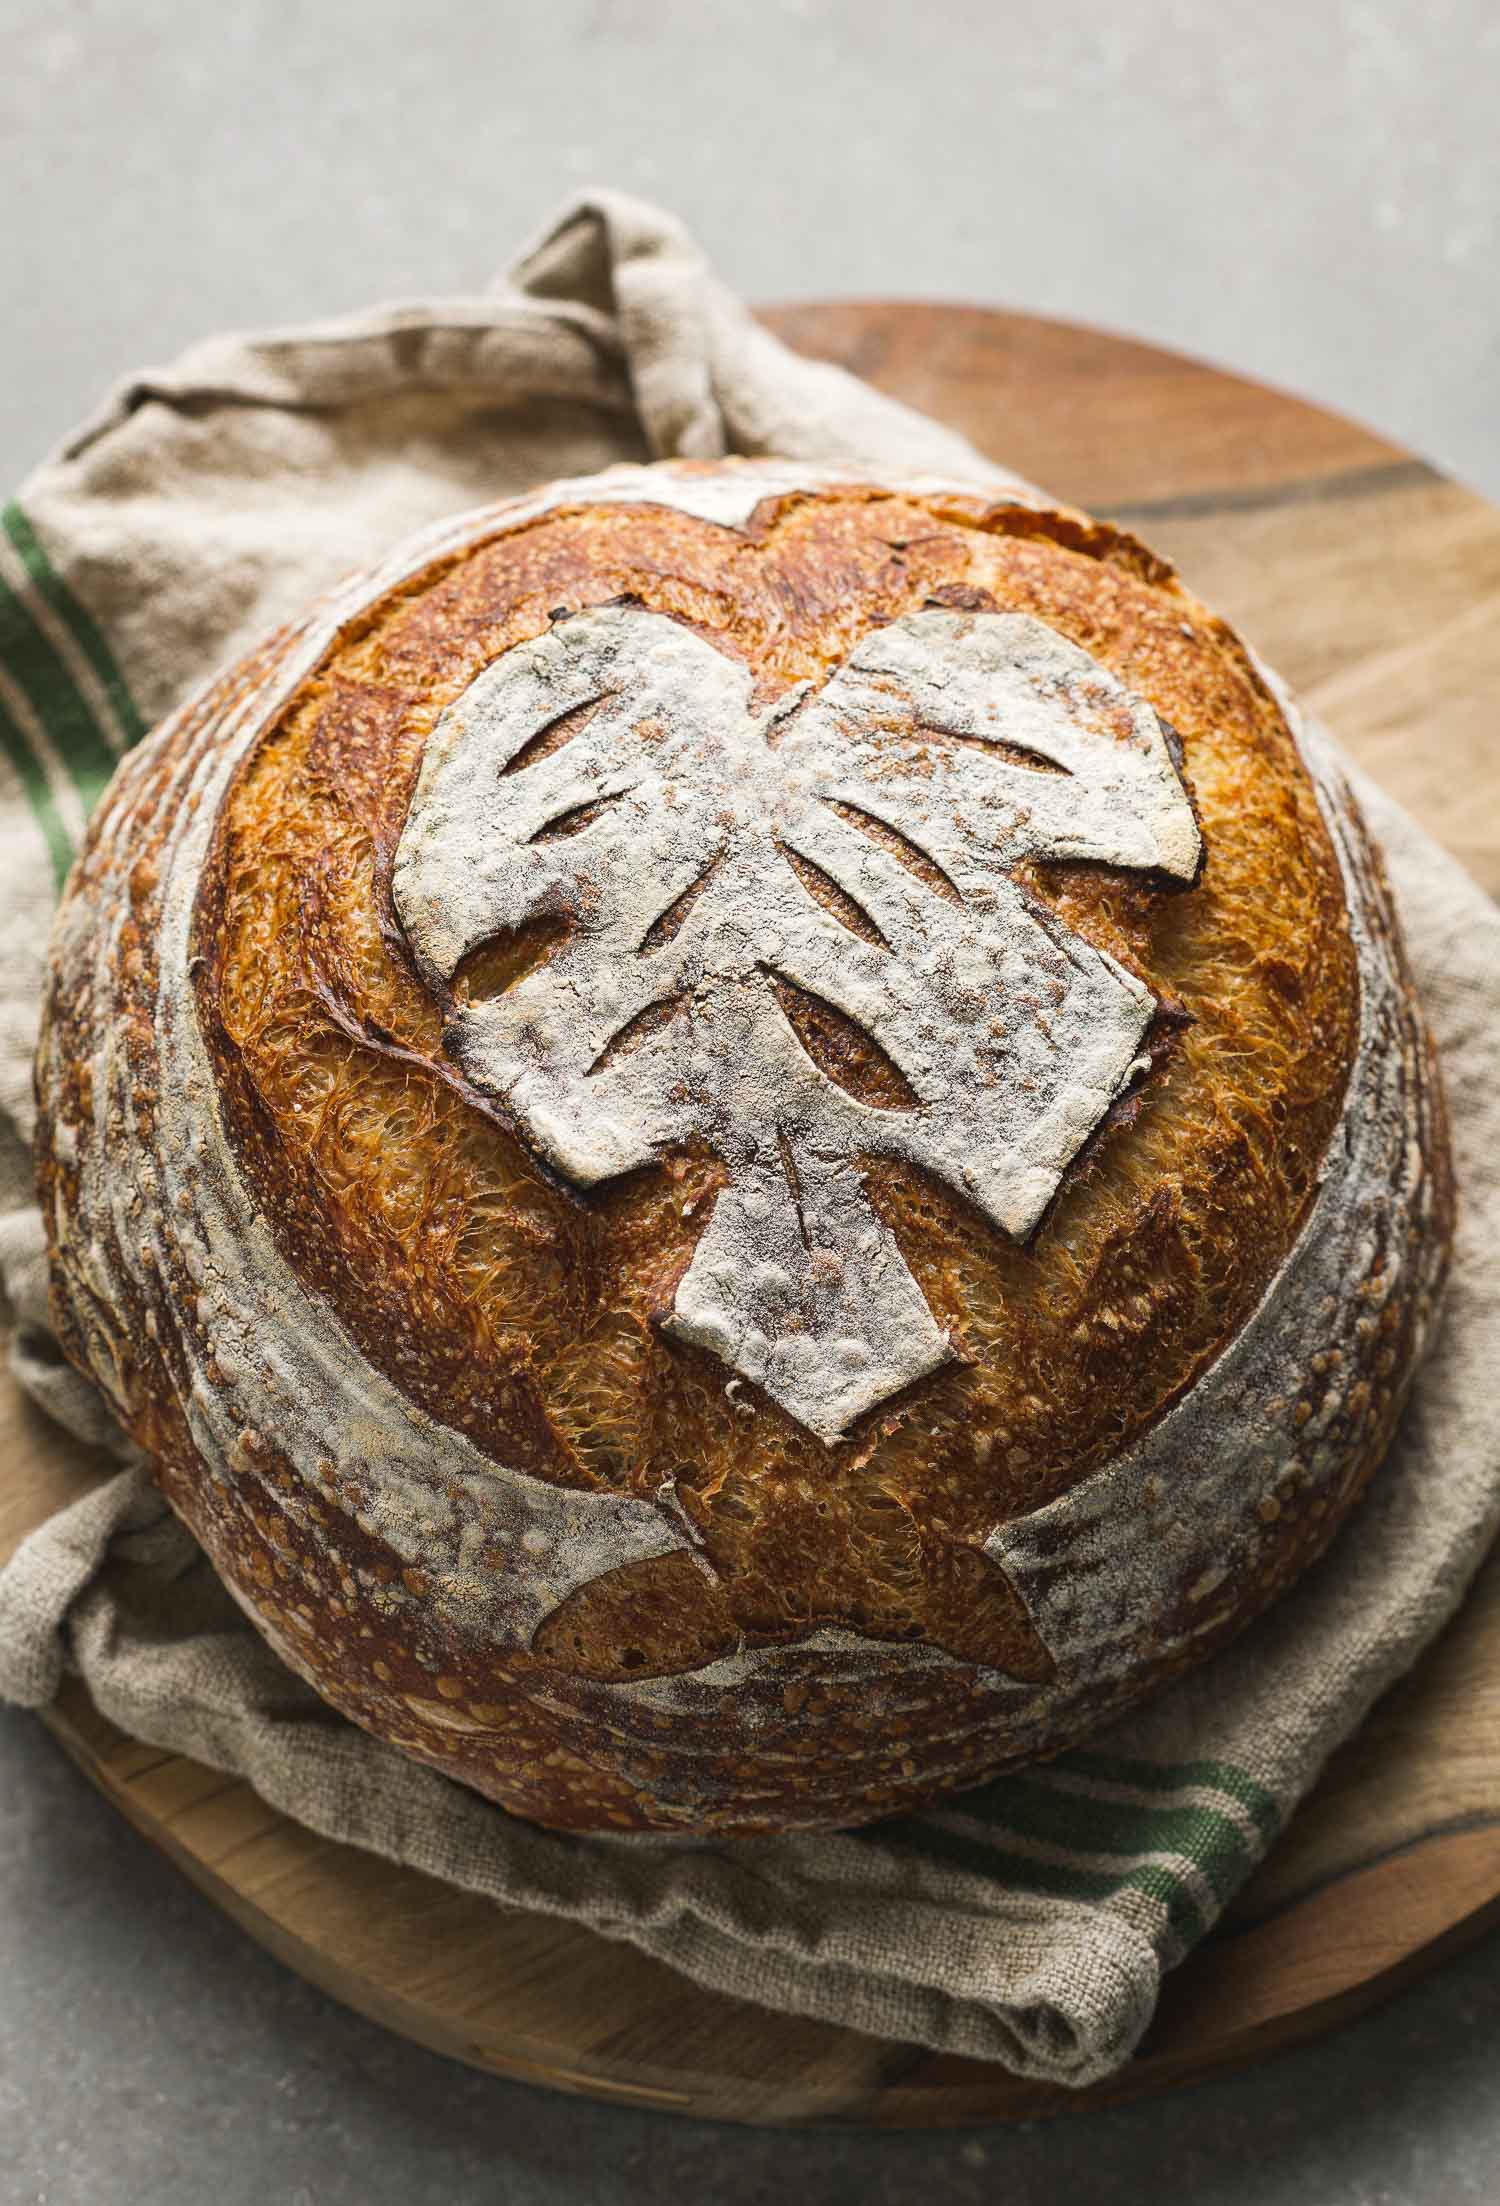
This recipe has been hitting high marks in the categories that sourdough bakers deem important: optimum fermentation, great oven spring, caramelized crust, open airy crumb, taste.
I highly recommend reading Trevor J. Wilson’s ebook, Open Crumb Mastery, for deeper insight about fermentation. The lamination and coil fold techniques have been made popular by Kristen Dennis in her excellent tutorial on youtube for her Basic Open Crumb Sourdough Bread. After following her recipe twice and achieving great results I decided to incorporate lamination and coil folds into the process I’ve been using for years. Fermentation time is key; again, it’s about watching the dough not the clock that will produce good results. Even for the recipe below you may need more or less folds than I used to achieve the structure the dough needs (but I try to provide as much guidance as possible in the hopes you will get the same results).
But I share this recipe not to tout that it will produce your best sourdough bread (most recipes out there have the potential to be the best). I hope it does but the most I can do is humbly admit that it’s been giving me the best loaves I’ve made so far and this will be my base recipe until more experience and knowledge prompt further change.
I’m sharing this recipe here for me so this formula doesn’t get lost in the mountain of notes I’ve collected of my bakes.
And also because I’ve got a dear friend who shares my love of naturally-leavened bread who will text or email to tell me about her most recent sourdough experience or to pass along a sourdough-related resource that she thinks I might enjoy. She is genuinely interested in hearing about what made today’s bake different than the day before (she’s fabulous all around, really). She is the one who, during one of her recent visits to New York City, when she was gifted a grande dame of a sourdough starter by a restaurant chef, thought to share it with me so she carried a portion of Regina with her on a plane and presented it to me when we got together in Park City this past winter.
She is also the one who will say, “Jean, why don’t you give this sourdough recipe a try and let me know how it goes.” I always happily oblige. She’s my sourdough buddy and I promised to post this recipe. So here it is, Georganne, to replace my cryptic handwritten notes. I used my Georgina in this recipe; until we are in the same city, under the same roof and we can play in the kitchen once again.
Notes About this Recipe:
- Sourdough Terms/Techniques: This recipe assumes you are familiar with certain sourdough terminology and techniques. If you are just beginning your sourdough journey I suggest visiting the links below to read my sourdough baking guide and other recipes with helpful information.
- Bulk Fermentation: The success of this recipe or any other sourdough recipe depends a lot on time and temperature. A warmer kitchen will accelerate fermentation and a cooler one will extend it. The times indicated in this recipe are based on my room temperature ranging between 74-80ºF.
- Cold Retard: Bulk fermentation at room temperature is followed by an overnight cold retard (storing in the refrigerator), which on average for me is 16 hours. This time is flexible so you can shorten this stage or extend it based on your schedule.
Recommended Reads in this Blog
- How to Make a Sourdough Starter
- My Sourdough Baking Guide
- Sourdough Bread Recipe Made with Unfed Starter (with useful notes)
- Orange-Raisin Sourdough Bread (with useful notes)
- Sourdough Bread, Ken Forkish Method

Sourdough Bread: My Master Recipe
This sourdough recipe is a hybrid of my old go-to and new methods I've learned recently. It's given me wonderful and consistent results for a beautifully open crumb.
Ingredients
- 440 grams bread flour
- 342 grams water (~95ºF)
- 90 grams active sourdough starter (fed the night before)
- 7 grams kosher salt (or sea salt)
Instructions
-
Day 1, morning: Mix the Dough. Mix the bread flour and water in a bowl, cover with plastic wrap and let sit for one hour. (Room temperature: ~74ºF)
-
Add the Starter. After one hour, add the sourdough starter and using a wet hand, mix into the dough by folding/kneading in or using the Rubaud method.
-
Add the salt/Stretch and Fold 1, 2, 3. After 30 minutes sprinkle the salt over the top of the dough and using a wet hand, dimple the salt in and knead it to incorporate into the dough. You can also use the Rubaud method here. In this step I also performed the first stretch and fold. Cover and let sit for 30 minutes. Perform two more stretch and fold sessions every thirty minutes. (Room temperature: ~75ºF)
-
Lamination. After the three stretch and fold sessions carefully turn the dough out on your work surface that's been lightly misted with water. Transfer the dough so that what was the top while it was in the bowl is now the bottom. Using wet hands, carefully pull the dough from the center, extending it to stretch it out without tearing the gluten strands. Repeat until you have a large rectangle. Pop the large bubbles with your fingers. Take two ends and fold over the dough 2/3 of the way. Take the other end and fold over (you will fold in thirds). Fold the dough in thirds again and transfer to a glass casserole dish (square if you have it) seam side down. Cover with plastic wrap and let sit for 30 minutes. (Room Temperature: ~77ºF)
-
Coil Folds. Using wet hands, take the middle portion on each side of the dough and carefully lift until the top pulls apart from the casserole dish. Tuck it under, rotate the dish and pull and tuck the other end. Rotate the dish to repeat this set. Perform three to four coil folds every thirty minutes depending on the behavior of your dough. The goal is to observe that the dough is gaining more structure and not spreading out as much after each coil fold session. For my loaves I normally will perform four coil folds. Another indication that coil folds are complete is if you see that your dough is plump with rounded edges. (Room temperature: ~79ºF)
-
Bulk Fermentation. After the coil folds continue with bulk fermentation until the dough has increased in size by roughly 30-50%. The top will be glossy with bubbles on the surface; it will be domed and jiggly. For my loaves at the temperatures indicated the total bulk fermentation time is 6 to 6 1/2 hours from first adding the starter to shaping. (Room temperature: ~80ºF)
-
Shape and Cold Retard. Dust your banneton (round or oval)with rice flour. Turn the dough out on a lightly floured surface (all purpose or bread flour). The top of the dough now becomes the bottom. Gently pull the dough to flatten it a little, fold in thirds and roll into a ball. Transfer the dough to the banneton seam side up, pinching the seams together. Cover with a plastic bag and refrigerate overnight.
-
Day 2, morning: Bake. Put your dutch oven with the lid on in your cold oven and preheat to 475ºF. When your oven has reached temperature take your dough out of the refrigerator and flip it over on the counter lined with parchment paper. I like to use a small cutting board for this step (parchment paper between the banneton and the board) to make it easier to flip the dough out. Brush the excess flour from the top of the dough and score. Put on your oven mitts and take your dutch oven out of the oven. Remove the lid and gently lay the dough in the pot using the parchment paper. Cover, return to oven and bake for 30 minutes. Remove the lid and bake for another 20 minutes. Cool on a wire rack for at least three hours before slicing.


Excellent blog, very helpful. I’ve been baking sourdough bread for 9 years, and probably followed similar path as you. No-Knead, then Tartine, and now for seven years, Ken Forkish. Your post is helping me now to move to a next level of goodness, I hope. I especially appreciate the links you provide, and I just bought Trevor’s book and watched Kristen’s YouTube with delight.
One question: do you have any tips for energizing my starter? It’s been going for 8 or 9 years, but it seems that it could be more vigorous, with more bubbles. Sometimes I feed it twice a day to hype it up a little. Any other techniques? I use 50/50 KAF bread flour and whole wheat. I used to use rye flour, but moved away from that for some reason.
Thanks.
Hi, Abbott. It’s so nice to hear this post was helpful and you’re right–it seems we have followed the same sourdough path. Buried deep in the blog archives are my first attempts at no-knead bread, then Tartine before FWSY. Trevor’s book was insightful and Kristen’s video very helpful.
As for the your starter, I wish I had something to add to what you’re already doing. I have favored rye flour for my starter from the beginning because it has always seemed to work well for me. If you’re still not wanting to return to rye maybe using all whole wheat flour instead of your current 50/50 mix? And maybe store the jar in a warmer environment to see if it makes a difference? These are the only things I can think of to try.
Hope this helps!
It does not look like a bread at all! It looks like a master piece!
Utensils for Cool Kitchen
Hello!
My mother starter is ready and I’ve been feeding it at 8pm everyday. When you state the levain as ‘fed the night before’, do I create a levain at 8pm the night before I intend to start making the sourdough (day 1)?
Also, what ratio of starter:flour:water do you recommend I use for the levain?
Love how your recipe is so detailed! 🙂
Hi, Kristine. Yes, your schedule would work. To ensure that your starter is just near or at peak by the time you use it the next day you would use a lower ratio of starter to flour and water. Depending on overnight temps in your kitchen, you can try 1:2:2 or 1:3:3, starter/flour/water. Hope this makes sense. Happy to answer more questions and glad you like the recipe details. 🙂
Excellent! I have officially adopted this recipe and will make it again. Made it today and it was absolutely delicious. I didn’t have time to let the dough rest in the refrigerator over night (as I usually do), therefore I was a bit apprehensive. The bread has a lovely crust, yet is soft inside. It smells great and has big, wonderful holes quintessential sourdough bread.
Hi, Tal. So glad this method worked for you and I appreciate you taking the time to give me feedback. Thank you so much!!
The only problem I see with the Master Recipe is that the autolyse is listed as one hour … and you expect that the levain will be ready at the end of that hour. But it’s the levain that is much more time-sensitive, meaning that it should be added to the autolyse at the precise time that it is most active. But your recipe goes in the opposite direction. I frankly do not understand why you would do that. So the only way of following your recipe would be to do an overnight levain of 1:10:10 (which guarantees a very slow build) or perhaps starting the levain in the morning with a 1:2:2 … and doing a longer autolyse (to be used when the levain is at its peak). Also, I’ll be baking it 50:50 whole wheat, so I will also be increasing the hydration by 2 points. And I’ll letcha know how it turns out.
Hi, Jules. Hopefully, I’m understanding your comment correctly. For this recipe, I feed my starter the night before or the morning of preparing the dough so it is at peak by the end of the autolyse period. I see you are suggesting an overnight levain and that is exactly what I note in the recipe (the starter is fed the night before). 50:50 whole wheat will make for a delicious loaf. Our current favorite is incorporating whole wheat and a little buckwheat–the flavor is wonderful! Please let me know how your bake goes.
What size Dutch oven do you use for your regular loaf of sourdough bread? Thank you!
Hi, Teri. I think the smallest dutch oven I use for baking my loaves is 5 1/2 quarts. It’s in another location or I would give you an exact measurement.
Hello! I followed your recipe and I must say, this produced by far my favorite sourdough loaf to date. The only part I got tripped up on was the levain, which one other reviewer mentioned. My levain peaks at around the 4or 5 hour mark, so an overnight levain doesn’t work for my baking schedule. I fed my starter at 10:30am and it was ready to go at 3pm, so I mixed my dough at 2pm, then added my levain (50/50 rye and whole wheat) at 3pm. My loaf was in the fridge by 9pm, and ready to bake the next morning. It was perfection! The crust had the perfect amount of chew, and the crumb was structured without being too dense. I will be making this again, and again. Many thanks for this great recipe!
Hi, Jennifer. So glad this method works for you. Sounds like you’ve got the right read on your levain and your dough, that’s great! Thanks so much for taking the time to give me feedback. 🙂
Have come to this page countless times and decided it was time to finally comment. This has been my go to sourdough process/recipe for the last several years. It has grown and adapted with me as I’ve become more experienced. Thank you for providing me with beautiful loaves over the years!
Hi, Julie. This made me so happy. Thank you so much for giving my method a chance and I’m so glad it has worked for you and you have made it your own. Thank you for this very nice feedback. Much appreciated.