Last year at around this time a family friend generously gifted to me a sourdough starter with a California Gold Rush pedigree. He had maintained his starter for decades and, understanding what a treasure it was to have my own to take care of, I was thrilled by his gift. Unfortunately, for a few months last year, I didn’t feel well and cooking, much less baking, was very low on my priority list. The starter sat in the refrigerator untouched, dying a slow death under my care (or lack of it). I’ve admitted to this friend that I was a poor steward of his gift and he was quick to offer to give me another. When the baking bug returned, I was too bashful to hold out my hand for a second sourdough starter handout. What if I killed the thing again?

So I attempted to create my own sourdough starter. I’ve made one before, aided by commercial yeast. I wasn’t diligent enough to maintain the starter, so it, too, died. This time I wanted a purer version. All you need are flour and water for the yeasty magic to happen. But proportions of the two vary by source. The type of flour, the temperature of water, the frequency of feedings, the container to use, where to store the starter–these are all factors to consider. The easiest approach is to buy one or get one for free by mail but the instructions in my German bread book seemed straightforward enough and the promise of being able to use the starter on the fifth day appealed to me.
But despite five days of achieving textbook results, overconfidence had me deviating from the feeding instructions (a starter stays alive with regular feedings of flour and water). I think I used water that was too warm and I switched flours, shocking the immature starter. On the sixth or seventh morning there was nary a bubble to be found. We were set to leave for vacation so I had no time to attempt to revive it. I killed my starter before it had a chance to reach its full potential.
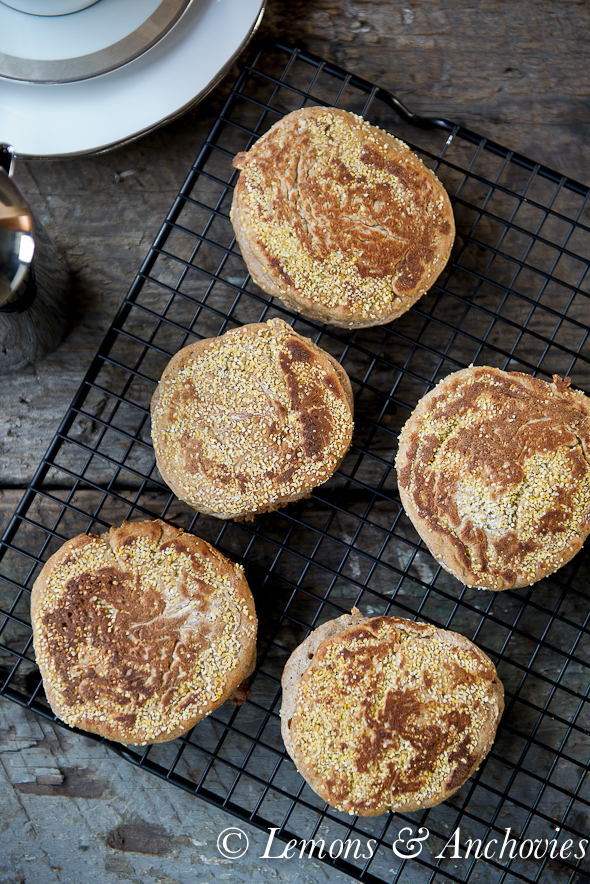
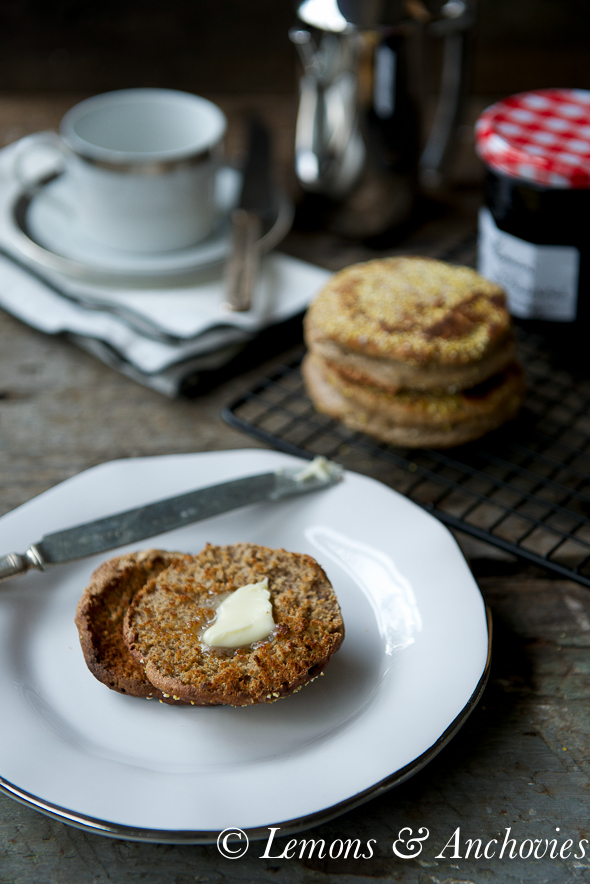
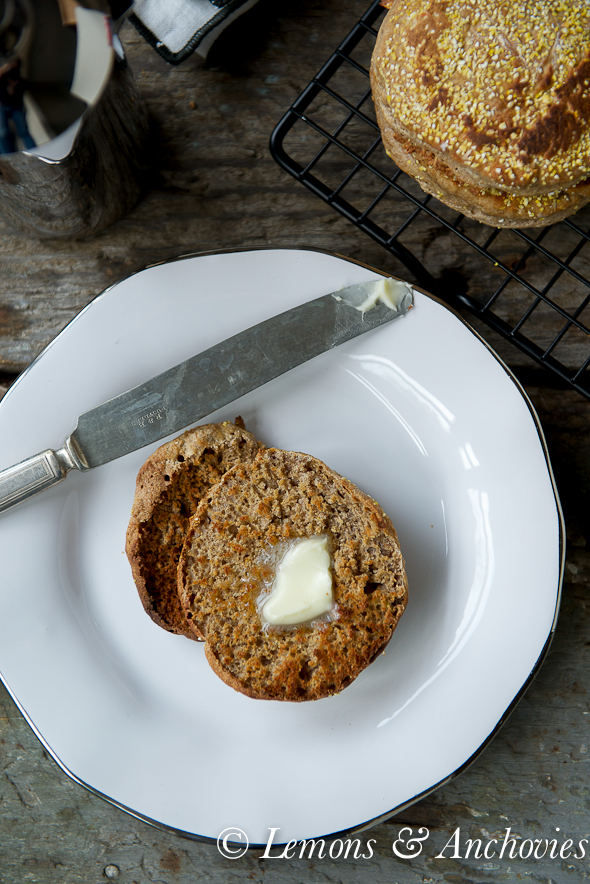
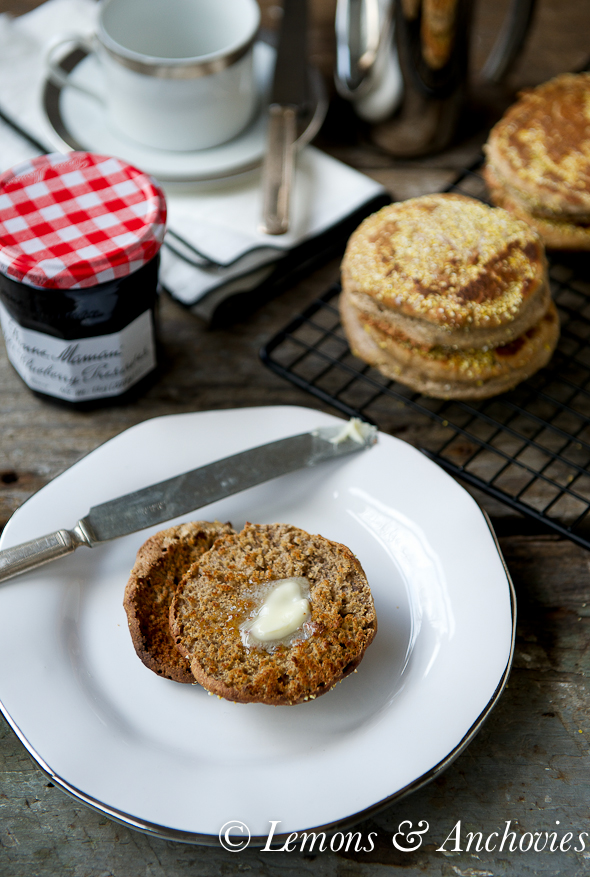
The upside is that I managed to bake these sourdough English muffins before my starter died. Since the sourdough flavor had not fully developed, these muffins had only a hint of sour flavor but I consider them an accomplishment just the same. Really, I made my own English muffins and they were a breeze! I even used a whole grain recipe (to feed my spelt flour obsession), giving these muffins a hearty, satisfying texture.
Rather than being disappointed by my first attempt at a sourdough starter, the tasty, toasted English muffins slathered with butter renewed my resolve. I’ve got another starter going this week and if all goes well this time around, I’ll be sharing more sourdough recipes with you down the road.
(If you’ve got access to a sourdough starter, this recipe from Kitchen Simplicity is a winner. If not, there are several instructions for starting a sourdough starter on the web.)

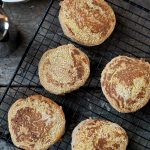
Sourdough Spelt English Muffins
Ingredients
- 1/2 cup sourdough starter
- 1 cup milk
- 2 cups spelt flour or whole wheat flour
- 1 tablespoon honey liquid form
- 3/4 teaspoon kosher salt
- 1 1/2 teaspoons baking soda
- cornmeal for dusting
Instructions
-
Stir together the starter and milk in a bowl large enough to accommodate all the ingredients. Add the flour and stir until smooth. Cover the bowl with plastic wrap and let it sit for 8 hours or overnight.
-
After 8 hours or the following morning, stir in the honey, salt and baking soda. You will find the mixture sticky and loose and this is okay. Transfer the mixture on a well-floured surface and knead it for a couple of minutes. Sprinkle more flour as necessary to keep the dough from being too sticky to work with but don't add too much as you want it to stay loose. I added an additional 1/4 - 1/3 cup while I kneaded the mixture. (Note: A dough scraper helped, too.)
-
Dust the surface and the dough with more flour as you flatten the dough with your fingers to roughly 3/4 inch thick.
-
Sprinkle corn meal on a baking sheet. Dust your cutter (mine was about 2 to 2 1/2 inches) before cutting the dough into rounds. This will prevent some sticking. I found that using a thin, flat spatula to scoop the rounds from underneath the cutter then transferring them to the baking sheet made it easier to work with the sticky dough. Using the dough scraps and re-shaping them for more rounds yielded 9 muffins for me. (I may have pressed my dough a little thinner than 3/4 inch.) Dust the tops with a little more cornmeal, cover the rounds with plastic wrap and let rise for 45 minutes.
-
When you're ready to cook them, preheat your oven to 325℉. Heat a cast iron skillet (or nonstick skillet) over medium heat. Transfer the rounds to the heated skillet and cook until golden brown on both sides, 2-4 minutes per side. If the muffins brown too quickly, adjust the heat. Return the browned muffins to the baking sheet as you finish cooking them then bake the muffins until they are cooked through, about 15 minutes. Let the muffins cool completely on a wire rack before splitting and toasting them.
Recipe Notes
Original recipe from Kitchen Simplicity with adjustments for using spelt flour.
Prep time includes overnight wait.


Experimenting with sourdough starter is something I have long wished to try, I admire you for trying from scratch! If you ever are fortunate to get some of that Gold Rush starter again, I will eagerly follow your adventures!
These look awesome!
So not a morning person, but if you bring me a tray of these, I’d gladly wake up! Haven’t really tried baking with spelt alone (always in combination with other flours) but these look like a winner, I agree! Yum…served with butter and some jam.
Okay – I am going to deem you the Spelt Queen! 🙂 These look and sound divine! I have always wanted to make English Muffins from scratch. Great to catch up last weekend! Hubby loved your cookies and ate all of them except one that i had!
As I child the minute I heard sourdough I refused to have anything to do with it. As an adult it is one of my favorite flavors of bread! I have received a few starters and like you they tend to die a slow painful death. I need to try your recipe! once I get another batch. Wish me luck!
I attempted a sourdough starter once. I killed it about 5 days in and was left feeling like a bad parent. I may attempt it once more since I’m slighly more mature. Anyway, love these muffins. They are gorgeous. So glad you got make them.
I love making things like English Muffins and bagels homemade, AND telling people they’re homemade. It makes my day when they realize homemade is SO much better!
Hi Jean! It’s been so long since I last stopped by and how I’ve missed your blog.
Your English muffins look perfect! I think I got very lucky because the only time that I attempted a sourdough I didn’t kill it — I was shocked. Hehe:) Anyways, it really looks like you know what you’re doing. So glad you persevered.
I’ve wanted to make English muffins for far too long, these may be just what I need to motivate me! What a perfect weekend baking project!
I made a batch of English Muffins yesterday and had extra biga – was looking for what to do with it when I came across your Italian Rosemary Loaf. I have just popped in the proofing oven and thought I would look at your other recipes. Excited for our bread tonight – I used fresh rosemary from the yard and we are going to have with a Capresse Salad with our first tomatoes.
Terry, I hope the rosemary loaf turned out well. There’s nothing like homegrown herbs, is there? Thanks so much for dropping by and having a look at my recipes–it’s always great to hear. 🙂
Made these twice now. Once with spelt flour. Once with 1/4 rye and 3/4 spelt. (I have two starters, btw, one each of rye and spelt. Each fed with sprout grain flour.). Both were great. Not the big “bubbles” you get in a white flour English muffin, but I really enjoyed the flavors of the spelt and rye. (Added some caraway seeds to the latter.)
Making my third batch later this week.
(A quick p.s., I started both starters from scratch about a month ago. Had some doubts on about day 4 or 5. But persevered. Now store in the refrigerator and feed weekly. Really enjoying the process.)
Chris, thanks for giving this recipe a chance and I’m glad you persevered with your starter. Hope you’ve been enjoying lots of sourdough baking!
Wow, these really turned out awesome.
Made them vegan by using soy milk and maple syrup.
Ended up with 12 and they puffed out nicely in the pan and a bit more in the oven.
Super easy to split open and oh so tasty.
Thank you for sharing.
So glad this recipe worked out for you and I appreciate the feedback, thank you!!
I am new to baking with sourdough starter and I am lost on one of the steps. When you say “cover and let sit overnight” does that mean on the counter or in the fridge? With a cup of milk added, I wasn’t sure! Thank you
Hi, Ashley. It’s a great question. For this recipe, because overnight temps in winter are so much cooler I have left the dough on the counter overnight even with milk. In warmer months the dough would bulk ferment much faster so you can refrigerate (cold retard) the dough after bulk fermentation then proceed with the recipe the next day. Hope this helps. 🙂