If you follow me on Instagram chances are you’ve seen the heavy bread-making posts lately. Much of the extra time I’ve had on my days off has been dedicated to preparing starter dough (you really only need to do this once), kneading…and waiting. Lots of waiting for a first, second and even a third rise. My husband doesn’t quite understand all the trouble I’ve been going through to prepare one loaf of bread when he thinks buying one would be so much easier (never mind that he is very particular about and is loyal to one brand for his thrice weekly French baguette supply). When that all-day loaf finally does come out of the oven though, he’s always the first in line.
Yes, baking your own bread is rather involved. Even with the no-knead method there’s required wait time before you can enjoy that first bite with butter and jam or a slice of cheese. In this version, the biga (starter dough) must ferment 24 hours in the refrigerator before it can be used. After this preliminary step, the kneaded dough must rise a few times (totaling about 3 hours) before baking the loaf for about 40 minutes. So, yes, if time is a premium, running to the store is the way to go.
But then I’d miss out on the fun of trying to remove the sticky dough from my fingers, I’d miss the therapeutic benefits from the kneading process and I wouldn’t be rewarded with seeing the flour, yeast and water come together into a smooth, cohesive ball. And how about the magic that happens under the dish towel during the 1 1/2 hour wait? There’s nothing quite like seeing the transformation of a handful of simple ingredients into a beautiful, tasty golden brown loaf.
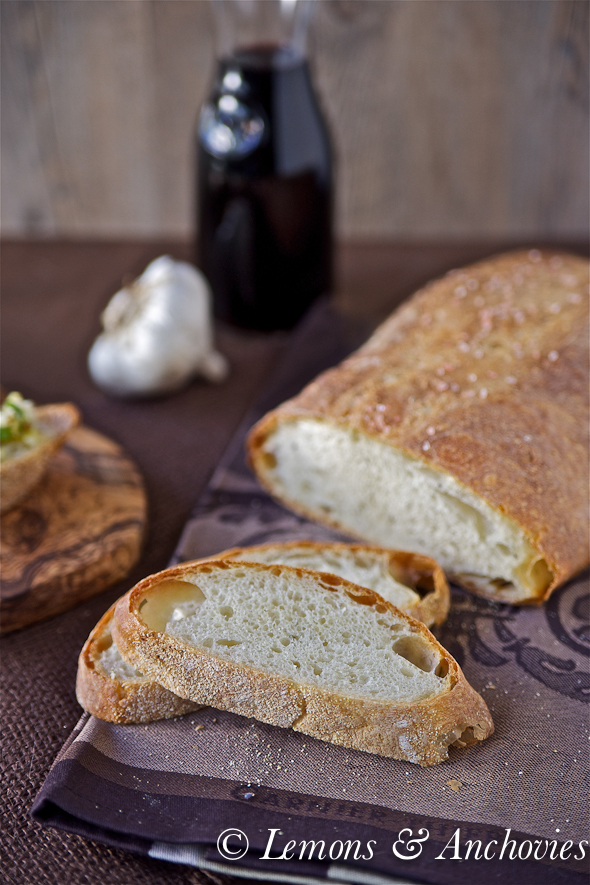
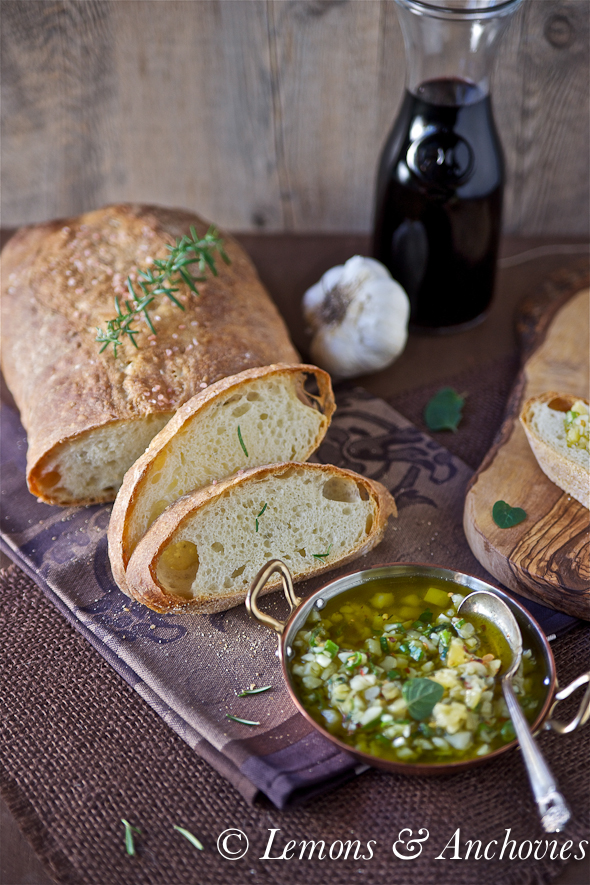
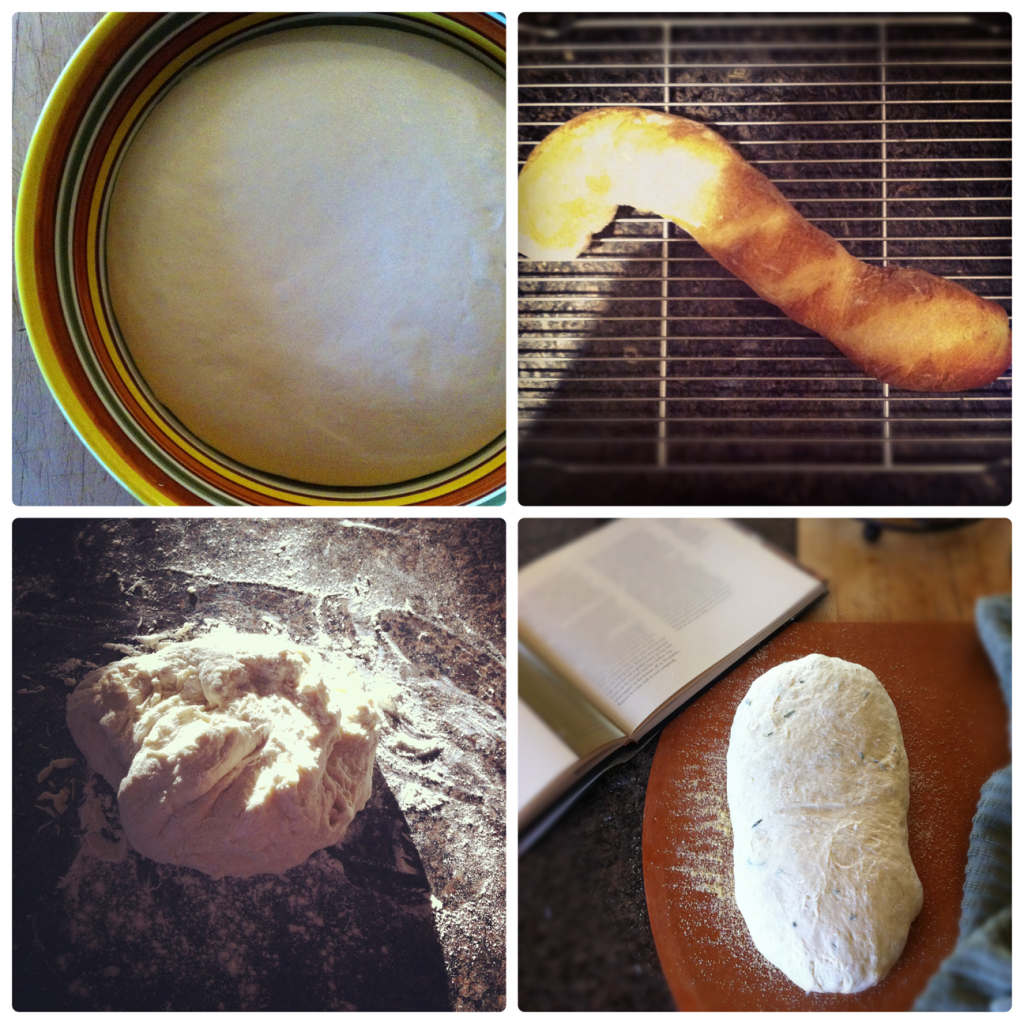
I’ve been working with homemade bread for a few years now and each experience always makes the Suzy Homemaker in me smile. When the loaf crackles as it cools on the wire rack, I know I’ve done something right. This loaf I baked recently is Il Fornaio’s recipe for Panmarino (rosemary bread, one of my favorites at the restaurant). Fragrant from the fresh rosemary with a crisp crust that is just slightly salty from the coarse sea salt sprinkled on it before baking, it’s hard not to be tempted to make a meal out of the entire loaf with a simple dip like this Salsa di Parmigiano and a glass of wine. I’ve been experimenting with several of the restaurant’s bread recipes (see my experience with Italian baguette in the last image below); it’s a good thing the recipe for starter dough is good for quite a lot of bread. One batch of biga will make several loaves. It will keep in the refrigerator for a couple of weeks but after that the starter can be frozen in smaller portions for later use. I’ve frozen a few bags of 1/4-cup portions of starter dough so I’m set for next time. What will be the next experiment? Panettone? Pane alle Patate? Pane alle Noci? I have a feeling that no matter what recipe I try next I’ll be smiling once I hear the crackling of the bread as it comes out of the oven.
* I created two separate printable recipe pages here so the starter dough can be printed on its own.
Biga, a Starter Dough Recipe
Ingredients
- ***Recipe for Biga Starter Dough
- 3/4 teaspoon active dry yeast
- 1/2 cup warm water 105°F
- 3 1/2 cups unbleached bread flour I used all-purpose
- 1 1/4 cups cool water
Instructions
-
Dissolve the yeast in warm water in a small bowl. Set aside for about 15 minutes, until creamy.
-
Measure the flour into a large bowl, create a well in the center and add the yeast mixture and cool water. Use a wooden spoon to stir all the ingredients together until the mixture is sticky and it's too difficult to stir with the spoon.
-
Cover tightly with plastic wrap and allow to ferment in the refrigerator for 24 hours.
-
You may store this starter dough in the refrigerator for up to two weeks. To use, scoop up the amount of starter you need and bring to room temperature.
Recipe Notes
From The Il Fornaio Baking Book
- ***Panmarino (Rosemary Bread) Recipe
- 3/4 teaspoon active dry yeast
- 1/2 cup warm water (105°F)
- 2 3/4 cups unbleached bread flour (I used all-purpose)
- 3/4 teaspoon salt
- 1/2 cup cool water
- 1/4 cup biga (starter dough), see recipe above
- Additional flour for work surface
- 2 teaspoons roughly-chopped fresh rosemary
- 2 tablespoons milk
- Olive oil for bowl
- Cornmeal for baker’s peel
- Coarse sea salt
- Dissolve the yeast in the warm water in a small bowl. Set aside for 15 minutes.
- Measure the flour into a large bowl; form a well in the center then add the yeast mixture, cool water, and starter dough. Stir together with a wooden spoon until too resistant to be stirred.
- Knead the dough briefly in the bowl then turn out on a lightly-floured work surface.
- Knead vigorously for 20 minutes, until smooth and elastic. Include some 1- to 2-minute rest periods along the way. (Whenever I found the dough a little too sticky, I dipped the heels of my hands in flour before proceeding.)
- Return the dough to the bowl and add the rosemary and milk. Gently knead them into the dough until they are completely incorporated. (Don’t worry if the dough falls apart because of too much liquid. This is what happened to me and I’m glad I didn’t give up on the recipe. It will work, promise!) Shape the dough into a ball as much as you can.
- Rub another large bowl with olive oil and place the dough inside it. Cover it with a dish towel and let rise at room temperature until it doubles in size, about 1 1/2 hours. After this time, punch the down the dough by folding the edges into the center. Cover and let rise a second time until doubled, about 45 minutes.
- Form the dough into a football-shaped loaf. Cover the loaf with a towel and let rise at room temperature for about 50 minutes. (For this rise, I set the dough on my pizza peel sprinkled with cornmeal). The dough is ready when it springs back gently when lightly pressed with your finger. While you wait, place a baking stone in your oven and preheat to 425°F.
- Mist the preheated oven with a spray bottle and quickly shut the oven door. Using a sharp serrated knife, make one slash about 1/2-inch deep along the length of the loaf. Sprinkle some coarse sea salt into the slash.
- Slide the loaf onto the baking stone and mist the oven again. Bake the loaf until it’s golden brown on top, dark brown on the bottom and sounds hollow when you tap it, about 40-50 minutes (it took a little less time in my oven). Cool completely before slicing.





You’re so right, baking bread is the ultimate therapy! I’ve had a few loaves in mind lately but haven’t had the time to devote to the process – now you’ve inspired me :).
How gorgeous! and I agree kneading bread is definitely therapeutic 🙂 And there is nothing like the smell of fresh baked bread!
What beautiful bread, Jean! There really is nothing like homemade bread!
Your bread looks delicious – look at all those gorgeous crusty air pockets! Italian bread must be one of my favourites, so so good.
I know what your husband means about the ease of buying from a shop but where’s the satisfaction in that? I do commend you for your dedication though. We use a breadmaker to create the dough and then take it from there so we can skip a few steps. But our bread looks nothing like as beautiful as yours.
A lovely bread! perfect for dipping in olive oil.
Cheers,
Rosa
I have been enjoying all your baking experience and you eating out experience in Instagram 🙂 The bread looks so perfect and I love those pockets it created.
ooh I want to make this! I miss baking bread – haven’t done it in so long! Anything with a pre-fermented started is the best!
I know about that big question that hovers around us when we prepare the bread at home. My husband is a biggie with home-baked bread and is always pushing me to make our own. But we recently found the ultimate bread supplier that even he, the home-baked bread lover he is, had to settle down with this bakery too. The best smell of a house is baking bread and nothing compares to the feeling after the bread comes out of the oven. Heaven!
I just love your bread, Jean. It’s so wonderful to make your own bread. I know it’s a huge job and takes lots of patience, but to me it’s all worth it when you take that first bite. 🙂
Oh my goodness, just looking at the photos and I can almost smell the amazing aroma that must fill your kitchen as this bakes. It looks wonderful and yes, it could most definitely be an entire meal with that yummy dip!
Your bread looks so delicious and rustic. It feels so great to make your own bread. I feel its worth all the time. Happy Holidays to you !
Oh wow, this looks amazing!!
Jean, that loaf looks amazing!! I love making my own bread, too, and the hubs just doesn’t get it. 😀
Hi Jean! Gorgeous bread and nothing like homemade bread- so worth the trouble and pleasure to make at home;-) I would love to try a piece with your Parmesan dip-that would be lovely;-)
What a stunning bread!!!! I can just imagine eating a slice with that divine dip and a great glass of CAB! Love the photo! (Glad you are getting use out of the “background board” 😉 )
I want to make bread. But there are 3 good breadmakers at the Hollywood farmers Market every Sunday and I always succumb to the convenience you mentioned. GREG
I saw your photos on Facebook and was excited to see your recipe. It turned out gorgeous Jean! Though baking isn’t my strong point, I find that making and baking a loaf of bread is so relaxing. Thanks for sharing & Merry Christmas! 🙂
You have totally inspired me to make more bread!! I’ve had sour dough starters over the years, and I’m going to start another after the holiday business slows down!
What a gorgeous loaf Jean! Would love to be dipping this into your parmesan dip 🙂
Your bread turned out lovely Jean. I adore good sour dough bread and where you live you can really get some awesome bread, I’m sure it’s inspiring. Your dip looks like it found it match made in heaven.
I found this recipe searching for “biga” recipes. Like you I worried about the looseness of the dough, but was pleasantly surprised with the results, albeit the loaf was far from “football” shaped. I used fresh yeast, but adjusted the quantity of yeast to the flour required.
In the second attempt, I was more liberal with the kneading flour; the result was a less pleasing loaf As I had fed the starter before the second loaf, I am going to try again returning to the light flour during kneading to see if that accounts for the different result.
When discussing this recipe with our niece, who is an avid bread baker, she referred me to this panmarino recipe, which will be my next experiment with preferments. http://sourdough.com/recipes/panmarino-italian-rosemary-bread. I found the proportions helpful, as it answered my question on how one might use all the starter from the “olive” panmarino in proportion to other ingredients; how to use the salt. I had mixed the salt in with the flour so that it would not affect the yeast, but I wasn´t sure whether you had actually used it when you chopped the rosemary.
Thank you for introducing me to this bread; it makes a great toastie!
Susan, thanks so much for sharing your experience with this recipe and also for the link to another rosemary bread recipe. I’ll have to try that next time, too.
As for the salt, I will have to consult the recipe again–I have forgotten where that salt was supposed to go! I will let you know after I check with the cookbook! 🙂