If you’ve been coming here for a while you might have noticed that I have a thing for homemade crackers. It hardly seems worth the trouble to make them when there are countless very good store-bought options. The best ones command a premium price and they’re a nice treat but at the speed my husband goes through crackers (it doesn’t matter how much I buy each week; if he sees it, he’ll eat it), there’s some motivation to make them at home. Besides, like baking my own bread, there’s something oddly satisfying about homemade crackers.
While at the grocery store the other day I picked up a Fine Cooking magazine showcasing soups and stews. I was pleasantly surprised to find a bonus while flipping through the pages by way of a couple of cracker recipes. Fine Cooking’s Seeded Crackers looked just like one of my favorite store-bought varieties so I set about making them as soon as I had a chance.
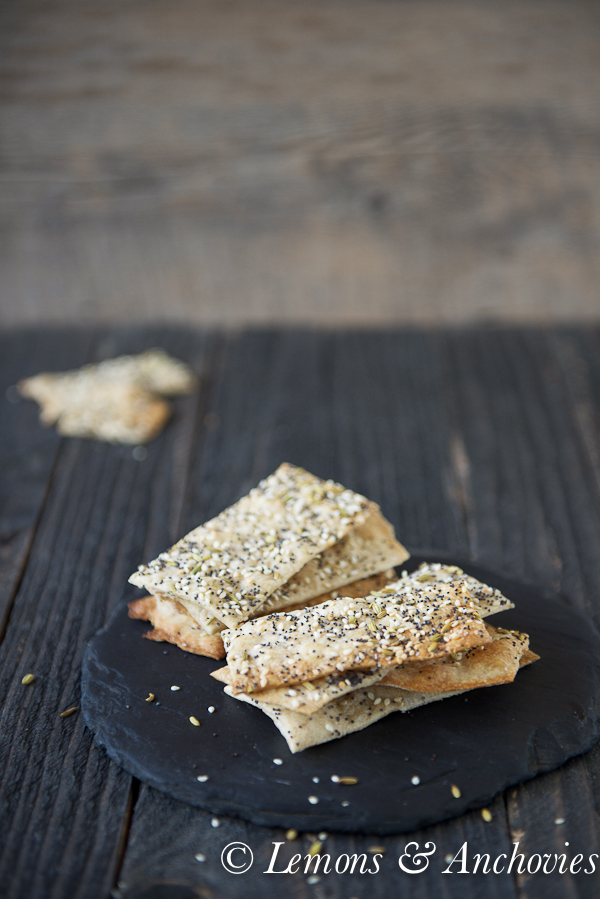
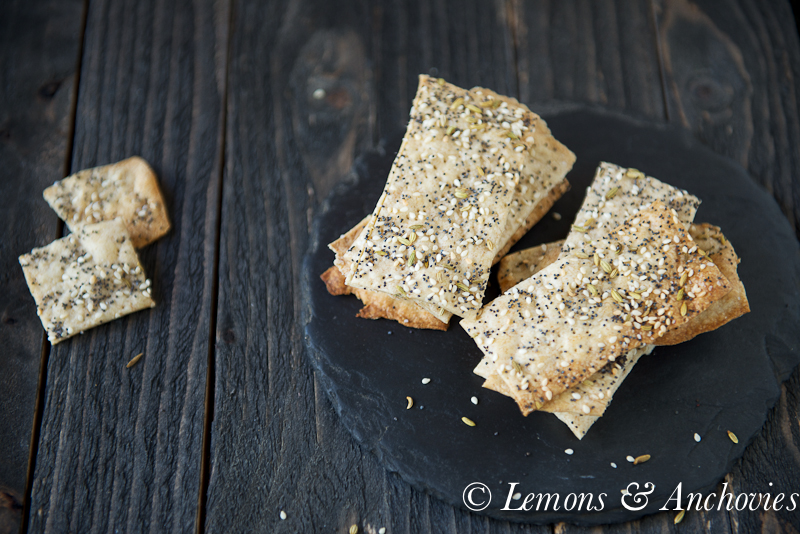
Today, these crackers happened in my kitchen. They turned out exactly the way they were pictured in the magazine and tasted much better than the ones from the store. Thin, crisp and much fresher tasting due to the brand new jars of sesame seeds, fennel and poppy seeds, I didn’t even feel the need to eat these with cheese or a dip (and I never eat anything plain). I did take liberties with the preparation. I found the instructions in the magazine a bit cumbersome so I fell back on my way of preparing the cracker dough.
Rolling the dough on an inverted baking sheet eliminates the trouble of flouring the work surface. Additionally, this way, the dough won’t spring back, you can score the crackers into smaller pieces with a knife and bake the crackers without having to transfer each piece to a separate sheet. I also prick the dough with a fork to keep it from bubbling while baking. When the crackers are done, the scoring on the surface makes it very easy to separate the individual pieces. You can separate using your hands or by using a knife by pressing it onto the scored lines. This method has never failed me and after getting not-so-great results with my first piece of dough, I’ve decided that there’s no reason to prepare crackers another way.
If you haven’t tried baking crackers yourself, I urge you to give it a go. You’ll be surprised how easy–and fun–the process is. My cracker-loving husband has already eaten half the batch.
Here are my other cracker recipes:
1. Sea Salt and Pepper Crackers
4. Cheddar, Feta and Caramelized Shallot Crackers
Seeded Crackers
Ingredients
- ***For the Dough***
- 6 3/4 ounces 1 1/2 cups unbleached all-purpose flour
- 2 ounces scant 1/2 cup whole wheat flour
- 1/2 cup water
- 1 teaspoon kosher salt
- 3 tablespoons olive oil
- ***For the Topping***
- 1 tablespoon sesame seeds
- 2 teaspoons poppy seeds
- 2 teaspoons fennel or caraway seeds
- 1/2 - 3/4 teaspoons kosher salt
Instructions
-
Position a rack in the lower third of the oven and preheat to 425° (the original recipe called for 450° but I found that too hot.
-
To prepare the topping: combine the seeds in a small bowl and set aside.
-
To prepare the dough: Whisk the all-purpose flour, whole wheat flour and salt together in a bowl. Add the olive oil and 1/2 cup water to the flour and stir with a rubber spatula until you have a crumbly ball of dough. Use your hands or a spatula to press the dough against the side of the bowl to collect the loose flour.
-
Set the dough on a lightly-floured surface and divide the dough into three equal pieces. Form each one into a square; working with one piece at a time, cover the other two with a clean kitchen towel.
-
There are two ways to roll out the dough. The original recipe calls for rolling out on a lightly-floured surface, cutting rectangles and transferring the pieces to an unlined baking sheet. I think this way is cumbersome, having to transfer the individual rectangles to the baking sheet. They get misshapen and bubble up while baking. Following my favorite way of preparing crackers, here's my alternative. Roll out the dough on an inverted baking sheet (place on top of a dish towel so it doesn't move around as you roll the dough). There's no need to add flour to it. Roll out the dough very thinly, about 7 by 14 inches. Brush the surface lightly with water then sprinkle 1/3 of the seed mixture for each piece of dough. Sprinkle about 1/4 teaspoon of the kosher salt (a little less is better). Press a large knife onto the dough, creating 2 by 4 inch rectangles then prick the surface with fork (this will prevent the dough from bubbling).
-
Transfer the baking sheet with the seeded and scored dough to the oven and bake for 10 minutes (I found 7 minutes to be better) or until the crackers are nicely browned. Take the baking sheet out of the oven and cool the crackers on a wire rack. Repeat the process for the remaining two pieces of dough. Note: A second baking sheet would be handy so you're not rolling out the dough on a hot sheet.
-
The dough can be refrigerated for up to 2 days and frozen up to 1 month. Defrost in the refrigerator before using. Store the crackers in a Ziploc bag; they should last up to a week.
Recipe Notes
Recipe from Fine Cooking Magazine: Soups & Stews, Spring 2013




I probably eat as many crackers as your husband – I must try making my own, these look very tasty! 🙂
Savory crackers are the hottest things right now in the kitchen of food bloggers! And these ones look sooooo good! I’m at work now…shhh…on lunch break, of course…but I’m wanting a healthy snack like this. when I’m at work, I like to graze, and this shoudl be a good one to have on my table. Nicely done, Jean. It’s still always better to make our own crackers when given the chance. That way, we know exactly what goes in the ingredient list. No funny-sounding ingredients need apply!
hehe, I’m making crackers right now but not as fancy as yours! These look wonderful.
With spring on the very edge of the horizon, I think it’s time to put down the kettle chips and start noshing on some healthier snacks- these crackers look like just the thing to satisfy my salt-tooth. 🙂
Lovely crackers! They must be quite addictive.
Cheers,
Rosa
i think it’s so cool you have such a passion for making your own crackers! you should open a shop. 🙂
Beautiful crackers Jean!!! I bet they did not last long in your house. Like you, I am simply obsessed with making crackers. Once you have the homemade version, the store bought versions just don’t quite have that special something. Lovely photos!!!1
Lovely crackers, I really need to try making these, you’ve inspired me.
15 minutes prep? VERY tempting… and there is no yeast too. 🙂 Saving it to give it a try someday very soon. You will recommend to add whole wheat right, instead of all all-purpose flour. I guarantee I can finish this while kids are in school. 😀
you know that I love homemade crackers. eating them more than making but still 🙂
I’m so going to try these seeded ones, thanks for another great recipe Jean!
I like making my own crackers as well, mainly because you can control what goes in but also to play with flavors.
Thanks for the recipe. I have to say, though.. I was wondering if the 1 Tbs of salt in the dough was a mistake? I reduced the salt in mine to 2 tsp and with the topping they were very salty (and I love salt). Just thought I might give a heads up! Otherwise, it was a lovely recipe!
Fletcher, thanks for catching that. It’s 1 teaspoon table salt according to the original recipe. I’ve corrected the recipe. My apologies for the mistake. 🙁
Made these day, and your trick about rolling the dough out on the tray is the best thing ever! I will be forever using that to roll out my cracker dough.
Brittany, thank you so much for your feedback. I’m so glad you liked the recipe and that this method of baking crackers worked for you. I wouldn’t do it any other way either. 🙂
Love this recipe — I think it is the same as Alton Brown’s Seedy Crsips recipe — but I found I had to bake 15 minutes at 425 to make them crispy, not doughy. Love your tip about rolling them out on the back of a cookie tray — fabulous!