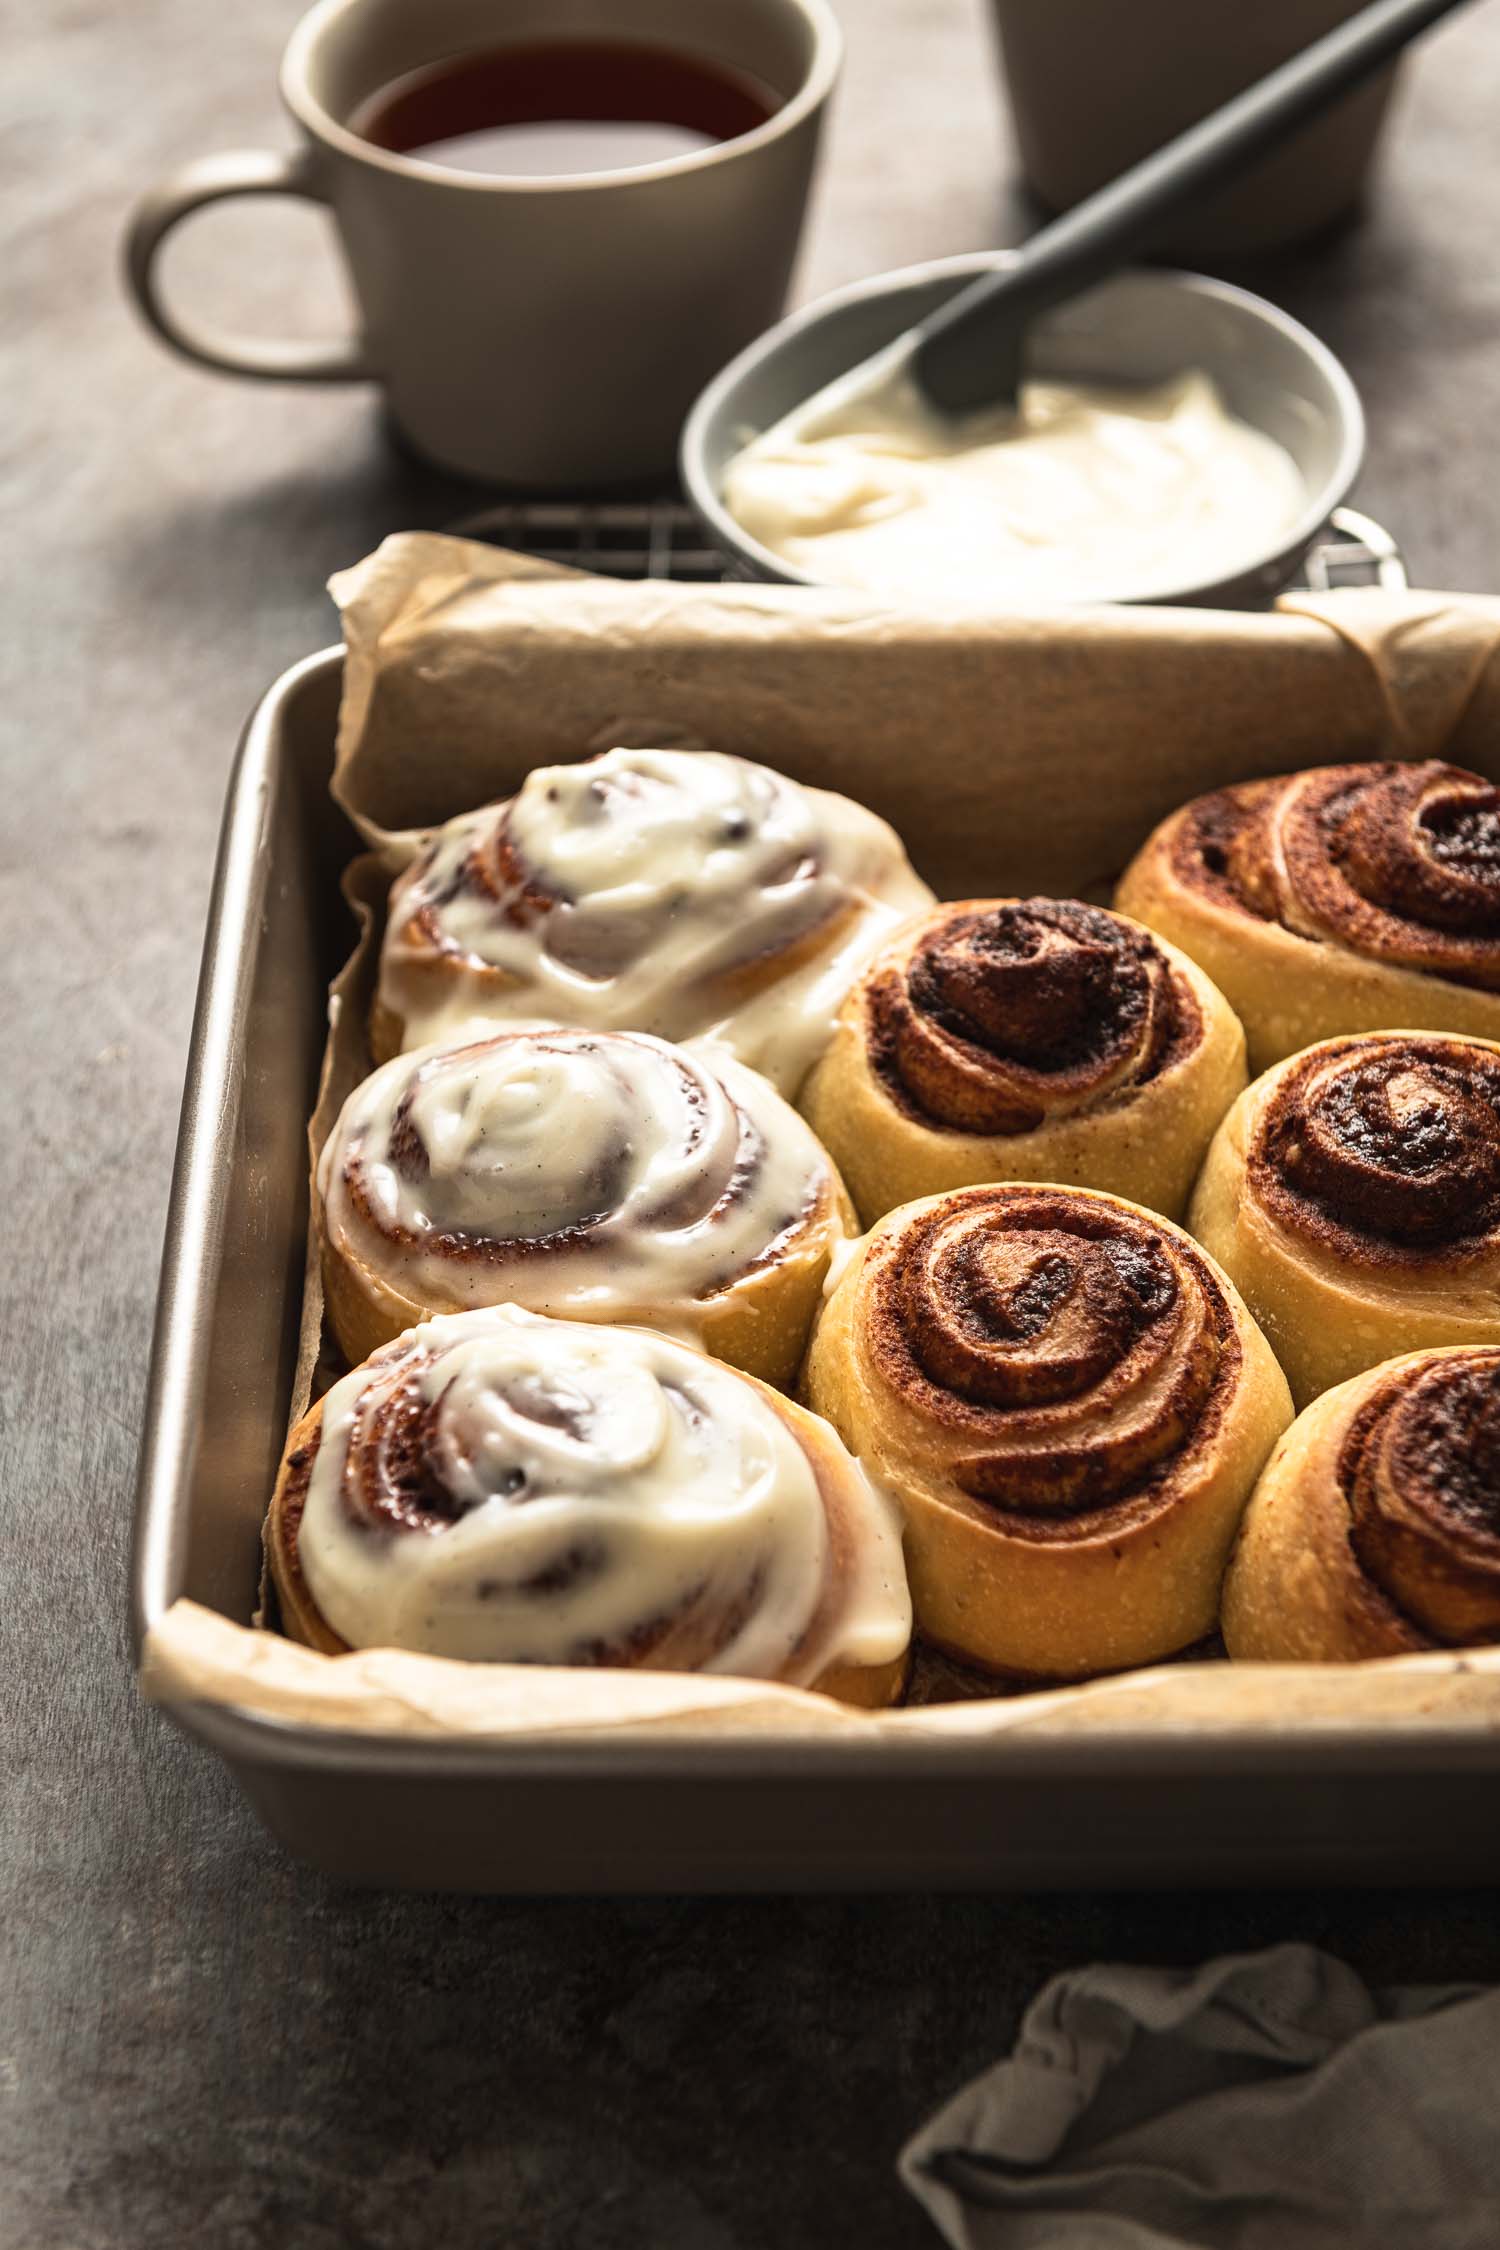
A glossy, blistered crust, chewy crumb with everything seasoning: there’s no better bagel than a New York style bagel and this one just happens to be made with sourdough.
(4/17/25: You can visit my Instagram page to watch a video on the two ways to shape these bagels.)

This recipe has been a long time coming. Over the past two years I’d made plans to share these sourdough bagels on the blog but caution would get the better of me and ultimately I would decide, one more test. Bagels, namely New York bagels, are an institution for many and I wanted to respect and do justice to them.

What makes a Bagel a New York Style Bagel?
A New York style bagel is not just a doughnut-shaped bread, it is known for its glossy, blistered crust, chewy texture and dense crumb. It is not doughy or bread-y. There is technique involved in achieving these characteristics. New York bagels are boiled before they are baked and malt syrup is added to the water to give them their coveted texture, color and shine.
The process isn’t difficult but it does take practice to get the fermentation (especially since these use sourdough starter rather than commercial yeast), boiling and baking times right.
(Side note: Based on my research, I understand that Canada has the Montreal bagel but I don’t know that I’ve ever come across one. It’s supposed to be smaller, sweeter and baked in a wood-fired oven. Would love to be able to compare the two one day.)

Bagel Seasoning Options
One of the fun parts about making bagels is choosing what toppings or flavors to incorporate into them. Everything bagel seasoning happens to be my favorite so it’s what I’ve experimented with but I’ve also made them with jalapeño and cheddar cheese.
I’m sharing my everything bagel seasoning recipe here but feel free to use your own proportions. Easier yet, you can also just buy the seasoning so you don’t have to hunt for each ingredient yourself.
Now for my fellow sourdough geeks. Please see my notes below and tell me how it goes if you try this recipe.

Sourdough New York Style Bagel Tips
- Hydration: Bagels are best made with low hydration dough. Depending on how you calculate the hydration of your bread (including starter amounts or not) the hydration of my dough is 53.5% (without starter) and 58% with starter.
- Flour: Use high protein flour if you can. I have tested this recipe using Central Milling High Mountain and King Arthur bread flours.
- Mixing the Dough: When combining the ingredients, I like to stir in the malt syrup and starter to distribute them in the water evenly (with the salt) before adding the flour.
- Using a Stand Mixer: I have a regular Kitchenaid mixer and this batch of low-hydration dough approaches the limit of its power. Make sure to mix the dough on low (setting 2) to keep the mixer from moving around and to not stress the motor. Kneading by hand is an option but this stiff dough can make that a challenge too.
- Bulk Fermentation: Bagels require bulk fermentation, a second proof followed by an overnight rest in the refrigerator so the required rise for each stage is conservative. You don’t want the dough to overproof.
- Malt Syrup: If you can’t find malt syrup, you can use honey or molasses in the dough and omit it in the boiling stage.
- Boiling Time: The longer the bagels boil the tougher and thicker the crust gets. I have found that one minute, 30 seconds per side, works for me.

Sourdough New York Style Bagels
A glossy, blistered crust, chewy crumb with everything seasoning: there's no better bagel than a New York style bagel and this one just happens to be made with sourdough.
Ingredients
- 700 grams bread flour
- 375 grams water
- 140 grams active sourdough starter
- 15 grams kosher salt
- 28 grams barley malt syrup (plus more for boiling)
Everything Bagel Seasoning (or use store-bought)(Optional)
- 40 grams sesame seeds (white or mix of black and white)
- 30 grams poppy seeds
- 30 grams dried minced garlic
- 40 grams dried minced onion
- 10 grams sea salt flakes
Instructions
-
Day 1, Mix – Add the water, starter, salt and barley malt syrup in a bowl of a stand mixer. Use a spatula to loosen the starter and evenly distribute it along with the syrup in the water. Add the flour.
-
Knead (in stand mixer) – using dough hook attachment knead for six to eight minutes on speed 2 until the dough is smooth, no longer sticky and a little stretchy. You might need to turn off the mixer to scrape down the sides of the bowl two or three times in between. (Note: You can also knead by hand.)
-
Bulk – Cover the bowl and leave the dough to proof. You should see a noticeable but not significant rise. This could take a few hours depending on temperature. At mid-70s (ºF), it would take three to four hours.
-
Divide – Divide the dough into ten equal pieces (each piece will weigh roughly 125 grams). Pre-shape the dough by rolling them into rounds then cover with a towel to keep them from drying out.
-
Shape – Two ways to shape: Option A) Poke your finger through the center of the ball of dough and stretch/pull on the dough gently until you have a ring/bagel shape. You will want a hole in the center that’s at least one inch in diameter to account for the second rise. Arrange the shaped bagel rings on a baking sheet lined with parchment paper.
Option B) Use a bench scraper to cut a radius into the ball. Pull apart and roll out into a log on the counter (don’t flour the counter). Each log will be roughly one inch in diameter. Pinch the two ends together to form a ring and roll the seam on the counter with the palm of your hand to seal. Lay each ring on a parchment-lined baking sheet, cover with plastic wrap.
-
Second Rise – Proof until the dough rings have risen a little. Allow about two hours for this stage depending on temperature. [As a guide, temperature in the mid-70s (ºF) will take about two hours.]
-
Cold Proof: Cover the pan tightly in plastic and store in the refrigerator overnight.
-
Day 2, Prep and Boil- Preheat your oven to 450ºF. If using a baking/pizza stone, place it on the middle rack of the oven to preheat. (If you have a baking pan of lava rocks for steam, preheat them now too on the lowest rack of your oven.) Bring water to a boil in a pot large enough to boil three to four bagels in a single layer (fill the pot about 2/3 to 3/4 full). Add about two tablespoons barley malt syrup to the boiling water and stir lightly.
You will need a a tray with a wire rack next to the pot to drain the drain the boiled bagels. Also, have a slotted spatula and/or a mesh skimmer to fish the bagels out of the pot. (See alternative below.)
If using topping, combine the everything bagel seasoning ingredients above (or use store-bought) in a wide, shallow bowl.
Carefully put one bagel ring into the boiling water one at a time, let boil 30 seconds, flip over and boil for another 30 seconds. The bagel rings will expand in the water.
-
Drain and Season – Take each bagel out of the pot and lay on the wire rack to drain. Then coat each bagel with the seasoning mix, flip in the bowl if you want both sides seasoned. Arrange each seasoned bagel ring back on the parchment-lined baking sheet. Alternatively, you can use the mesh skimmer to pick up the bagel ring and allow the water to drain over the pot and directly place it in the bowl to coat with the seasoning before placing on the parchment-lined baking sheet.
-
Bake – If using steam, carefully add about one cup hot water into baking pan with hot lava rocks. Place the baking sheet with the bagel rings in the oven and bake for five minutes (or if using a baking stone, pull out the oven rack and carefully slide the parchment with bagels onto the baking stone or use a pizza peel.) Remove the lava rocks and continue baking until the bagels are golden and glossy, another 15-20 minutes. Repeat the boil/bake process with the next batch of bagels until all 10 are done. Allow to cool on a wire rack before enjoying.


I don’t think we have very good bagels here in australia so i don’t know what they are meant to be like. But i love all the seeds on top, and they look fabulous.
cheers
sherry https://sherryspickings.blogspot.com/