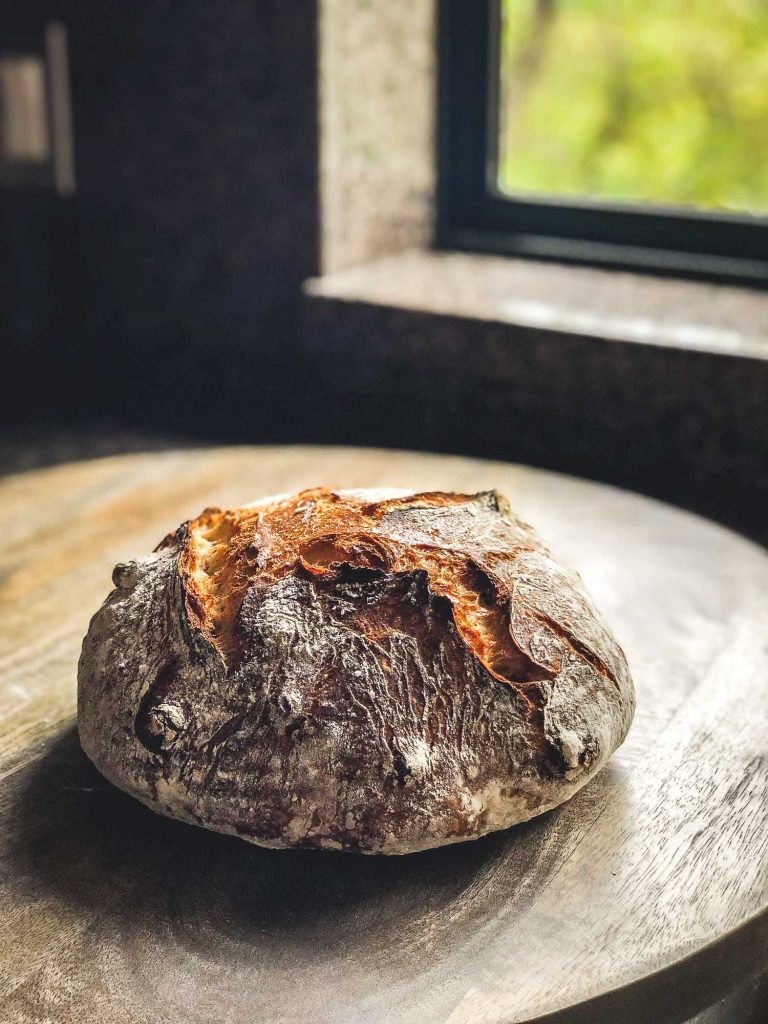
Orange-Raisin Sourdough Bread
A rustic sourdough loaf infused with citrus flavor and lightly sweetened with raisins. This is a slight modification on my go-to sourdough recipe .
I’ve dabbled in sourdough baking for a few years now–well, truthfully, it was more like a mild obsession at certain points and I wound up taking a break from homemade sourdough because I grew impatient with parts of the process I couldn’t get right.
My efforts sometimes yielded picture-perfect loaves, more out of luck than skill, admittedly, and the rest, not so much. If you would have asked me then how one loaf could turn out so beautifully and have a half-hearted rise the next even using the same recipe, I wouldn’t have had an answer. I knew that several variables could affect each bake–water temperature, room temperature, the type of flour, the strength of my starter–but I didn’t understand how everything worked together.
I’ve heard seasoned bakers say that it takes time “to get a feel for the dough”, to know when it’s ready to bake. These same bakers would also say that it doesn’t matter if your bread rises perfectly–it will always taste great. Well, they were right about the latter and of course the former, too, but I didn’t get it at the time. I started to feel that I’d never produce consistently well-risen loaves so I stopped baking them entirely…for one year. I dutifully fed my starter, Ida, keeping her ready until the sourdough bug bit me again one day.
That one day happened this past winter. I had missed baking bread so I picked up where I left off the year before and decided that I’d put in the time to truly understand the process. I had been mostly using the Ken Forkish no-knead technique (my go-to recipe here) and I decided that I would stick with it until things started to click…and I’m happy to say that yes, I’m finally starting to get it.

There’s not one right way to bake bread and even unattractive loaves–misshapen and flat–made with your own two hands are still tasty and gratifying. I’ve baked a lot this winter and the things I’ve observed and learned have emboldened me to make some changes with my normal bread-baking process and try new things…and they’ve been working!
This recipe mostly follows my base recipe using the Ken Forkish method (link above). Besides using all white flour for this recipe (I’ll talk more about flour in the next post) the key difference is that I used less sourdough starter. One thing I realized was that with the greater amount of sourdough starter I had been using (based on the original Ken Forkish recipe) the yeasts have been consuming all the sugar in the dough during the overnight bulk fermentation, inhibiting optimum rise when baking.
I don’t fault Mr. Forkish for this–his recipe was designed to make two loaves which makes overnight bulk fermentation the ideal amount of time for the yeasts to do their thing and for the dough to develop good flavor…but I’ve halved his original recipe. This winter it occurred to me that the smaller amount of dough I’ve been working with might perform better with a shorter bulk fermentation time. But rather than overhauling the entire process (I did anyway with great results and I’ll explain in the next posts) by reducing the bulk fermentation time and getting up at the crack of dawn to tend to the dough, I decided to reduce the population of yeasts (i.e., using less starter) working through the dough instead.
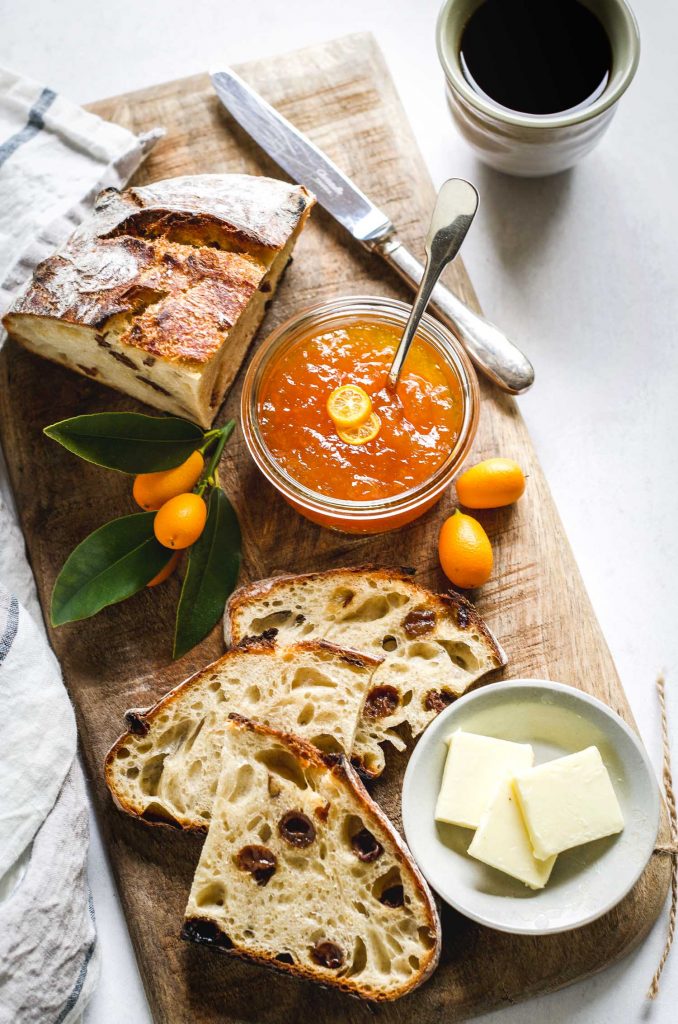
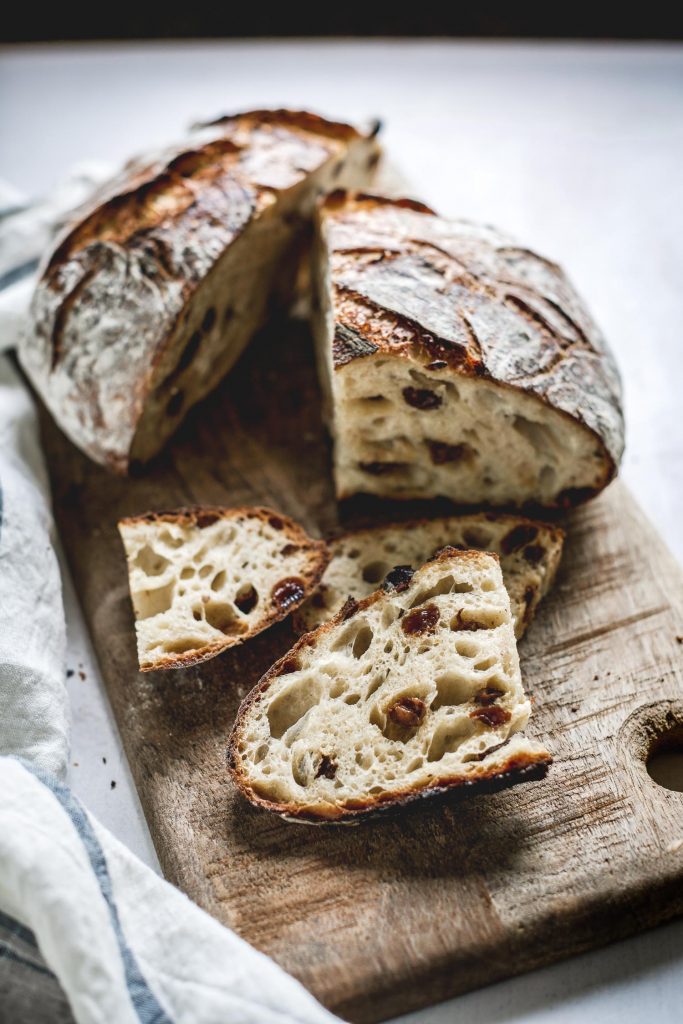
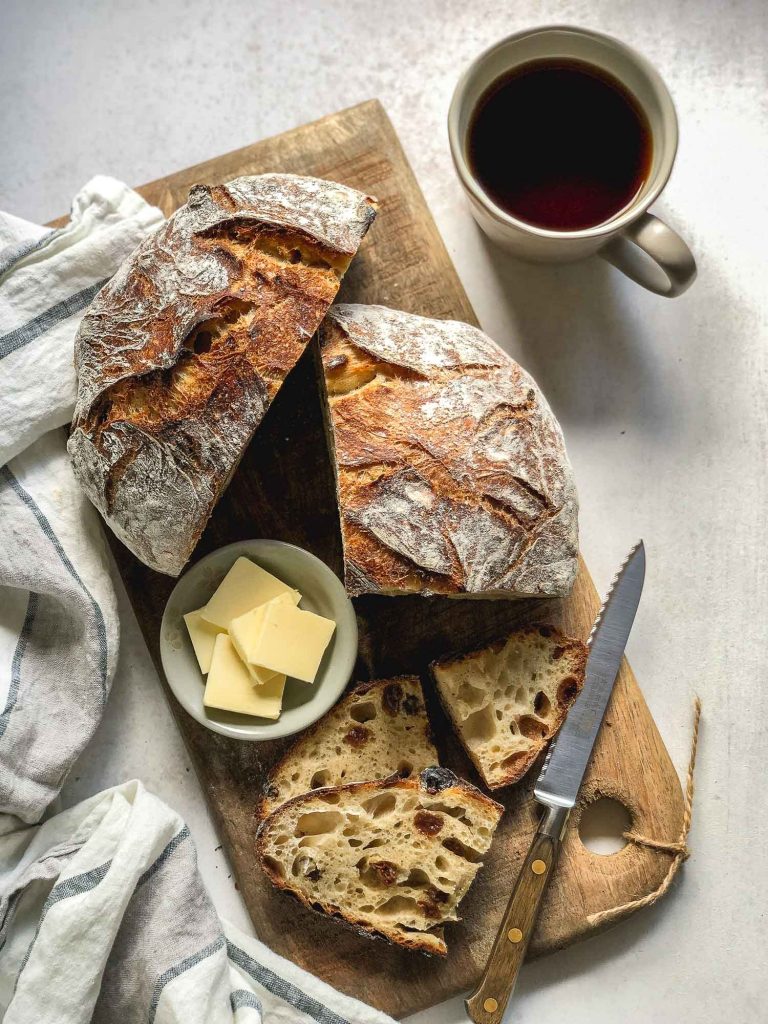
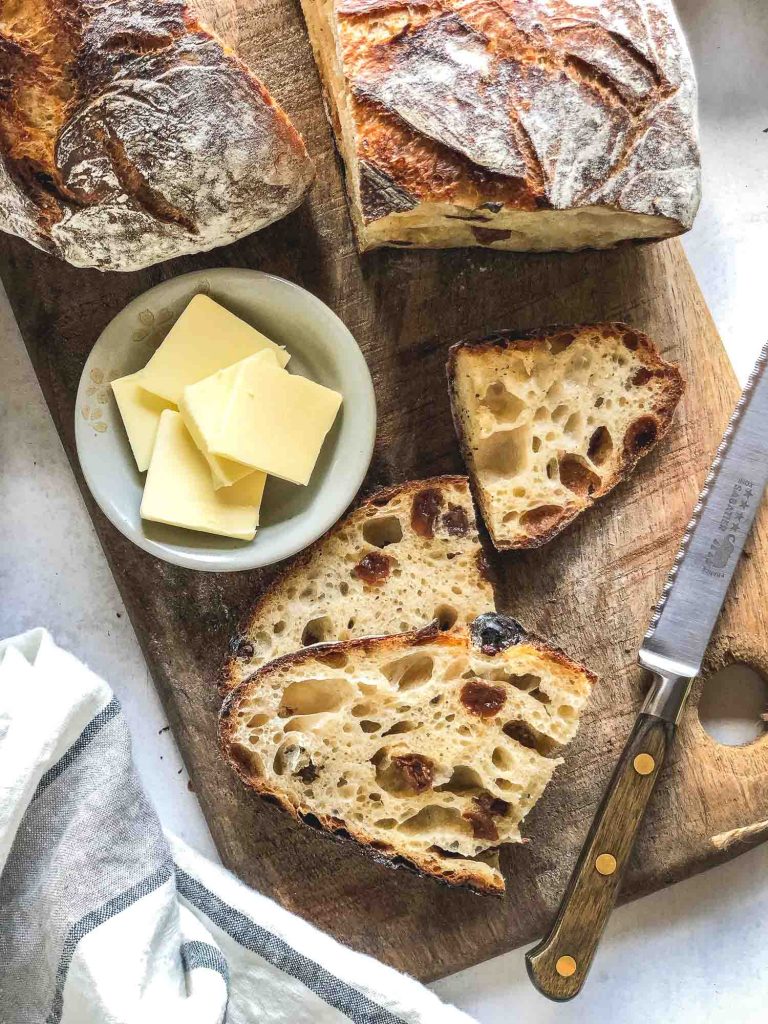
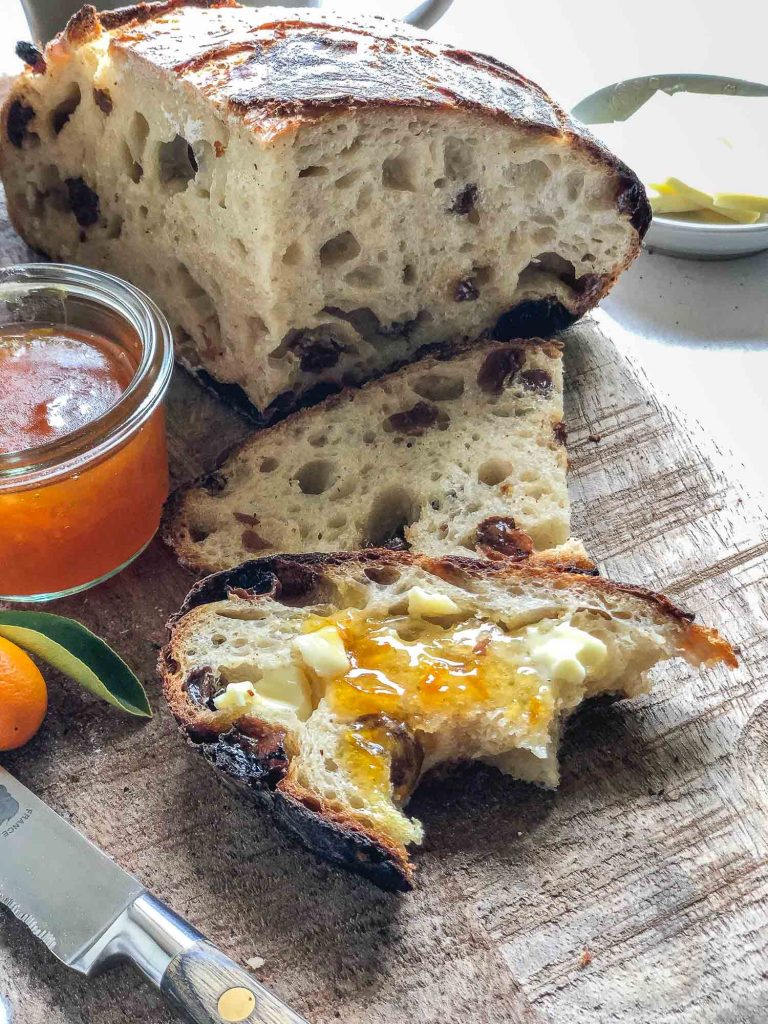
This one change has made a big difference in my bakes. I’ve been achieving more consistent results–great oven spring and a light, airy crumb. I’ll share more changes I’ve made with my usual routine in the next two posts but for now I hope you like my Orange-Raisin Sourdough bread. Dried orange peels infuse this loaf with a pleasant hint of citrus and a light sweetness from raisins. Feel free to add sugar if you like but I prefer not to do this and we’ve been enjoying it with the Kumquat Marmalade that I shared in my previous post.
If you’re excited about sourdough baking like I am, stay tuned for the next two recipes. This one is already quite straightforward and simple but I’ll be sharing a method that’s even easier and with some of my favorite flavor combinations.
Part Two of this series: Sourdough Bread using Unfed Starter
Part Three of this series: A Sourdough Baking Guide and Chocolate-Cherry Sourdough Bread
Note: For the techniques mentioned in this post, please watch these Ken Forkish videos.
Orange-Raisin Sourdough Bread
Ingredients
- 80 grams fed sourdough starter
- 440 grams all-purpose flour
- 342 grams water at 90-95ºF (preferably filtered)
- 6 grams kosher salt (I use about half the salt normally recommended)
- 65 grams raisins (soaked in water for 30 mins; okay to use more)
- 1 1/2 teaspoons orange peel (okay to use more)
- Rice flour for sprinkling on the banneton to prevent sticking
Instructions
-
Day 1 (around midday), feed the levain. Before refreshing your mother starter, set aside 20-30 grams of the unfed starter and to it add equal amounts flour and water to end up with 80 grams of levain required in this recipe. For example, if you use 20 grams of unfed starter, add 30 grams each of flour and water to get 80 grams levain. Set aside until at peak rise (about 4 hours; longer on cold days. In winter I store the levain inside the oven, turned off with the light on.)
-
Day 1 (“Autolyse”: See Note). Stir in the fed starter and orange peel with the water in a bowl. Once the starter has been evenly distributed in the water add the flour. Cover the bowl with a kitchen towel or plastic wrap and let sit for thirty minutes to one hour.
-
Day 1 (evening), add the soaked and drained raisins and kosher salt to the mixture in the bowl. Combine the dough using a wet hand and folding the dough over from the bottom to top. Then Ken Forkish employs what he calls the “pincer” method to make sure all the ingredients are fully incorporated. Imagining your hand as a lobster claw (my description), cut through the dough pinching a few times, mixing, then pinching again. If you’re using the caraway seeds at them at this step.
-
Day 1 (evening), fold the dough. Pick up one portion of the dough (without taking it out of the bowl) and fold it over. Repeat this folding step a few times, inverting the dough with the folds at the bottom of the bowl when done. This folding step should be done three to four times before the dough rests overnight over a period of one to two hours. I fold every thirty minutes in the space of two hours before the overnight rest. After folding, cover the bowl with a towel or plastic wrap and let it rest overnight.
-
Day 2 (morning), shape the loaf and final proof. Transfer the dough to a lightly floured surface. The dough will relax and flatten when you take it out of the bowl. Taking one section of dough at at time, fold the sections over the rest of the dough until you have a somewhat tight ball shape. Then tighten the dough by pulling it towards you by cupping the dough with both your hands using your pinky fingers as the anchors. This tightens the dough shape as you pull it towards you. Rotate then repeat three to four times until the dough holds its ball shape. Transfer the dough on a floured banneton with the seam side down. Cover the entire proofing basket with a plastic bag and let rest for one to four hours (if your kitchen is warmer the proof time will be shorter; check the dough after one hour). To test for readiness, poke the dough with a floured finger, making about a 1/2-inch indentation. If the dent springs back immediately, the dough needs a longer proofing. If the dent springs back slowly and doesn’t completely disappear, the dough is ready to bake.
-
Day 2, bake. This recipe uses a dutch oven for baking. Preheat your oven to 475ºF with a rack in the center of the oven. Put the dutch oven with the lid on the rack while the oven preheats. Once the oven has reached temperature, invert the dough on a lightly floured countertop. Even better is to invert the dough on a piece of parchment paper. Make sure you have oven mitts then take the (very hot) dutch oven out of the oven and place on the counter or stove. Remove the lid and rest one of your mitts on top of the lid so you don’t touch it by accident. Take the ends of the parchment paper and carefully lift and transfer the dough to the dutch oven. Cover the dutch oven and place it back in the oven. Bake covered for 30 minutes then uncover and bake for another 20-25 minutes, checking your bread at the 15-18 minute mark just in case your oven runs hot. When done, tilt the bread out of the dutch oven and let it cool on a rack for at least 20 minutes before slicing.
Recipe Notes
- This recipe is my modification on Ken Forkish’s Overnight Country Brown Bread and employs the techniques in his book Flour, Water, Salt, Yeast which are illustrated in this set of videos. I recommend viewing them for proper execution of stretch-and-fold, shaping the dough, proofing and baking.
- “Autolyse”: A true autolyse means combining only the flour and water–not the starter and salt–for a brief rest to hydrate the flour without starting the fermentation process. Lately I’ve been incorporating the starter during the short rest period and have been yielding better results.


Would you use this bread to make a sandwich? Thinking of flavors to pair..
Hi, Naina. The flavors are subtle here so I would say, yes. This is coming from someone who loved cinnamon raisin bread toasted and topped with cheddar cheese to it can work with savory-sweet. It might also go well with fig jam and ham and brie, for example. Hope these suggestions help.
This turned out beautifully!! The crust was golden and had such a delicious orange flavor. I did use craisins instead of raisins for personal preference. Thank you for the recipe!
So glad you liked this recipe, Holly. I love craisins too and I bet they were delicious in your bread. 🙂
Hi there! I have loved reading through your posts. I too have been devoted to the Ken Forkish methods and had some confusion about the feeding ratios which thankfully your blog cleared up for me!
I was wondering about the orange peels you use for this recipe. How do you dry them out? Just air dried or in the oven? Would tangerines/clementines work as well? Also do you chop the pieces up fairly small?
Thanks so much!!
Hi, Kristi. Thanks for your nice note; I’m glad you have found some of my posts helpful. The orange peels I used here were store-bought, from Penzey’s Spices so I didn’t do any of the work. However, you certainly can do it yourself and clementines and tangerines should also work. Air drying strips of peel might be the easiest way to go and you can chop them up finely to use them in recipes. The Penzey’s peel I have are chopped fairly small. Hope this helps!
This bread is so tasty. I like to add walnuts and dried apricots and a bit more whole wheat flour. Your pictures are incredible!!
Hi, Alana. I’m so glad you are enjoying this recipe and I appreciate the feedback. Love your addition of walnuts and dried apricots, too. And what a nice compliment about my pictures–thank you all around! 🙂
I’ve been making this bread for quite some time and each time it comes out fine. Your instruction says to ” fold” not stretch and fold. So you don’t stretch? I’ve been doing stretch and fold without any problem.but should I not stretch ? I live at 6000 ft in high altitude, but I don’t make change for this recipe. Thanks for sharing it.
Hi, Fumiko. You are doing it exactly right–I’ve somehow just abbreviated my instructions, assuming that when I say fold that you are stretching the dough, too. Apologies for the confusion and I’m glad the recipe has been working for you. Thanks for your feedback and for coming back to rate it. 🙂
Sorry I forgot to rate it. My friends whom I share this bread with just love it.
.
Hi, in the process of making this now — I know Forkish is notorious for having overnight rests on the countertop and not in the fridge! Is this the case for this recipe?
Hi, Ali. Hope your recipe worked out well. What I’ve found for Ken Forkish’s overnight bulk fermentation method is that it works best when ambient temperatures are much cooler. It doesn’t work as well during the summer months here in the Bay Area so I’ve learned to adjust his recipes for daytime bulk and overnight cold retardation (I’ve documented the changes to his method in several recipes here). Happy to answer any questions if you have them. 🙂
I wish I could give it 10 stars. This bread is amazing! The only thing I changed was to put everything together all at once. I was a little concerned that it was so moist, not keeping its shape but it came out perfect. I used my own orange peel that put in the vitamix and ground really fine.
The 5 stars that I chose don’t stay on and I can’t figure out why.
Thank you so much for this wonderful feedback. I’m so glad you like this recipe. Love that you used your own orange peel. 🙂
Thanks for this great recipe. I’ve been baking sourdough for about 10 years now and am always curious about different approaches. Having recently discovered a local source for organic oranges again I’ve begun candying the peels. The next step was to look for a bread recipe that used them. Yours worked very well for me and opened up a whole new perspective on sourdough. I’m baking at 8,500 altitude in Ecuador and will probably make some adjustments as I go along but I also used your basic recipe for my latest rye bread and am very pleased with how it came out. I’m using some of my basic recipes which are tuned up versions of some from “The FreshLoaf”. from years ago. Using more water to flour presented some challenges since I’m used to kneeding by hand but overall it’s working well. I’ll try a whole wheat now with the same recipe. I’ve also downloaded “Flour, Salt, Water and Yeast” and am finding it very interesting. Thanks also for turning me on to Ken Forkish.
Jan, I’m glad this recipe worked out well for your candied orange peels–I can imagine how good your loaf must have been using them. I do agree that higher hydration bread takes some getting used to and if you ever have questions, I’d be happy to help. One note I’ll make about the Ken Forkish book, mind your dough temperature. I might have missed it in the book but for recipes calling for overnight fermentation on the counter, the method works best for cooler temperatures to avoid over proofing the dough. Hope this helps. 🙂